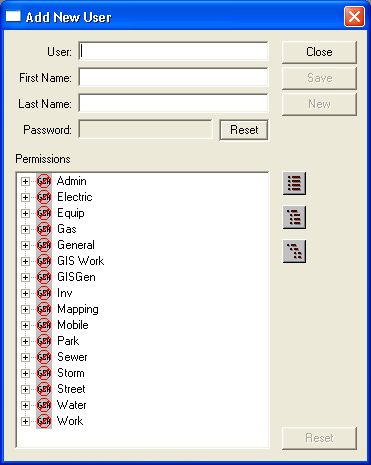
 . The Add New User window will appear.
Note: If you choose to set up Windows Authentication in the UIAdmin program, you will map this login name to the users' Windows Accounts. For additional information, consult the UIAdmin help guide.
Note: Users will set their own passwords upon logging in to Lucity for the first time. They can then change their passwords as needed using the Help>>Change Password option in the main menu. If you have set up Windows Authentication, users will only login with their Lucity user name and password on the initial attempt. After the first login, the system will log them in automatically using the Windows Accounts defined in UIAdmin.
 to save user information.
 to continue adding new users (repeat steps 1-5).
 to return to the Security window.
Note: You may experience a pause or delay while your system is adding the new user. This is normal.