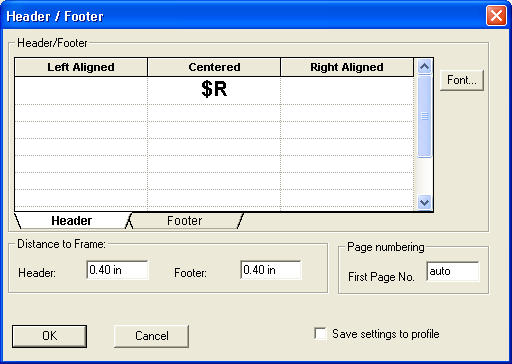
To add a header or footer to your browse report prior to printing, click to open the Header/Footer window.
To define the header for your browse report, click on the Header tab; for the footer, click the Footer tab.
You have the following options for aligning the header and footer:
Left Aligned
Centered
Right Aligned
Note: The default setting is Centered.
The following codes are used to create your header and/or footer:
$D - Prints the current date.
$P - Prints the page number.
$N - Prints total number of pages.
$P/$N - The "P" tells you what page you're on and the "N" tells you how many pages the report contains. For example, the footer will read 9/15 (page 9 of 15).
$F - Prints the file name of the document if exported or imported as a file. If you just print from a Browse the code will print "Untitled" as the file name.
$A - Prints the application name.
$R - Shows the register/tabsheet name, if a grid is used.
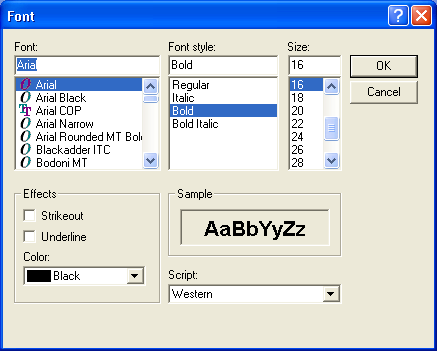
If you want to change the font of the header or footer, click to open the Font window.
From here you can select the new font, font style, and size of your text. You may also want to select an option from the "Effects" list in the lower left corner. The script will default to Western, but you may change it if desired.
When you are finished, click and your screen will return to the Header/Footer window.
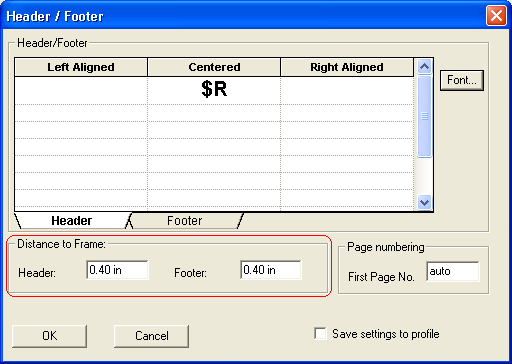
The "Distance to Frame" window, located towards the bottom of the Header/Footer window (see figure below), displays the distance between the header/footer and the page's frame. The default distance setting is 0.40 inches for both the header and the footer.
Note: You can change the distance of the header without changing the footer or vice versa.