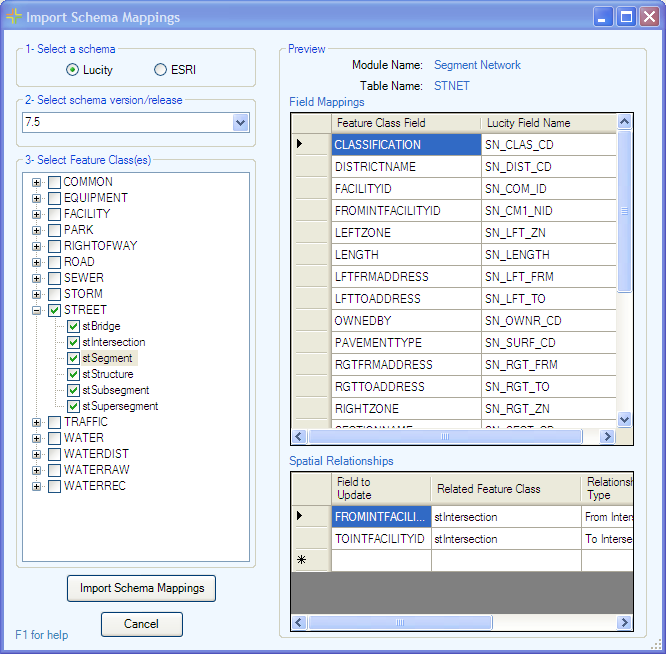
1- Select a schema
Use these two buttons to select which schema the agency is using for their GIS data
2- Select schema version
Choose which version of the schema to load.
3- Select Feature Class(es)
This is a list of feature classes that have a preconfiguration saved for this schema. Select which feature classes in the schema should be linked to Lucity modules. Checking a program name will select all feature classes associated to it.
Preview *
Selecting a specific feature class on the left side activates this section. This section provides a preview of how the feature class will be linked to Lucity. At the top of this section are the names of the Lucity Module and Table that the selected feature class will be linked to.
Field Mappings *
This part of the preview section displays a list of fields in the feature class and which fields they will be linked to in Lucity.
Spatial Relationships *
This part of the preview section displays the Spatial relationships that will automatically be created for this feature class.
Import Schema Mappings
Imports the configuration for all modules selected in the 3- Select Feature Class(es) section.
* This section is read-only. Once the schema is loaded users can modify the geodatabase configuration to meet their needs.