The Lucity GIS Viewer is designed to use either map packages, online services, or ArcGIS Server services. The majority of agencies will probably use local map packages with the GIS Viewer. This section goes over creating a local map packages.
How To Enable ArcGIS Runtime tools
One ArcMap option must be changed before a map package can be created that will work with the viewer.
In ArcMap go to Customize > ArcMap Options.
On the Sharing tab check the Enable ArcGIS Runtime Tools box.
Click OK.
Publish a Map Package
In ArcMap create a map that has the features that need to be in the map package.
Adjust symbology and labeling as desired (this will carry over into the map package and be displayed in the viewer)
If a layer isn't selectable in the map, when the map when the map package is created it won't be selectable by default in the viewer. However, users do have control over layer selectability in the viewer.
This is a good point to import the feature class aliases, especially if any of them were changed in the map.
On the Lucity Editor toolbar click the Alias Import button. This will update Lucity with any names changes made to the feature classes.
Note: This does not require ArcMap to be in an edit session.
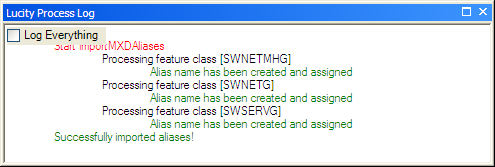
The following message will appear:
Click Yes. The process log will appear with the results. Review the results to make sure that all the Aliases were imported properly.
Note: For more information on configuring/importing aliases go here.
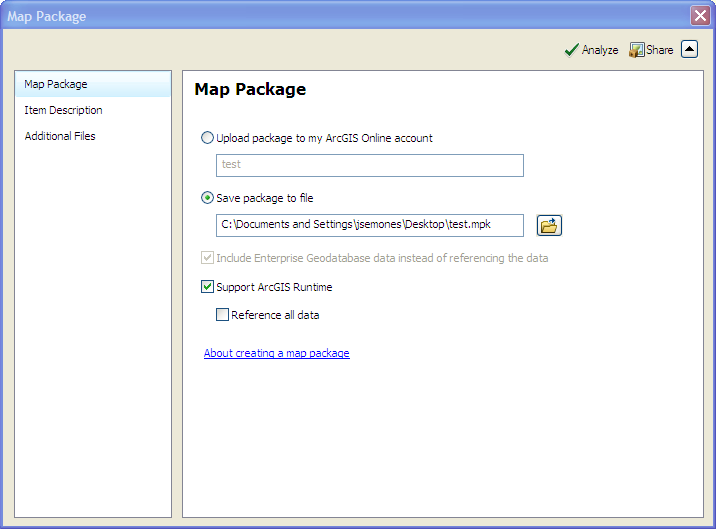
To create the Map Package click File > Share as > Map Package.
Note: If this is a tiled image or layer choose File > Share as > Tiled Package.
The following window will open:
On the Map Package page choose the location the map package will be saved to. The best location would probably be somewhere on the local network that all users that are using the GIS Viewer will have access to.
Check the Support ArcGIS Runtime box.
The Reference all data box controls how the package handles the actual data. Normally the package will include a copy of all of the data from the geodatabase. Marking this box causes the map package to point to the geodatabase and read the data from there. The Geodatabase must be accessible over the network if this box is checked.
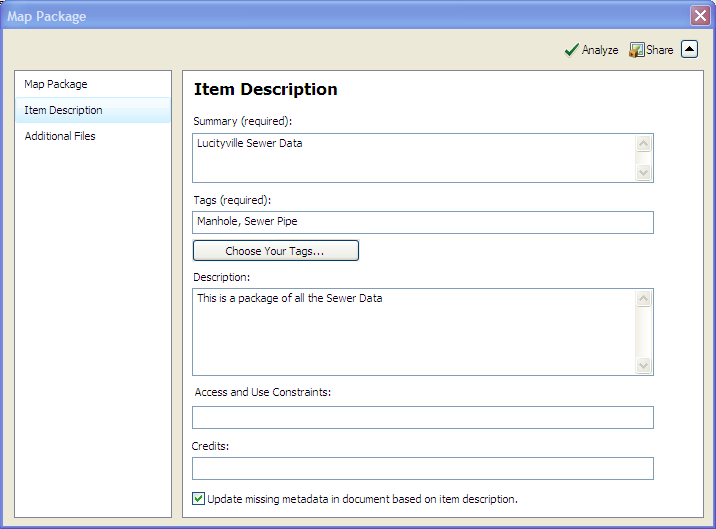
On the Item Description page enter a Summary, Tags, and Description.
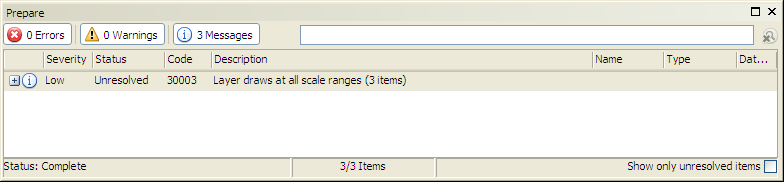
At the top right click the Analyze button.
The following Prepare window will popup. It provides Errors and Warning for what you are about to publish.
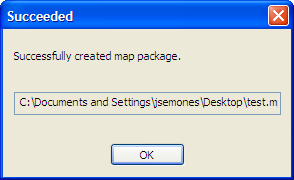
After correcting the Errors, and addressing any desired warnings or messages, go back to the map package window and click the Share button.