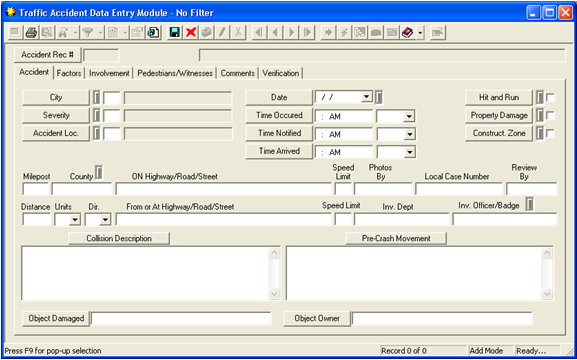
- Open the Data Management module by selecting Transportation > Accidents > Data Management. The following window will appear:
- Click
 on the module toolbar to enter Add Mode.
Note: Upon adding a new record, the Accident ID field will be automatically populated with the next sequential record number.
- Enter the accident information from your case report into the Accident tab.
Note: The accident Date is required to save the record.
- For verification purposes, you will need to include the ON street and At street (the ON street indicates the name of the street the accident occurred on; the At street indicates the name of the street the accident occurred from or near).
- Upon saving the record, the information in the ON street, At street, and Local Case Number fields will be automatically populated into the grayed-out identification field of the header. This creates a unique accident ID.
- The Severity field will be used to indicate whether the accident involves property damage, injuries, or fatalities. These designations will appear in the corresponding collision diagram.
- Under the Factors tab, enter the road conditions, light conditions, weather conditions, and traffic control features that may have affected the accident. This information should come from your case report.
Note: The Collision field should be used to indicate the type or angle of the collision (rear end, head on, etc.). These designations will appear in the corresponding collision diagram.
- Under the Involvement tab, enter the vehicles, occupants, violations (citations), and officer's opinion of contributing causes into the grids provided. This information should come from your case report.
Note: At least one unit must be entered in the Vehicles grid in order to save the record.
- The Travel Direction and Pre- Crash Maneuver fields in the new Vehicle record will be used to determine a collision diagram.
- Under the Pedestrians/Witnesses tab, enter the identification and contact information for any pedestrians involved in the accident or witnesses to the accident. If pedestrians were involved, you will also indicate any injuries in this tab.
- Enter any additional comments in the Comments tab.
- Use the Verification tab to confirm that the accident location information has been validated. The system will perform this validation automatically; however, the user can edit the data in the verification fields.
Note: If the validation process is successful, the system will save the record as Validated. If the validation process is unsuccessful based on a lack of sufficient information, the system will save the record as Unvalidated. If the user successfully alters the information, the system will save the record as User Validated.
- This tab contains data from the corresponding Intersection Network and Segment Network modules. The system will automatically fill the Street ID and Node ID that correspond with the ON street and At street included in the Accident tab, as well as the corresponding intersection diagram.
- The system will create the collision diagram based on the information entered by the user. This tab will display the type of diagram created (rear end, head on, etc.) if there is sufficient information to do so.
- Use the Toolkit function
 to view or print an Intersection Collision Diagram. Within the diagram, you will be able to access the Location Analysis report. This function is useful for determining and prioritizing accident locations.
 - Click
 to save the record. You must include the date of the accident and at least one unit in order to save the record.
Note: Upon saving the record, the header fields will be automatically filled out and validation checks will be performed. If you attempt to save the record without enough information for the system to verify accident location, the following message will appear:
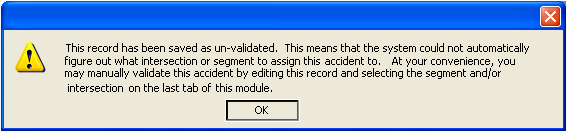
- The system will save the record; however, you should manually validate the record by selecting the segment and/or intersection on the last tab of the module in order for it to appear in the Collision Diagram.
For additional information on the Accident Validation Process, consult the help guide.