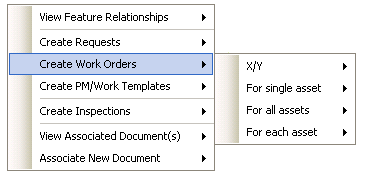
- X/Y: This option creates a work order or PM/Template with an associated X/Y coordinate.
- For a Single Asset: This option creates a work order or PM/Work template for the asset.
- For All Assets: This option creates a SINGLE work order or PM/work template for ALL of the selected assets.
- For Each Asset: This option creates a separate work order or PM/work template for each selected assets.
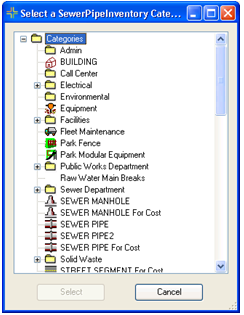
Default Work Category or if "For all selected features in map" is selected the following popup will appear prompting for a category for each type of asset. This is required in order to properly populate the category associated with each asset selected. 
Note: The Select button is only enabled if a valid category is selected.

- Additional fields can be configured so they also appear in the grid. Each row in the grid represents a separate work order or pm/PM template record. Refer to the Default Fields Setup tool available on the Lucity toolbar in ArcCatalog for more information.
- It is strongly recommended to populate the CategoryCode column first as other columns may populate automatically based upon the category chosen.
- To assign the same value to multiple rows, select the desired rows by holding down the Shift key, then while still holding the Shift key click in the field to update and set the value. After updating the cell click on another cell for the grid to be refreshed and show the updated values.
Note: The grid automatically detects data type errors after another cell is selected. If the entered value is not valid a message similar to the following will appear:

- Work flow setup columns will be followed by a white button. Clicking the button will open a popup list of selectable values. Select the appropriate item from the list. If the user has permission, the Show All button will be enabled allowing them to toggle between seeing just the items associated to the category or all items in the system.
- Submit and View in Desktop: This option will submit the work order or PM template and automatically open them up in desktop application. The first record will be opened in edit mode.
- Submit and View in the Web: This option will submit the work order or PM template and automatically open them up in the Web application.
- Submit Only: This option will submit the work order or PM template, but Lucity will not be opened.
- Cancel: This will cancel the work order or PM template.