Reports
- Click on the Reports button
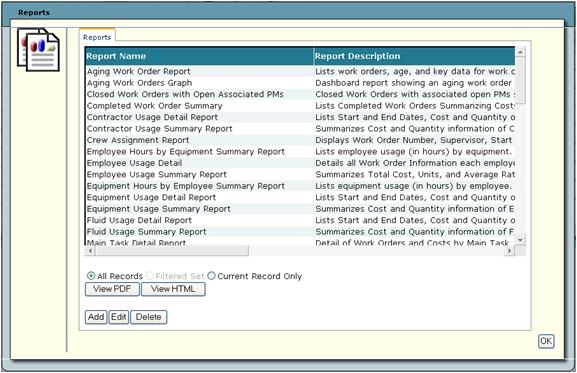
 to open the Reports dialog. The following window will be displayed:
- This dialog displays each report by name. It also lists a brief description of each report, the report file name, and indicates whether the report is a Quick Report.
Note: The reports listed include your organization's custom reports as well as the standard gbaMS reports.
- This dialog displays each report by name. It also lists a brief description of each report, the report file name, and indicates whether the report is a Quick Report.
- To view a report, highlight a report name and click View PDF or View HTML. The report will be displayed in a separate window.
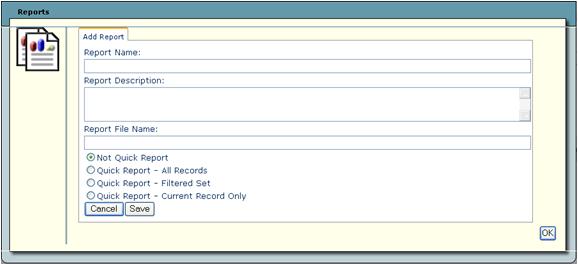
- To add a new report, click Add. The following dialog will appear:

- This dialog allows you to indicate the report name, description, file name, and quick report status. Click Save when you are finished defining the report. It will then be added to the reports list in the previous window.
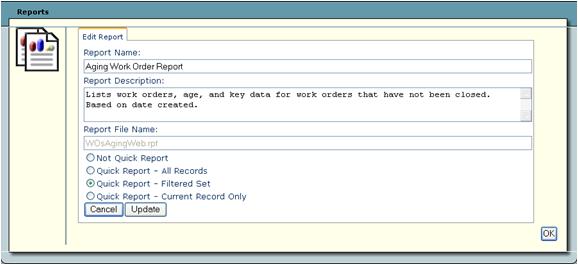
- To edit a report name, description, or designate a report as a Quick Report, highlight a report name and click Edit. The following window will open:

- When you designate the report as a quick report you can indicate whether it applies to all records, the filtered record set only, or the current record only. This will determine which data is contained in the report. Click Update when you have finished making your selections.
- Quick Reports are then displayed in the drop-down menu beside the Reports button. To access a Quick Report, simply click on the report name and it will immediately open in a separate window.

See Also |