Editing an Auto-Numbering Field

  1. To edit auto-numbering properties for a field, select the auto-number listed under the feature class in the tree on the Geodatabase Synchronization Setup form.
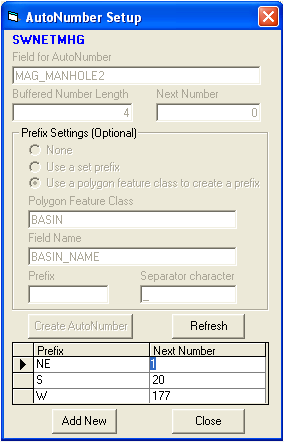
  2. Click the Auto-Numbering tool located at the top of the Geodatabase Synchronization Setup form.  The following dialog will be displayed allowing you to edit the Prefix or Next Number settings in the grid at the bottom.

    Create Edit

  3. To edit a Prefix or Next Number, place your cursor in the appropriate field and type your changes. Then, click "Close". Your changes will be added to the Geodatabase Synchronization Setup and can be viewed by selecting the feature class in the tree and clicking the "+" next to the feature class.  A list of the auto-numbers along with spatial relationships will be displayed.

    Note: You cannot edit the grayed-out fields on this form. If you need to change any of these fields, you'll need to remove the auto-numbering field and recreate it.

See Also

Setting up Auto-Numbering for Features

Add an Auto-Numbering Field