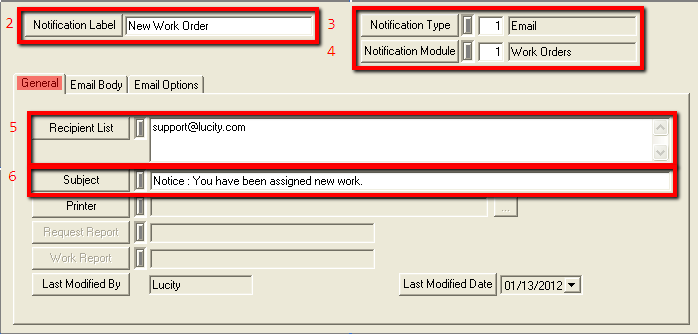
The Notification Setup module can create default email messages that will be sent out automatically to each recipient listed, as well as other recipients specified in the module sending the notification. Those emails will either be sent automatically, or are triggered manually from the different modules. For automated messages, settings within the modules will control when the notification is sent.
Email notifications work for all modules that support notifications
Note: The system administrator must configure the system values for the SMTP server, and the default sender address before the email notifications will work. For Access users they are in Work > Administration > Server Email Settings. For SQL Server and Oracle users they are in the Lucity Administration Tools.
Considerations
How To Create an email notification

 on the module toolbar to add a new record.
Note: These recipients will ALWAYS receive this notification every time it is used, whether they are specified by the sending module or not.
Note: When entering multiple email addresses, use a semi-colon (NOT a comma) between each address. Blind cc emails are not permissible (i.e. all email addresses will be visible to all recipients)
Note: By default most modules that require “Email” as the notification type will automatically send emails to the recipients that are specified in those modules. Therefore recipients do not always have to be specified in the recipient’s grid.
Note: All other fields will be grayed out as they do not apply to this type of notification
Note: To add another line into the Email Body section hit CTRL+Enter
 to save the email notification
Email Options
The Email Options tab is discussed here.
|
In This Section |