Click the button. If the highlighted Asset does not have a Default Work Category, the following pop-up appears to prompt the user to select a category:
When Assets are selected, only categories associated with the highlighted Asset appears.
When User Point Graphics are selected, the Category list includes all categories.
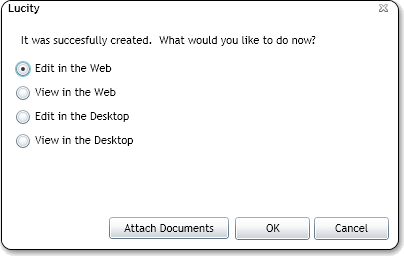
Select a Category and click OK (required). The system creates the Work Order with the highlighted Assets attached. The following pop-up appears:
Click Attach Document to browse to and select a document to attach to the Work Order (if desired).
Choose one of the Edit or View options and click OK. The selected Lucity platform opens and displays the new Work Order record.
Note: After the Work Order is created, the Work Order Number is automatically entered into the Attach to Work Order tool, so that users can quickly highlight other assets (even on other tabs) and attach them to that Work Order.
 button. If the highlighted Asset does not have a Default Work Category, the following pop-up appears to prompt the user to select a category: