
- There can only be one default map
- Enter the layer within the feature service that corresponds with each type of redlining layer, Point, Polyline, and Polygon.
- Do not add any map services that will be used as a base map.
- This grid does not show services that have related Feature Services for editing. Those are added in the next step.
- Do not add any map services that will be used as a base map.
- Check the Disable Identify box to stop the identify tool from querying that service. Disabling Identify also disables the ability to select features in that service. Note: Users can also manually control selectability in the map.
- If a layer includes editable features but you don't want your users editing them check the Disable Edits box to disable editing that service in this map.
- The Order field displays the default order of the layers based on the defaults entered in the Map Services tool. Enter new order numbers in the Order Override column to adjust the order (0 is closest to the basemap)
Note: Lucity Data in all layers will be recognized by the Web Map and viewer tools, as long as the aliases are setup correctly.

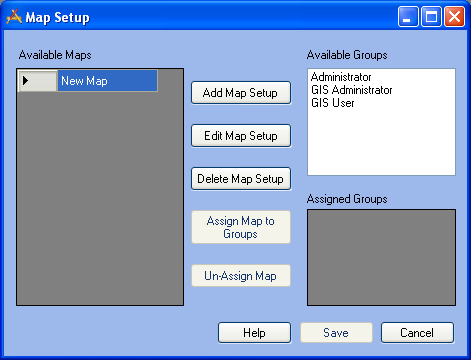
- Select a map in the Available Maps list on the left-hand side of the dialog.
- Highlight one or more groups in the Available Groups list on the right-hand side of the dialog.
Note: The only groups that will appear in the Available Groups list are those that have been assigned as a Default Group in the Lucity Security Program.
- Click the Assign Maps to Groups button in the center of the dialog
- The groups currently assigned to each map will be displayed in the Assigned Groups list in the lower-right corner of the dialog.
Note: While each map can be assigned to multiple user groups, each group can only be assigned to one map. So, if the Administrator group is assigned to the Water Map, and later assigned to the Traffic Map, the Administrator group will have access to the Traffic Map only.
- Highlight a map in the Available Maps list.
- Highlight a group in the Assigned Groups list.
- Click the Un-Assign Map button.
- Click Save to save any changes made.