Task Dates
If the Work option Enforce Task Start Date = End Date is enabled only 1 Date field will appear on the Task forms.
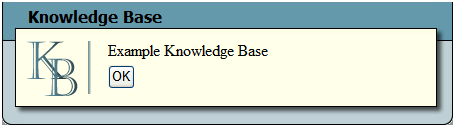
![]() Knowledge Base button
Knowledge Base button
Based on your Work Flow Setup in your desktop version of Lucity, some Problems may have associated Knowledge Base information when selected on Request submittal forms. When you select one of these Problems on the form, the Knowledge Base window will appear. Click OK to close the Knowledge Base dialog. To view this information again, simply click the ![]() button on the form.
button on the form.
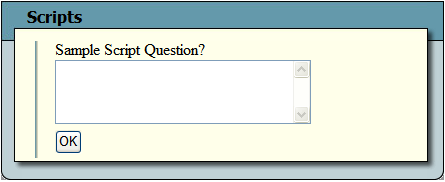
![]() Scripts button
Scripts button
Based on your Work Flow Setup in your desktop version of Lucity, some Problems may have associated Scripts when selected on Request submittal forms. When your users select one of these Problem on the form, the Scripts window will automatically appear. This window will allow users to enter a response to each script in a large text box. Click OK to close the Scripts dialog. To view this information again, simply click the ![]() button on the form.
button on the form.
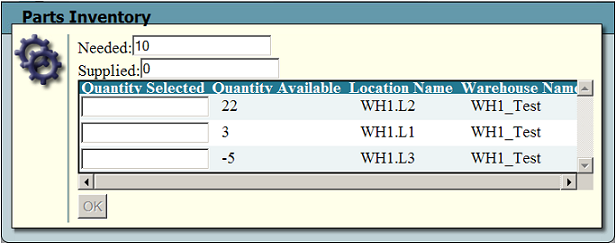
Parts Integration
Based on settings in your desktop version of Lucity, the Warehouse Parts Inventory module can be integrated with the Work module to provide optimal inventory management. This integration allows you to disperse parts from warehouse locations for use on work orders. To use this integration, you'll need to complete the parts inventory integration setup in the desktop application.
The basic steps required are listed briefly below; however, we recommend consulting the Lucity Help guide for additional details on the Parts Integration Options and dispersal process.
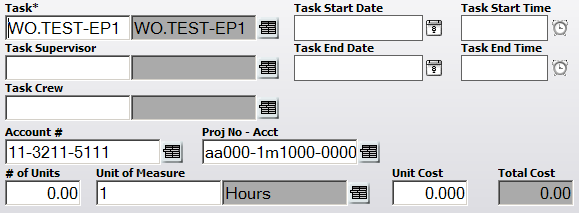
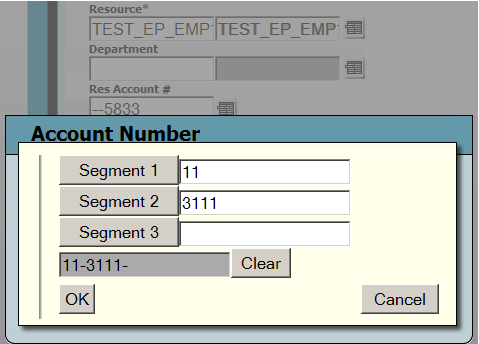
Partial Defaulting Example
By using the Financial Integration options in the desktop application, you can enable partial defaulting for Account Numbers and Project Numbers on the web forms.
The basic steps required are listed briefly below; however, we recommend consulting the Lucity Help guide for additional details on Partial Defaulting and Work Flow Setup.
Note: These options can be used with or without Eden financial integration.
Financial Integration Example
If your desktop application is integrated with Eden Financial Systems, you can select Eden account numbers on the work order forms.
The basic steps required in the Lucity Administration for Web Apps are listed briefly below. For instructions on setting up the Eden InForum Gold Integration in the Desktop application, consult the Lucity Help guide. You must then clear the web cache before any changes to the integration setup will take effect in the web forms.
File Uploads
When the File upload control is added to a Citizen Request form citizens will see this on the form.

They can click the Choose File button for a pop-up to browse to a record.
Sign Images
On forms for the Sign Inventory and Sign Library there is a picture file field that can be added. This field will display the Sign Images on the form.
Note: Before this field will work the sign images must be copied from the ...\Pict\SignLib folder that is installed during the Lucity Server install(in the Lucity share) to the web server in the inetpub/wwwroot/LucityWeb\images\signlib folder.
Work Order Location Fields
The Work Order form has a special set of Location fields (Address, Street Name, Street Name 2). These allow users to add location data to the work order without having to go to the location grid and add a location record. When the user fills these fields and and save the record the values in the field are used to automatically create a record in the Location grid. If the work order form is edited and these location fields are changed the original location is retained but the new address is added as another record to the work order location grid.

Note: These fields will always display the information for the first location on the work order. Even if several locations have been added using them.