Option
Use/Purpose
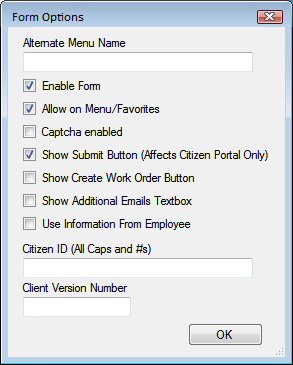
Alternate Menu Name
When a Form is created a unique name is required. By default, that name appears at the top of the form, on the menu, and on the website. If the form should have a different name or alias, add that here. If this field is filled in only the Alternate Menu Name will be seen by the end-users.
Enable Form
This checkbox makes the form accessible to users in the web app. All forms, whether they represent parent or child records, will need to be enabled to be used on the web.
Note: This is a very important step. If the form is not enabled, it will be unavailable for use in the webapp.
Allow on Menu/Favorites
Mark this box to make the form available for use on internal menus. Note that this checkbox is only available on certain types of forms. Typically, these are parent records (like Work Orders, Requests, or Inventory forms). Child records will not be added to menus (i.e. Work Order Resources, Fleet Components, etc.).
Note: This is a very important step. If this box is not checked, the form will not be available to add to a menu. Follow the link for additional information on adding forms to menus.
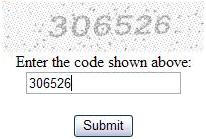
Captcha enabled
Captcha is a way to reduce some of the spam requests that might otherwise be submitted through a web form. Checking this box adds a code similar to the following to the request web page. Users will be required to type the code prior to submitting their request.
Show Submit Button
This box allows administrators whether or not the Submit button will appear on a web citizen form. Marking this box causes the button to appear. This usually needs to be checked.
Show Create Work Order Button
This adds a Create Work Order button to internal request forms. This allows users to enter a request, then save and create a work order quickly.
Show Additional Emails Textbox
This provides additional email address fields to web citizen forms so that a requester can have the request create email sent to more than one email address.
Use Information From Employee
Checking this option causes the form to pull information from the employee's Lucity employee record (Work > Work Flow Setup > Employees) to populate fields when they are filling out a request. This works for internally submitted requests.
Citizen ID
The Citizen ID makes forms accessible to the Web Citizen product. This field is used to link an external site to a form. In addition, this can be used over an intranet site for an agencies users that do not have a Lucity login ID.
- Enter a unique, alphanumeric ID using uppercase letters and numbers only (e.g. XYZ123, CITIZEN1). Do not use any symbols (i.e. *, #, %).
- The ID will then be used in an entry page from an external, non-web site. You'll need to include a string similar to the following:
<"http://<servername>/LucityWebCitizen/?FUI=XYZ123">Click here to report a problem </a>
Note: For public web forms to be used by citizens, several security permissions will need to be enabled. Consult the Group Assignment topic for additional information. To make public web forms available to internal users, mark the Allow on Menu checkbox. Administrators can then add the form to menus and assign groups to it. To make this only accessible to public citizens, Do not check Allow to Menu.
Client Version Number
Enter in the version number that the client is currently using.