The Settings button on the Lucity Toolbar brings up a window that allows users to modify settings that affect how the Lucity GIS tools login, other parts of the user experience.
Login Settings
Every time a user opens ArcMap and attempts to use a Lucity tool they are prompted for their Lucity login and password and if there is more than one Lucity client, they will be prompted for which client they are logging into. There are two things that can be setup to speed up this process
The Lucity tools for Arc 10x support using Lucity Windows Authentication. Upon using a Lucity GIS tool the program checks to see who is logged into the computer and if that user has windows authentication configured. If it finds an associated Lucity account it checks to see if they have permissions to run the Lucity GIS tools. If the correct permissions are present the user is automatically logged in and the Lucity GIS tools are activated. This will stop users from being prompted for their login and password when they try to use the Lucity GIS tools. Lucity Windows Authentication must be setup by an administrator in the Security program.
Part of the login process checks to see what Lucity client the user is logging into. The user will be prompted to choose the client out of a list every time they start ArcMap and try to use a Lucity GIS tool. If there is only one client available the program will bypass this step. To by-pass the client selection dialog, you can specify a default client that should be used for the .mxd.
Note: This setting is saved with the .mxd; it is not a user-specific setting!
On the Lucity Edit toolbar click the Settings button
In the settings dialog, select a client from the new default client list
Make sure the Save new default client value checkbox is checked
Click Save on the Lucity GIS Settings dialog form. A prompt similar to the following will appear:
Save the .mxd.
Note: If using windows authentication users will no longer receive any login prompts when using and Lucity GIS tool INCLUDING when starting an edit session!
User Settings
There are several user specific settings that are set using the Settings button found on the Lucity GIS Editing toolbar. These settings will be used anytime the user logs into the Lucity GIS extension regardless of the .mxd or machine.
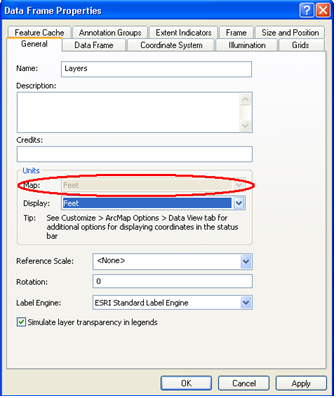
Several of the Lucity GIS tools search for features around where the user clicks based on a search tolerance. The system default is 7 map units. The map units are determined by what is listed in the ESRI Data Frame Properties dialog. Within ArcMap go to View > Data Frame Properties > General tab.
Users can set a new default search tolerance for Lucity GIS. This is used with all Lucity GIS tools that use a search tolerance.
Click the settings button on the Lucity GIS Editing toolbar
In the given box fill out the default Search Tolerance. The number used will be in map units, which is based on the projection used in the map.
Click save.
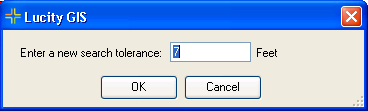
Alternatively, the search tolerance can be changed on the fly for a specific tool in the map. This change will only last while the tool is selected.
While the tool is selected, push Shift + F7. The following dialog will appear:
Users can disable the Lucity editor extension. This is useful if the user never or rarely edits feature classes linked to Lucity. Having this checked will prevent the extension to become active every time they edit the geodatabase linked to Lucity.
Click on the settings button on the Lucity GIS Editing toolbar
Check the Disable ‘Lucity will now be updated’ prompt when saving edits check box.
Click save.
Alternatively the editor extension can be disable on the Editing toolbar. Changing it this way will only disable it for that session of ArcMap.
Check the Disable Lucity Editor checkbox on the Lucity GIS Editing toolbar
Note: The new settings will take effect the next time ArcMap is opened.
Work Orders, Requests, and PMs can be displayed by Show in Map tool several different ways. They can display the assets and/or the address/XY locations. There are several settings that control what the show in map will display for this user.
Click on the Settings button on the Lucity GIS Editing toolbar
Choose either Work Orders, Requests, or Routines and click the associated dropdown box.
Select whether the Show in Map tool should show the Assets, the Locations, or Both.
 Bypass Login