Lucity GIS contains an editor extension that tracks edits made to the geodatabase that is linked to Lucity and ensures that those edits are synchronized with the Lucity databases.
Tool
|
Name
|
Function
|

|
Process Log
|
This is a log for all of the Lucity GIS tools. I provides error messages an other information about what is happening.
|

|
Lucity GIS Edit Session Status
|
This is a quick way to see the Lucity edit sessions current status. (Red-session not enabled, Yellow-session is initializing, Green- Session is enabled)
|

|
Update Spatial Relationships
|
This updates any spatial relationships assigned for the selected features. Spatial relationships are setup in the geodatabase configuration and are designed to update a feature's attribute based on the attribute of a related feature.
|

|
Force Synchronization
|
This tool forces the automatic synchronize process to be run on-demand against the selected features. This is mostly used to push changes made outside of a Lucity Edit session into Lucity.
|

|
Delete
|
This deletes features from the Map and Lucity at the same time.
|

|
Clear Lucity Edit Cache
|
This clears out the Lucity Edit cache for the current user. This stops recent ArcMap edits from being pushed to Lucity.
|

|
Disable Lucity Editor
|
This disables all of the Lucity Edit tools.
|

|
Settings
|
This contains map settings that help to speed the process of logging into Lucity while in ArcMap. It also contains some user settings to control how the Lucity GIS tools work.
|

|
Sewer Tools
|
Provides special tools for specific Sewer edits that must be performed in Lucity and in ArcMap at the same time. Sewer Renumber, Sewer Merge, Sewer Split, and Sewer Reverse Flow.
|

|
Storm Tools
|
Provides special tools for specific Storm edits that must be performed in Lucity and in ArcMap at the same time. Storm Renumber, Storm Merge, Storm Split, and Storm Reverse Flow.
|

|
Street Tools
|
Provides special tools for specific Street edits that must be performed in Lucity and in ArcMap at the same time. Renumber Street Feature, Merge Segments, Split Segments, Split Subsegments, and Merge Subsegments. There are also tools to manage Supersegments. Define Supersegments, Dissolve Supersegments and Generate Supersegment Features.
|

|
Water Tools
|
Provides special tools for specific Water edits that must be performed in Lucity and in ArcMap at the same time. Water Renumber, Water Merge, and Water Split.
|

|
Alias Import
|
This takes the aliases currently defined for all Lucity Feature classes in the map and associates them to the feature classes in the Lucity Geodatabase configuration.
|

|
Help
|
Links the user to the Lucity GIS web help section about the analyst tools.
|
- To start editing the Lucity geodatabase, go on the ESRI Editor toolbar and click
Editor > Start Editing. To load the ESRI Editor toolbar, go to View > Toolbars and select Editor.Note: Make sure the Lucity GIS Editing Tools 7.50 toolbar is loaded.
- The ESRI edit session starts,
Lucity GIS checks to see if a user is logged in yet. If no users are logged into Lucity GIS in this ArcGIS session , a login prompt will appear.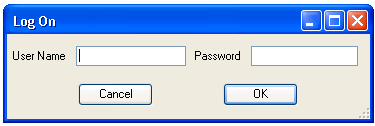
This is the same login as their standard Lucity login.
- It processes for a few moments to retrieve the necessary data and settings, and will prompt users that upon completion of edits, the Lucity desktop application will be updated. This prompt will appear once during the ArcGIS session.

Warning: If users start editing a Lucity geodatabase and do not receive this message, something is wrong. They should stop editing, close the project, reopen it, and try to start editing again. If they still do not receive this message, contact a Lucity support representative. Another indicator that there is something wrong with the edit session is the color of the Lucity Edit Session Status.
Once the edit session starts, the Lucity GIS Editing toolbar will be enabled. Also, the Edit Session Status will change from yellow to green.

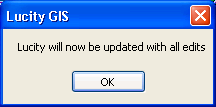
4. When saving edits, a prompt will appear saying, "Lucity will now be updated."
Once edits are completed they need to be saved in ArcMap so Lucity knows to sync them.
How To
Save edits
- After making edits, go to the ESRI Editor toolbar and select
Editor > Stop Editing or Save Edits. Select the option to save edits, and a prompt will appear stating that Lucity is going to be updated.Note: if users stop editing and don't save edits Lucity will not sync them.
- It will pause for a few moments to figure out what needs to be updated. A progress bar will appear in the lower right-hand corner of ArcMap and the Edit Session Status will be yellow. Do not close ArcMap while this is processing or the changes will not be made to the desktop.
- The progress bar runs twice to 100%. The first time, it is reordering features so that they are updated into the desktop in the correct order and retrieves necessary information needed for the synchronization. Depending upon how many features that are updating a pause may occur at 100% during the first progress bar. This pause will depend upon the computer's memory and how many features were updated.
- After the second progress bar completes, it will automatically close. This means that the desktop application updates are finished and the Edit Session Status will be green.
Note: When user delete a feature from the map using the delete key, it does not delete the feature from Lucity; it changes its status to "Not in Map". To tell whether or not something is in the map, open the Inventory module for that feature and find the feature . If the "Show in Map" button is enabled, the feature is in the geodatabase. If the "Show in Map" button is disabled, the feature is not in the geodatabase. There is a special delete tool that allows users to delete features both in the map and in the desktop application simultaneously.
 Start the Lucity Editor