System > Configuration > GIS > Show in Map to open the configuration window.Note: If there is no project selected, the web map will be used by default.
Note: Since this window determines what GIS project is displayed, it must be defined before the initial use of the Show in Map button. This setting can be overridden on a per-module basis by setting a different map project in various Lucity modules. For additional information, consult the Show in Map topic in the Lucity Help Guide.
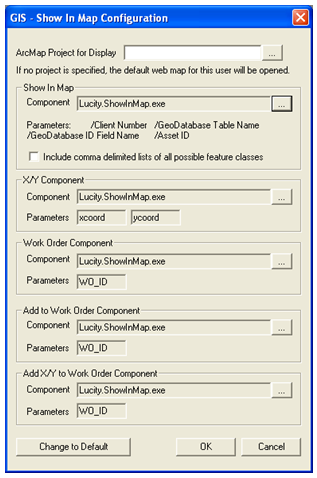
Note: To use a different Show In Map program click the  button next to any of the program components and find the custom .exe to use.
Note: To use a different Show In Map program for addresses go to System > Configuration > GIS > Address Show In Map.
Note: Administrators can setup the Show In Map for multiple users at once in ArcCatalog. For more information go here.