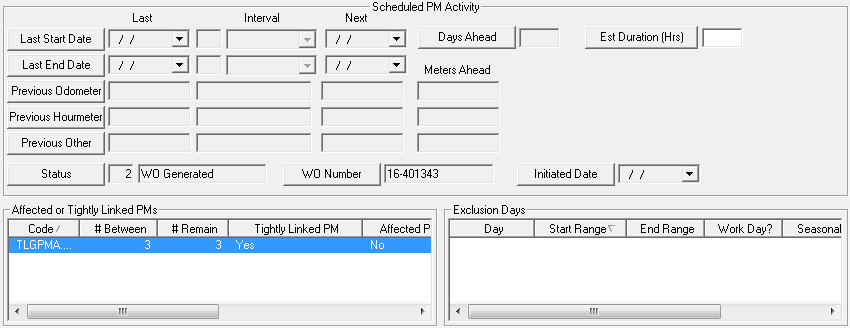
The Scheduling WOs tab allows you to set up when and how often your PMs are generated. The fields in this tab will be inaccessible if the Scheduled PM checkbox in the header is not marked. This checkbox distinguishes a regular work order template from a PM.
Note: This tab is not used for Grouped PMs. If you are creating a grouped PM, you should use the Grouped PMs tab for scheduling.
Note: If a PM work order status is "Open", the PM will not appear in the Work Order module's Toolkit. Thus, you cannot use that PM to generate another work order until the current one is closed. Only one open work order per PM is allowed. However, you can have multiple work orders open when using the regular work order template.
Note: Once a PM is designated as Scheduled, it cannot be switched to a non-scheduled Work Order. If you want to disable the PM and keep it from scheduling you will need to remove the start and next values as well as the interval.

The first step when scheduling a PM is to determine if the PM is to be on a fixed schedule or a floating schedule.
Each time a PM work order is closed, the PM schedule resets itself. Thus, if you do not close a PM work order and the next scheduled date arrives, the PM work order will NOT be generated until you close the current one (i.e. only upon closing the current PM work order will the new one be generated). This functionality can be modified by several options
Note: The nightly Lucity PM Service generates all pending preventative maintenance work orders based on the schedules you set up.
|
In This Section How To Set Up a Fixed Schedule (WO Start Date) How To Set Up a Floating Schedule (WO End Date) How To Set Up a Floating Schedule (Meter Readings and Dates) |