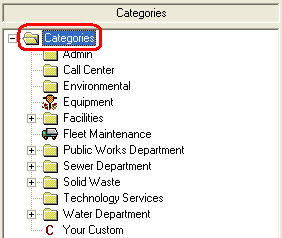
- Highlight the 'Categories' branch in the left window to add a category.
If you are adding a sub-category, highlight the existing category you want associated with the new sub-category.
- Click
 on the module toolbar.
 - Enter a new category by entering a unique, alphanumeric code in the first field and the category description in the second field. You can use the branch name for the category description. This description is what will be viewed in the category pick list.
Note: Click the field caption to see a list of existing categories as duplicate categories are not permitted.

- Select a classification from the drop-down menu for the category.
- If you select 'Inventory Item' as the classification, the Common Name field will be enabled and you will be required to populate it- continue to step 5.
- If you select 'Classification', the Common Name field will remain inaccessible - skip to step 9.
- Select a common name from the drop-down menu. By choosing a common name you are linking an asset to that category. When you link an asset to a category you are enabling a work order to pull quantity information from the module that houses that asset.
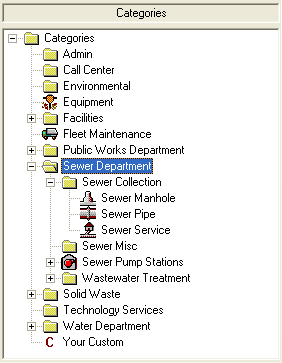
Note: An asset refers to an inventory item such as a sewer pipe or storm pump. Assets may also include intangibles such as sewer service. Upon selecting a common name for the asset, an icon will appear next to that asset in the category tree. See example below.
- Select the Unit of Measure (UOM) Type. You can select either 'count' or 'sum'. If you select 'count', the Quantity field (found in the Work Orders module Costs tab) will count the number of like assets associated with that work order. If you select 'sum', the Quantity field will add the total measurements of the like assets.
Note: 'Sum' is primarily used for linear assets such as pipes. This field along with the UOM field must be populated if you want use the Calculate Units option in the Work Order Tasks grid.
- Enter the field you want 'summed' in the UOM field. If you chose 'count' for the UOM type, you can leave this field vacant.
Note: You must use the same field name as listed in the field properties dialog Field Name window.
- Select the Unit of Measure form the pick list.
- Enter any default account or project numbers that you want auto-populated in a work order when this category is selected.
- Click
 on the module toolbar to save the category.
 - To remove a Category from the tree, highlight a listing and click the
 button on the module toolbar. A prompt will appear asking you to confirm the deletion.
 Note: If the Category selected for deletion contains sub-categories, the Category AND all sub-categories will be removed from the tree.
Upon entering multiple categories and sub-categories your tree should resemble the example below with various categories, sub-categories and assets.