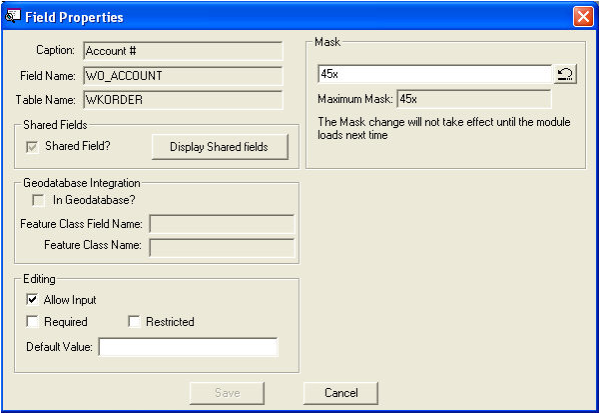
The Field Properties window contains information about the field and provides system admins with the ability to edit the properties of the fields. contains the following information:
To open the Field Properties window press Ctrl + Right-click while in view mode.
Caption |
The field description displayed in Lucity |
Field Name |
The name used for the field in the database |
Table Name |
The name of the database table that the field is stored in. |
Shared Field |
If this box is marked that this field is a shared field. Any changes to it here will affected all users in all other modules that it is used in. Click the Display Shared Fields button to see which modules this field is used in. |
Geodatabase integration |
This field is a flag that lets the user know if this field in Lucity is linked to a field in a Geodatabase. If the In Geodatabase? field is marked the Feature Class Field Name, and Feature Class Name fields will provide more information about the link. |
Editing |
|
Allow Input |
This allows users to make a field editable or static (static fields have a gray background) Mark this to make the field editable. Note: Not all static fields can be made editable. Some are blocked by the system. |
Definable in Code/Type List |
This only appears if the selected field is the code portion of a Code Type set of fields. Marking this box will make the pick-list editable (to those is the correct permissions) within the module. Un marking this box will stop users from editing it. |
Required |
Mark this to make the field required. Users will not be able to save new or edited records until the field is filled out. |
Restricted |
Mark this to make the field restricted. Restricted fields are grayed out and un editable by all users that don't have a special Security Permission. Restricted fields cannot be edited globally. |
Default Value |
Enter a default value for the field. If the field is empty when the records is saved it will automatically be updated to this value. |
Mask |
This controls how many characters users can enter into a field. This gives admins the ability to adjust the mask for the field. What appears here depends on the type of field this is.
|
Maximum Mask |
This represents the absolute largest this field's Mask can be and acts as a guide when editing the mask. |
AutoCalc * |
The AutoCalc function allows an admin to include a custom calculation in a field. This calculation will be preformed be default upon saving a record or by using the Calculate tool on the module toolbar. Enter an equation in the grid provided and use the Check Formula button to check for accuracy. A prompt will appear to inform whether or not the calculation is valid. Example: Users can enter something like this in the calculation field: (this example is for Sewer Pipe Inventory) [NT_DIA] / [NT_LENGTH] The system will search through the user-defined formula and replace the field names with values from the current record. For example, if the current record had NT_DIA = 8 and NT_LENGTH = 250, the system will return and calculate this expression: 8/250. Notes:
|
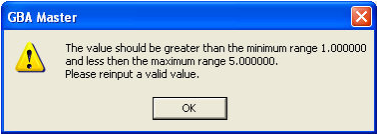
User Range * |
This allows an administrator to include a minimum and maximum range for the values in a field. User will receive an error message if the value entered in the limited field is outside of the range specified.
|
The Field Properties window provides the following functions:
Note: Static fields cannot be modified and contain a grey background. Editable fields can be modified and contain a white background.
Note: Certain field types may have additional functions on the Properties window. These are listed below.