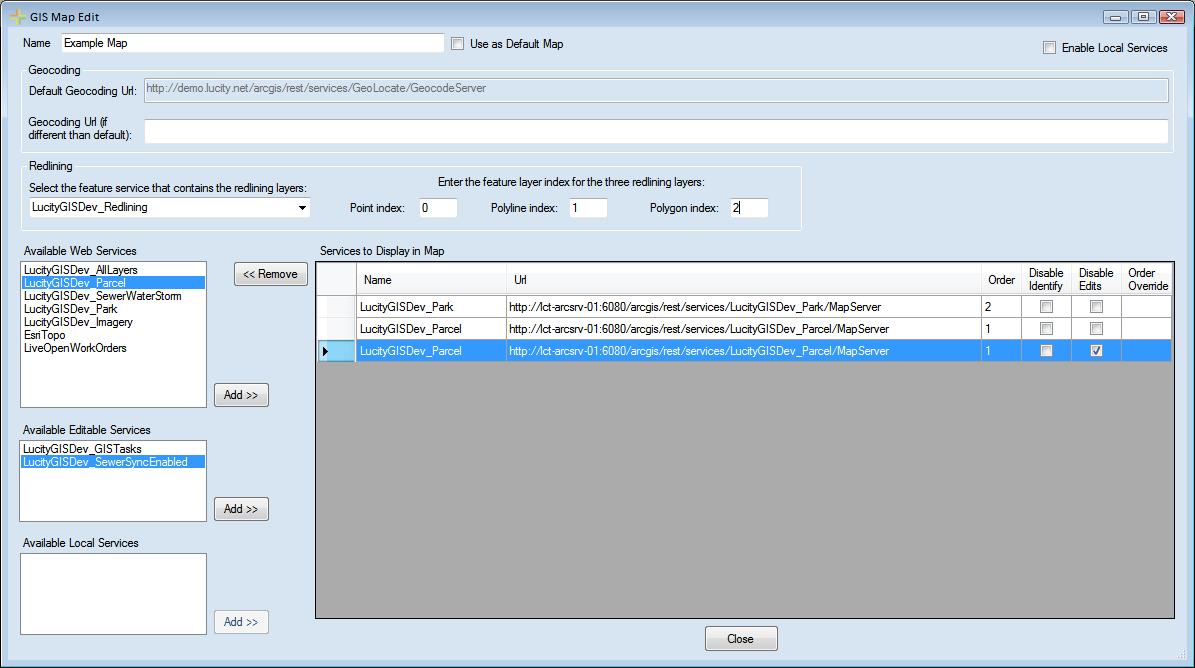
- This action will not disable the ability to also use web services in this map.
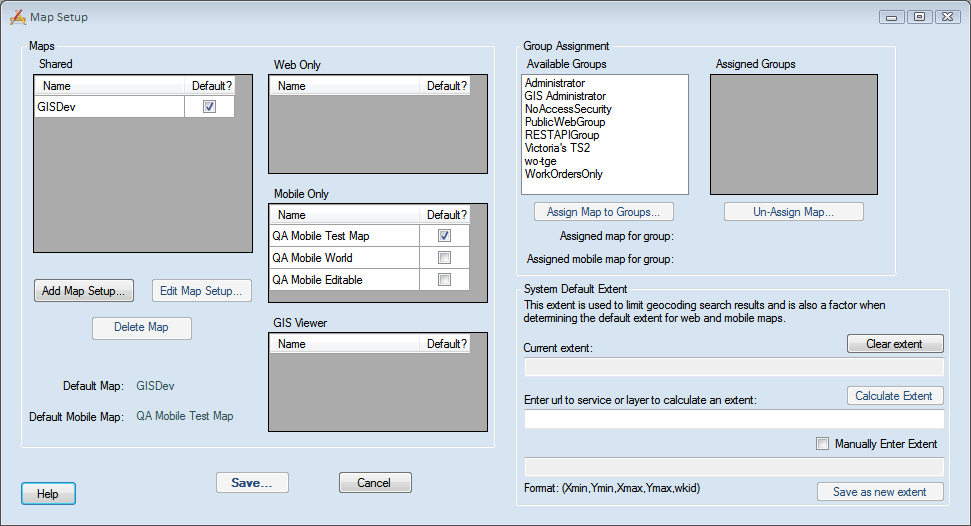
- Maps with this box marked cannot be used for the webmap, or within Lucity Mobile.
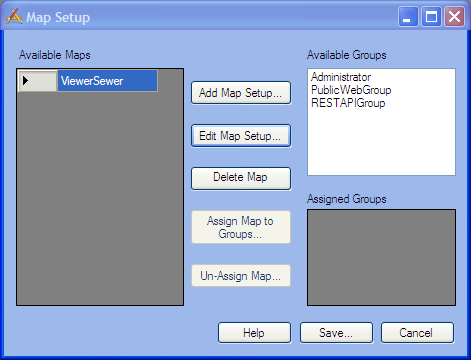
- There can only be one default map. If more than one map exists, the Viewer will ask which one to use. The default map will appear at the top of the list.
- The Geocoding Url can be either a URL for a geocoding service OR the path to a geocoding package (.gcpk).
Note: The Lucity GIS Viewer will recognize Lucity data in all layers, as long as the aliases are set up correctly.
Note: The other parts of this screen are used for the Lucity Webmap. All maps that have the Enable Local Services box checked will be visible to all Lucity GIS Viewer users.