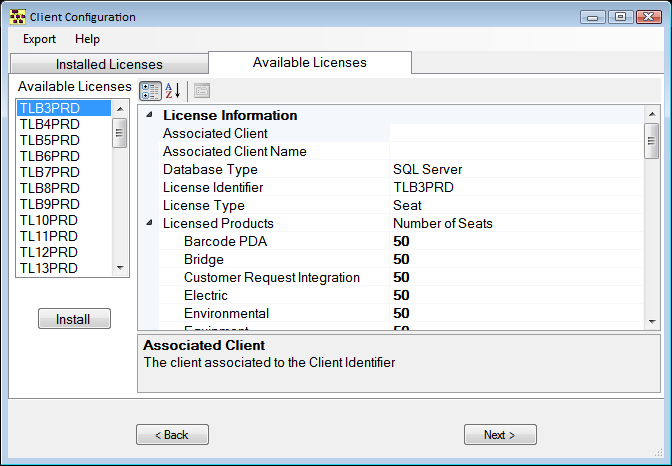
Note: Licenses marked PRD are for production use. Licenses marked NPR are meant to setup Test or Development environments.


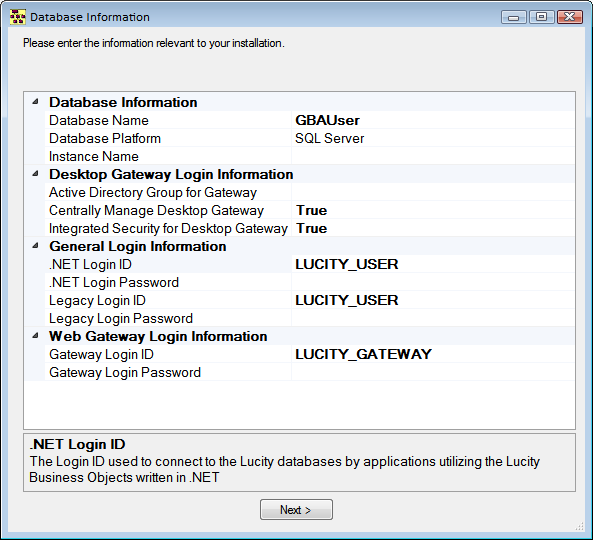
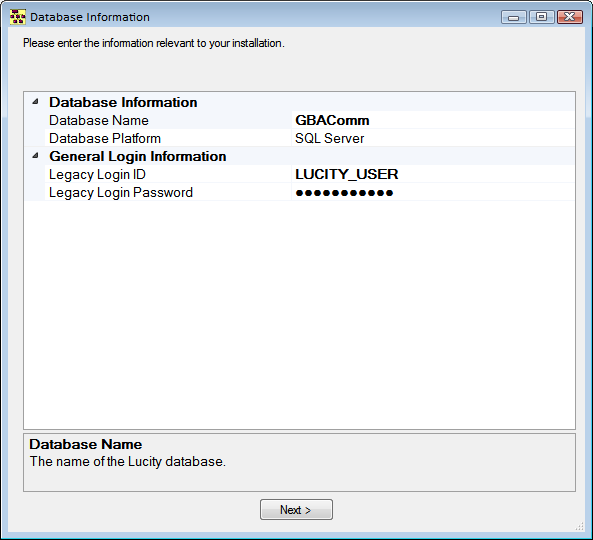
- Database Information - This specifies the location of the database(s)
- Database Name - Enter the actual name of the database to be connected to. This could be GBAComm, GBACommPRD, etc...
- Database Platform - This is automatically filled out based on the License file. If this is incorrect please contact Lucity Support.
- Instance Name - This is only for SQL Server or Oracle databases. Enter the name of the SQL Server or Oracle Server instance.
- Path - This is only for Access databases. Enter the Path to where the databases will reside. This should be located in the Lucity Share's Data folder.
- Desktop Gateway Login Information. These are setting that have to do with how login information is passed to the database. More Information about these settings (Database Connection Encryption Options, http://help.lucity.com/webhelp/v145/install/index.htm#25355.htm)
- General Login Information - The items in this category indicate the Login credentials to use when connecting to the database. It is only required for SQL Server and Oracle server clients.
- .NET Login ID - Indicates the Login ID to use when connecting to the database for applications that were developed using Microsoft .NET technologies. This login information is retrieved via the Gateway Login account.
- .NET Login Password - Indicates the Login Password to use when connecting to the database for applications that were developed using Microsoft .NET technologies. This login information is retrieved via the Gateway Login account.
Note: The .NET credentials are persisted to the GBAUser database.
- Legacy Login - Indicates the Login ID to use when connecting to the database for applications that were developed prior to utilizing .NET technologies.
- Legacy Login Password - Indicates the Login Password to use when connecting to the database for applications that were developed prior to utilizing .NET technologies.
Note: The Legacy credentials are persisted to the GBALogin.mdb in the central CONFIG directory.
- Web Gateway Login Information - The Web Gateway Login Information section is required for all SQL Server and Oracle clients regardless of whether they use the web applications. It does not pertain to Access installations. Client Maintenance uses the information input into these fields to generate a new account in SQL Server or Oracle and assign permissions for that account. Changing the data in these fields (like updating to a new password) will update the password in SQL Server. If clients are using the Web applications, they must also go to each of their virtual directories and make the password changes there (or re-install the web apps).
- Gateway Login ID - Indicates the Login ID used to connect to the GBAUser database and retrieve the connection information for the Lucity databases. If the Integrated Security for Desktop Gateway option is set to False, both the Web and Lucity Desktop applications will use this account.
- Gateway Login Password - Indicates the Login Password to use to connect to the GBAUser database and retrieve the connection information for the Lucity databases. If the Integrated Security for Desktop Gateway option is set to False, both the Web and Lucity Desktop applications will use this account.
Note: The Gateway Login Password should be at least 8 characters in length.
