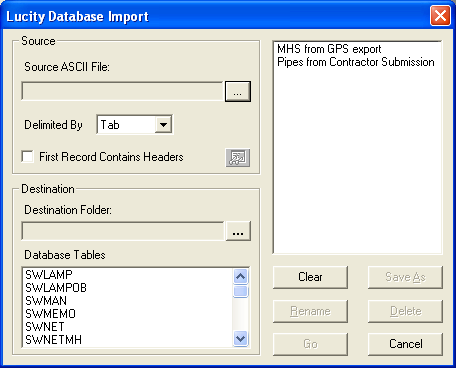
To access the Import module, select Sewer > Import/Export > Import and the following window will appear:

Note: When using a pre- defined import, you will not need to select a database table. The pre-defined import will automatically be associated with one.
 next to the Source ASCII field and select a source file from the pop-up window.
 . The file will then appear in the Source ASCII field.
 next the Destination folder field and select a destination folder from the pop-up window.
 to begin the import.