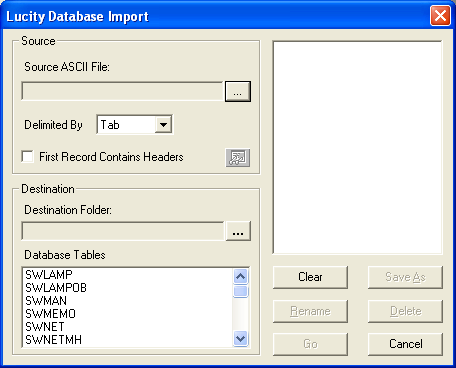
To access the Import program, select Sewer > Import/Export > Import. The following window appears:

 next to the Source ASCII field and select a source file from the pop-up window.
 . The file now appears in the Source ASCII field.
 next to the Destination Folder field and select a folder from the pop-up window.
Note: You can save the import you created as a predefined import by clicking "Save As." The import is then added to the list in the upper-right corner of the window.
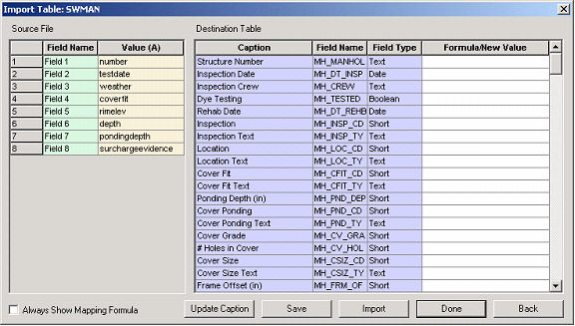
 to continue the import process. A screen similar to the following appears:
When importing data from an outside source to an existing database, the user must first configure the data. The Import Table window (pictured above) facilitates data configuration by matching up fields from the Source Files with fields in the Destination Table and providing a mapping formula in the Formula/New Value column. This formula ensures that data will be transferred into the correct fields.