In order to set up Web, you'll need to complete the basic steps listed below in the Lucity Administration Tool. Click on the links for additional information.
Create Dashboard Templates and custom Dashboard pages.
You can set up Users and then add Frames, data drills, Reports, RSS Feeds, and Asset Hierarchy Trees.
Create Views that will include the data that you would like to display.
You can select grid types, select grids, and add Forms to each of the grid
Specify where the views, forms, and Timesheets appear on the menu.
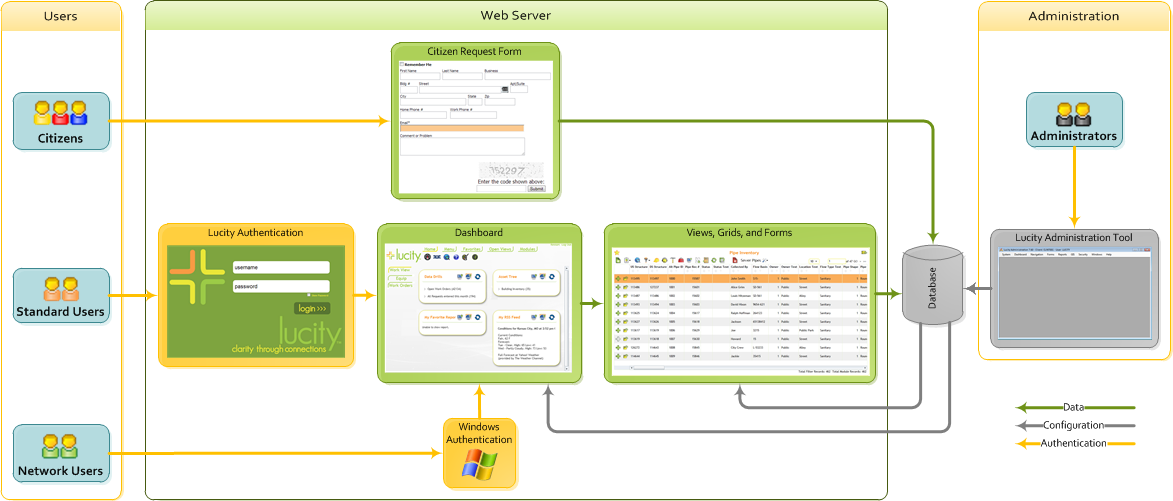
Note: For end-user instruction on the Dashboard, GIS Server Tasks, Web, and Web Citizen applications, consult the Web Help Guide.This section goes through how to setup Lucity web after it is installed.
Below is a basic diagram of how the Web system works. For additional information on the steps in this process, consult the topics in the Lucity Administration Tool guide, which describe how to setup the individual components