Selecting Grid Types to Display

The first step to setting up a view is select which grids should appear in it.

  1. Under Step 1: Select a Grid Type look at the tree of greed types that are available for the current module. Step 1: Select a Grid Type. This section lists all grid types available for this view. The list of available types is determined by the type of view selected in the View/Form Manager.
  2. Mark the checkboxes for each grid to add to the View. This will create the overall structure of the web view.

    Example: In the example below is a Work Order Entry Form. It includes the main parent grid for the Work Order Module, as well as child grids for Work Order Locations, Work Order Tasks, and Work Order Assets. The Task grid has children too for Employees, Materials, and Fluids.

    grid type

  3. To change the order of grid types select a grid type and then use the up and down arrows on the left side of the screen.

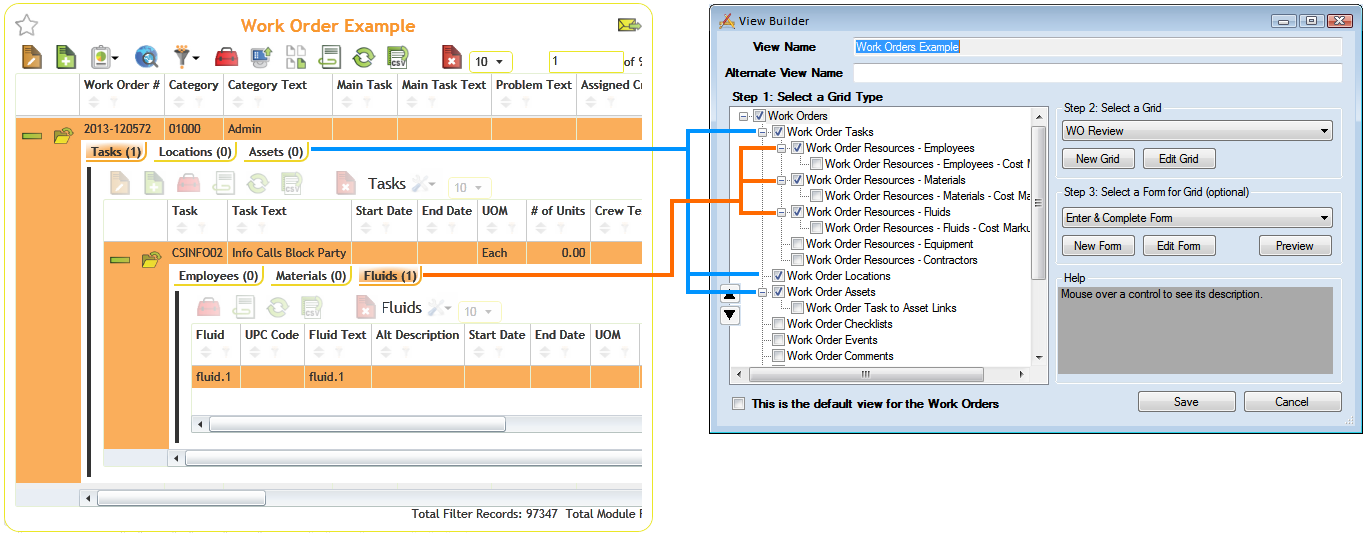
    Note: The View cannot be saved until Step 2: Select a Grid has been completed for each Grid Type that is checked.

See Also

View Builder

Selecting Grids

Adding Forms to Grids