
Menu > View Settings enables you to control how the Lucity Mobile application behaves.
Settings Toolbar functions
|
Save |
In the top-right corner, tap the Save icon. This action will save the settings and automatically return to the previous screen. Some setting changes are not visible until the application is closed and relaunched. |
|
Help |
Launches the Lucity Help Guide. |
|
Send Settings |
Enables users to send their current configuration to Lucity Support for review. |
Connection settings
Control how the mobile application connects to the agency's Lucity Mobile Server.
Note: These settings only appear in the settings screen before the user logs into the application.
Name |
Identifies the current connection configuration. Different configurations with unique names enable users to connect to multiple Lucity clients from a single device. |
Host |
Sets the path to the web server and a port number (optional).
Lucity Mobile assumes that it should use port 80 for http communication and port 443 for https communication. If your agency is using a different port follow the host name with :###.
|
Scheme |
Identifies whether the Lucity Mobile Server is running under HTTP or HTTPS. |
Rest Application Path |
Sets the virtual directory of the Lucity REST application. |
Enable Full Logging |
Causes Lucity Mobile to write additional information to the log, which can be useful to Lucity Support when trying to diagnose problems. |
Application settings
Control how various parts of the application behave.
Note: These options only appear after the user has logged in. They are saved individually for each user.
Page Size |
Sets the number of records that appear in a view before forcing the user to jump to the next page. |
Device Identifier |
Automatically generated ID for the device to help admins recognize it in the Lucity Web > Admin Portal > Users and Licenses > Activations Manager. Uses the first user's Login ID + the device's Model Number. |
Enable Full Logging |
Causes Lucity Mobile to write additional information to the log, which can be useful to Lucity Support when trying to diagnose problems. |
Enable Location Tracking |
Indicates that the device is tracking its location.
|
Map settings
Control how the mobile map behaves.
Note: These options only appear after the user has logged in. They are saved individually for each user.
Show in Map Search Priority |
Controls how the Show in Map
|
Navigator Type |
Selects whether the Find Directions tools in the Map will use Google Maps or ArcGIS Navigator to give users Driving Directions. |
Default Category |
Sets the work category used by the map when creating Work Orders or Requests using location addresses or XY coordinates instead of assets.
|
Plotted Color |
Controls the color of all plotted features when using the Advanced Show In Map for Work Orders tool. |
Completion Color |
Controls the color of completed features when using the Advanced Show In Map for Work Orders tool. |
Selection Color |
Controls the color of the currently selected features when using the Advanced Show In Map for Work Orders tool. |


 button operates when displaying Work Orders and Work Requests. When both assets and location addresses/XY coordinates are attached to a Work Order or Request, this setting tells the Show in Map tool which to plot:
  How to change a setting
 button and tap View Settings. The Settings page opens.
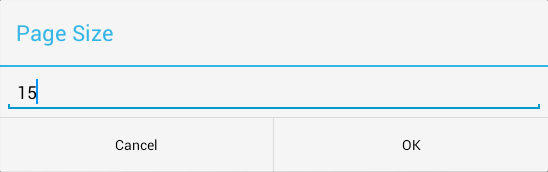
 . Your settings are updated.