- Enter a unique name in the Name field.
- Under Lucity applications that can use this map, select Web & Mobile, or Mobile only.
- Set the Geocoding Url. Enter a URL or path here if the geocoding service used for this map will be different than the one entered in the Default Geocoding Url field. The Default Url is set in Lucity/CS EAM Administration under System > Settings on the GIS Web tab.
- Select the Redlining layers if you use redlining in your map.
- Use the map services listed in the Available Web Services and the Available Editable Services to populate the Services to Display in Map grid.
- Modify the service settings in the Services to Display in Map grid.
Note: The Mobile Map tools will recognize Lucity/CS EAM data in all layers as long as the aliases are set up correctly.
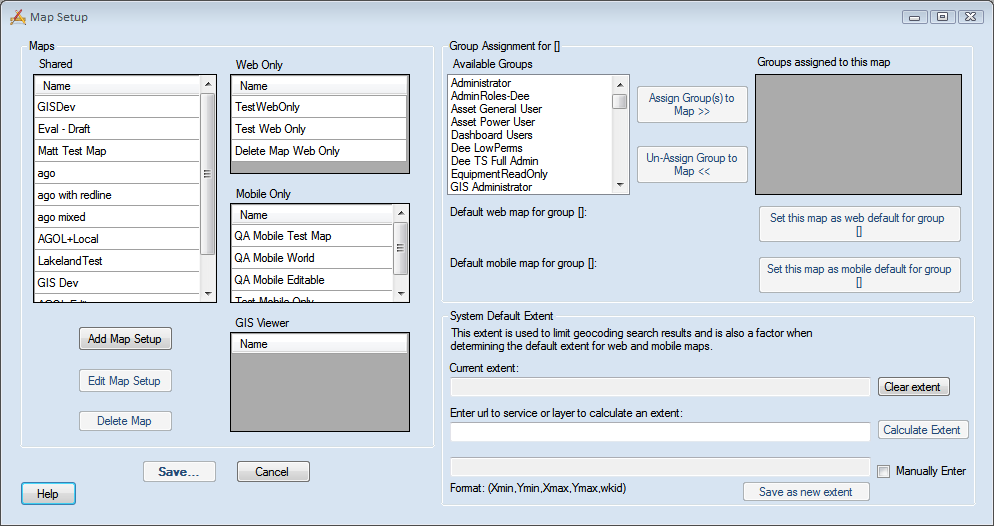
- Select the map in one of the grids in the Maps section.
- Select one or more groups you want to access the map in the Available Groups grid.
- Click the Assign Groups to Map >> button. The groups will move to the Groups assigned to this map grid and are now able to access to that map.
- If the map should be a default map for a group, select the map in the Maps section.
- Select the group in the Available Groups grid.
- Click the one of the Set the map as... buttons.