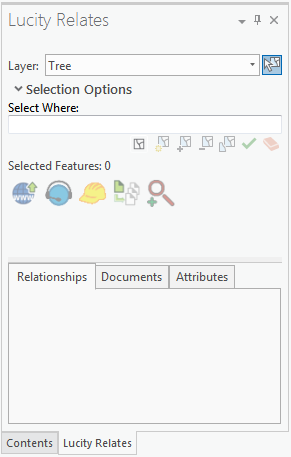
The Lucity Relates tool allows users to select a feature(s) in the map and view all Lucity records that relate to it. The tool also allows users to create Work Orders, Requests, and Inspections in Lucity, based on features in the map.
Selection Tools
Selection Tools
Layer
Enables the user to choose a Lucity layer in the map from which to select features.
Enables the user to select features in the map based on what is selected in the layer field.
Selection Options
Select Where
Enables the user to enter a SQL statement to select features based on attributes.
This tool can be used to either modify the current selection or create a brand new selection. Statement parameters can be automatically added using the attributes table. The following buttons control how the results of the Select Where statement are handled.
Clear Selection
Deselects any selected features.
New Selection
Clears the current selection and creates a new selection based on the Select Where statement.
Add to Selection
Adds the results of the Select Where statement to the current selection.
Remove from Selection
Eliminates the results of the Select Where statement from the current selection.
Select from Selection
Narrows the current selection to only records that match both the current selection and the Select Where statement.
In the Select Where field, type in the selection you wish to make.
You can manually type in field names and values.
If you have a current selection and the Attribute tab is populated, you can right-click in the grid and select Create New Expression or Add to Expression.
Click the button to validate the expression.
Select what you would like to do with the expression:
New Selection
Add to Selection
Remove from Selection
Select from Selection
The selection will be modified according to your guidelines.
Selected Features and Tools
This section of the Lucity Relates tool lists the selected features. Users can highlight one or more features in this list to view additional information, like Relationships and Attributes.
Selected Features List
Displays a count and list of all features selected in the map.
Click on one more more records in this list to view related relationships and attributes or to perform one of the following functions.
Open in Web
Works with information highlighted under Relationships. Opens the related records in Lucity Web.
Create Request
Creates Requests for all features highlighted in the Selected Features List.
Create Work Order
Creates Work Orders for all features highlighted in the Selected Features List.
Create PM/Template
Creates PM/Templates for all features highlighted in the Selected Features List.
Create Inspection
Creates Inspection records for all features highlighted in the Selected Features List.
Document
Uploads and attacches a document to all features highlighted in the Selected Features List.
Point Location
Creates a point in the map and records its x/y, lat/long, and reverse geocoded address. This can be used to add an X/Y point to a Work Order or Request.
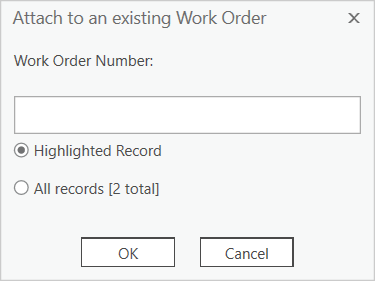
Attach to Work Order
Attaches highlighted assets and X/Y Points to an existing Work Order.
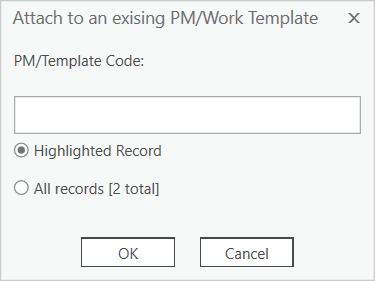
The Attach to PM/Template tool enables users to attach assets and locations to a pre-existing PM.
How To Attach Assets to a PM
Select one or more features or Work Points in the Webmap or from the Data Table.
If needed click in the field next to the Attach to PM tool and enter a PM/Template ID.
Note: If you clicked the Add Asset/XY from Map, or Show Selected in Map (for a single record) options in the Show in Map tool in the Work Order module, then the PM/Template ID is supplied.
Click the Go button next to the tool. The selected features or points are attached to the PM/Template.
Features are added to the Asset grid of the PM/Template.
Work Points are added to the Location grid of the PM/Template.
Attaches the selected assets and X/Y Points to an existing PM as a PM Asset.
Relationships tab
Displays any Lucity records (from various modules) that are related to the records highlighted in the Selected Features List.
Attributes tab
Displays attributes for a single selected record in the Selected Features List.
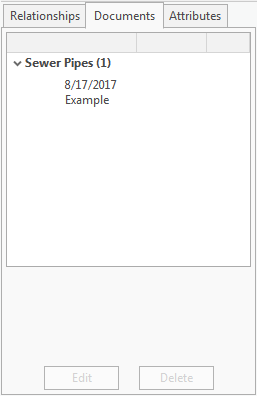
Documents tab
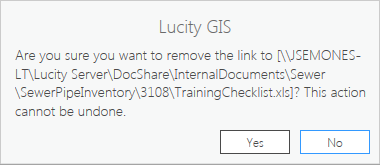
Displays a list of documents attached to the selected records.
Select the desired features. A list of these records appears in the Lucity Relates tool.
Highlight one or more of the features.
A list of Lucity modules that are related to the selected feature(s) appears in the Relationships tab at the bottom of the tool. Each module listed also includes a count of the related records.
Select the desired feature(s) or XY/Address Locations in the map. The Lucity Relates tool lists the selected features.
Highlight one or more of these features.
Click the button. The following pop-up appears:
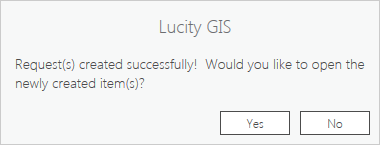
Select whether you would like to create Requests for just the highlighted records or for all of the selected records. (Lucity will create one Request for each asset.)
Check the Export the current map view and attach it as a document if you would like to export the current extent of the map as a pdf and attach it to the work request.
Click OK. A pop-up appears when the process is complete:
Select the desired feature(s) or XY/Address Locations in the map. The Lucity Relates tool lists the selected features.
Highlight one or more of these features in the list.
Click the button. The following pop-up appears:
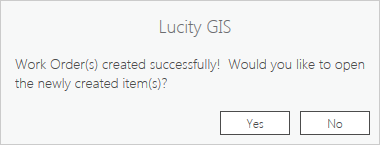
Indicate whether you would like to create Work Orders for just the highlighted records or for all of the selected records.
Choose whether to create one Work Order for all features or locations or one Work Order for each feature or location.
If desired, select a Template for the Work Orders.
Check the Export the current map view and attach it as a document if you would like to export the current extent of the map as a pdf and attach it to the work order.
Click OK. The following pop-up appears when the process is complete:
If desired, click Yes to view the new Work Orders.
Select the desired feature(s) or XY/Address Locations in the map. The Lucity Relates tool lists the selected features.
Highlight one or more of these features in the list.
Click the button. The following pop-up appears:
Select whether you would like to create PMs/Templates for just the highlighted records or for all of the selected records. (The tool will create a single PM that covers all of the selected records.)
Enter a Routine Code and Routine Description for the new PM.
Check the Export the current map view and attach it as a document if you would like to export the current extent of the map as a pdf and attach it to the pm/template.
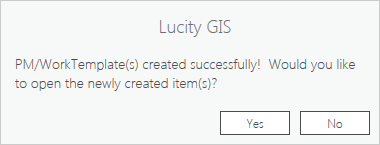
Click OK. A pop-up will appear when the process is complete:
If desired, click Yes to view the new PMs/Templates.
Select the desired feature(s). The Lucity Relates tool lists the selected features.
Highlight one or more of the features in the list.
Click the button. The following pop-up appears:
Indicate whether you would like to create Inspections for just the highlighted records or for all of the selected records. (One inspection will be created for each asset.)
Choose which type of Inspection you would like to create.
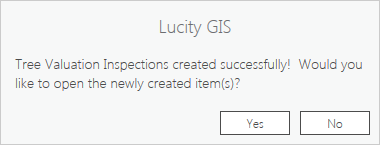
Click OK. A pop-up appears when the process is complete:
If desired, click Yes to view the new Inspection records.

 How to use a Where statement to select features


 button. The module opens in Lucity Web, displaying the related records.
 button. The following pop-up appears:
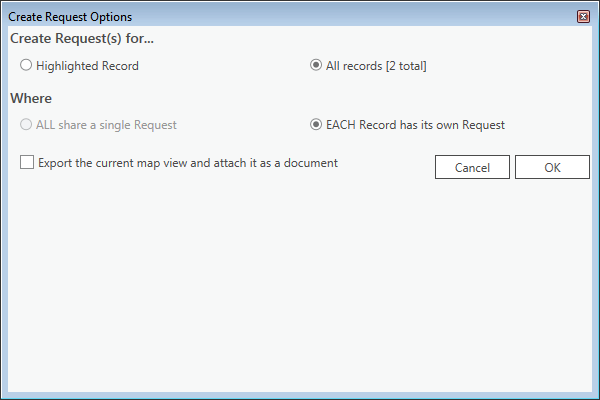
 button. The following pop-up appears:
 button. The following pop-up appears:
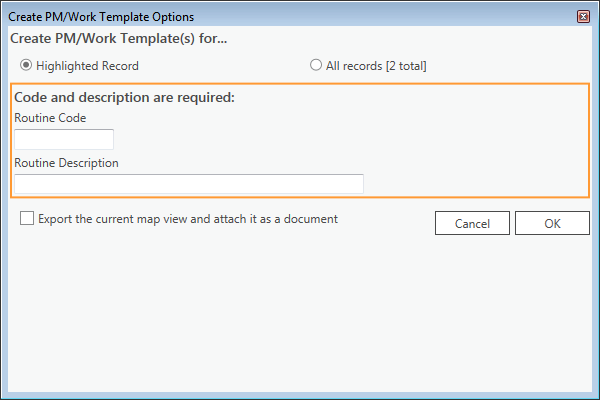
 button. The following pop-up appears:
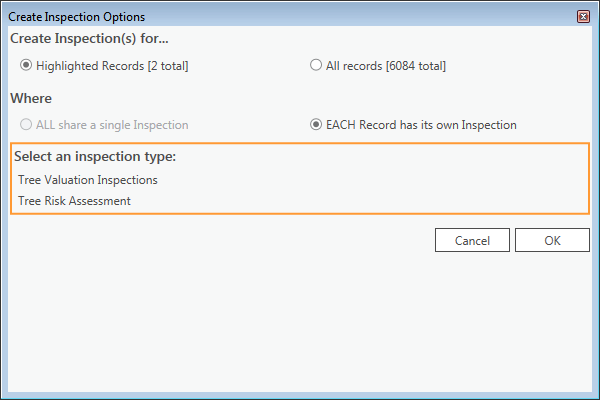
 . The following screen will appear:
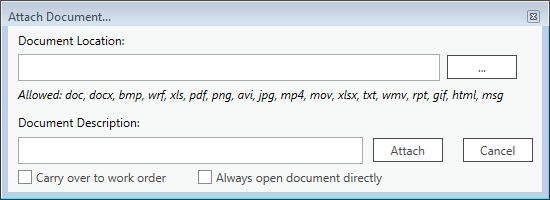
 tool.
tool.