![]()
The Create Lucity Work Layers tool enables users to create special layers within the map that display information about Work Orders, Work Requests, Master Projects, and PM/Templates. This tool creates various Work Location Layers. Once the layers are created you can use the listed Work Location tools to interact with the layers.
|
Allows users to interact with the Request layers created using the Create Lucity Work Layers tool. |
|
|
Allows users to interact with the Work Order layers created using the Create Lucity Work Layers tool. |
|
|
Allows users to interact with the Master Project layers created using the Create Lucity Work Layers tool. |
|
|
Allows users to interact with the Project layers created using the Create Lucity Work Layers tool. |
|
|
Allows users to interact with the PM/Template layers created using the Create Lucity Work Layers tool. |
Available Work Location layers
Requests |
Creates temporary static layers of Work Request locations based on dates, categories, filters, and spatial filters. |
Requests (Live) |
Creates dynamic (live) views of Work Request data based on a filter. |
Work Orders |
Creates temporary static layers of Work Order locations based on dates, categories, filters, and spatial filters. |
Work Orders (Live) |
Creates dynamic (live) views of Work Order data based on a filter. |
PM/Routine |
Creates temporary static layers of PM/routine locations based on dates, categories, filters, and spatial filters. |
PM/Routine (Live) |
Creates dynamic (live) views of PM/Routine data based on a filter. |
Master Projects |
Creates temporary static layers of Master Projects based on a filter. |
Master Projects (Live) |
Creates dynamic (live) views of Master Project data based on a filter. |
Project (Live) |
Creates dynamic (live) views of Master Project data based on a filter. |
Note: The Inventory feature classes do not need to be added to the map before using this tool.
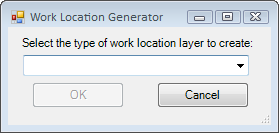
How To Create a Work Layer
Publishing Tips
If you publish the live layers to a map service to display in a webmap you will need to first register your Lucity Database with your ArcGIS Server. When doing this you will want to use the Lucity_User login and password for the Lucity database.


