Assigning Formulated Values

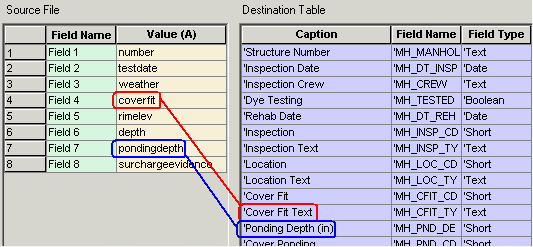
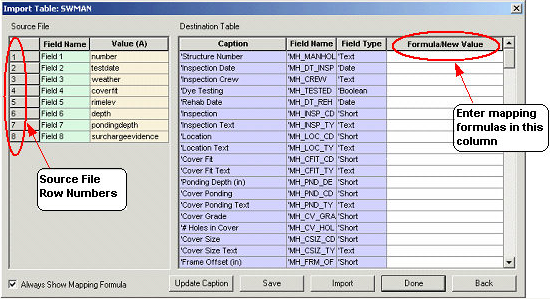
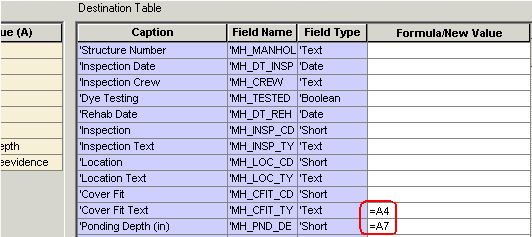
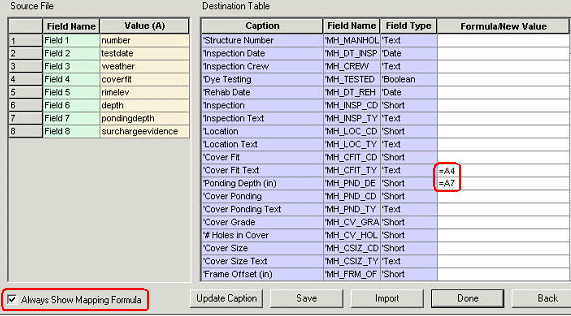
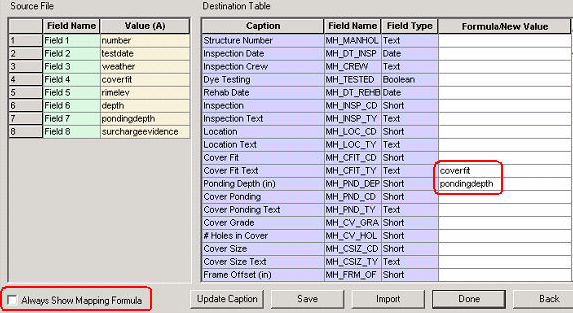
To assign mapping formulas to the appropriate fields, complete the following steps:

  1. Match up the source file field values (in the Value A column) with their corresponding fields (in the Caption column) in the Destination Table. See the example below.

    Match Values

  2. Enter the following mapping formula in the Formula/New Value Column next to the corresponding field: =A(the source file row number) See the examples below.

    Mapping Formulas

  3. Upon entering the formulas, your screen should resemble the following.

    Destination Table

    Note: Check the "Always Show Mapping Formula" checkbox in the bottom left corner of the screen (see the example below) to display the formulas from the source file in all the cells under the Formula/New Value column.

    Checkbox

    Note: When the checkbox is unmarked, the actual data will appear in those cells (see the example below); however upon selecting a cell, the formula will reappear.

    Checkbox Unmarked

  4. Use the buttons at the bottom of the screen when you finished entering the mapping formulas for each field. A list of button definitions is found below.

Button Image

Button Definition


This button updates the captions for the Destination Table. This should be performed if any of the captions in the Inventory or Inspection modules are changed and you selected a pre- defined import from the Database Import screen.

This button saves all the import formulas you created so the next time you import similar data you will not need to reassign all of the formulated values. When selected, you can either save over an existing pre-defined import or type in the name of a new import.

This button imports all of the new data and saves it as a database file separate from the master databases called "Validate.mdb". The next step will be to validate and transfer the data.

This button takes you back to the Lucity Database Import window.

This button tells the program you are through assigning formulated values and returns you to the Database Import window.

See Also

Import

Importing from Scratch

Using Pre-Defined Imports