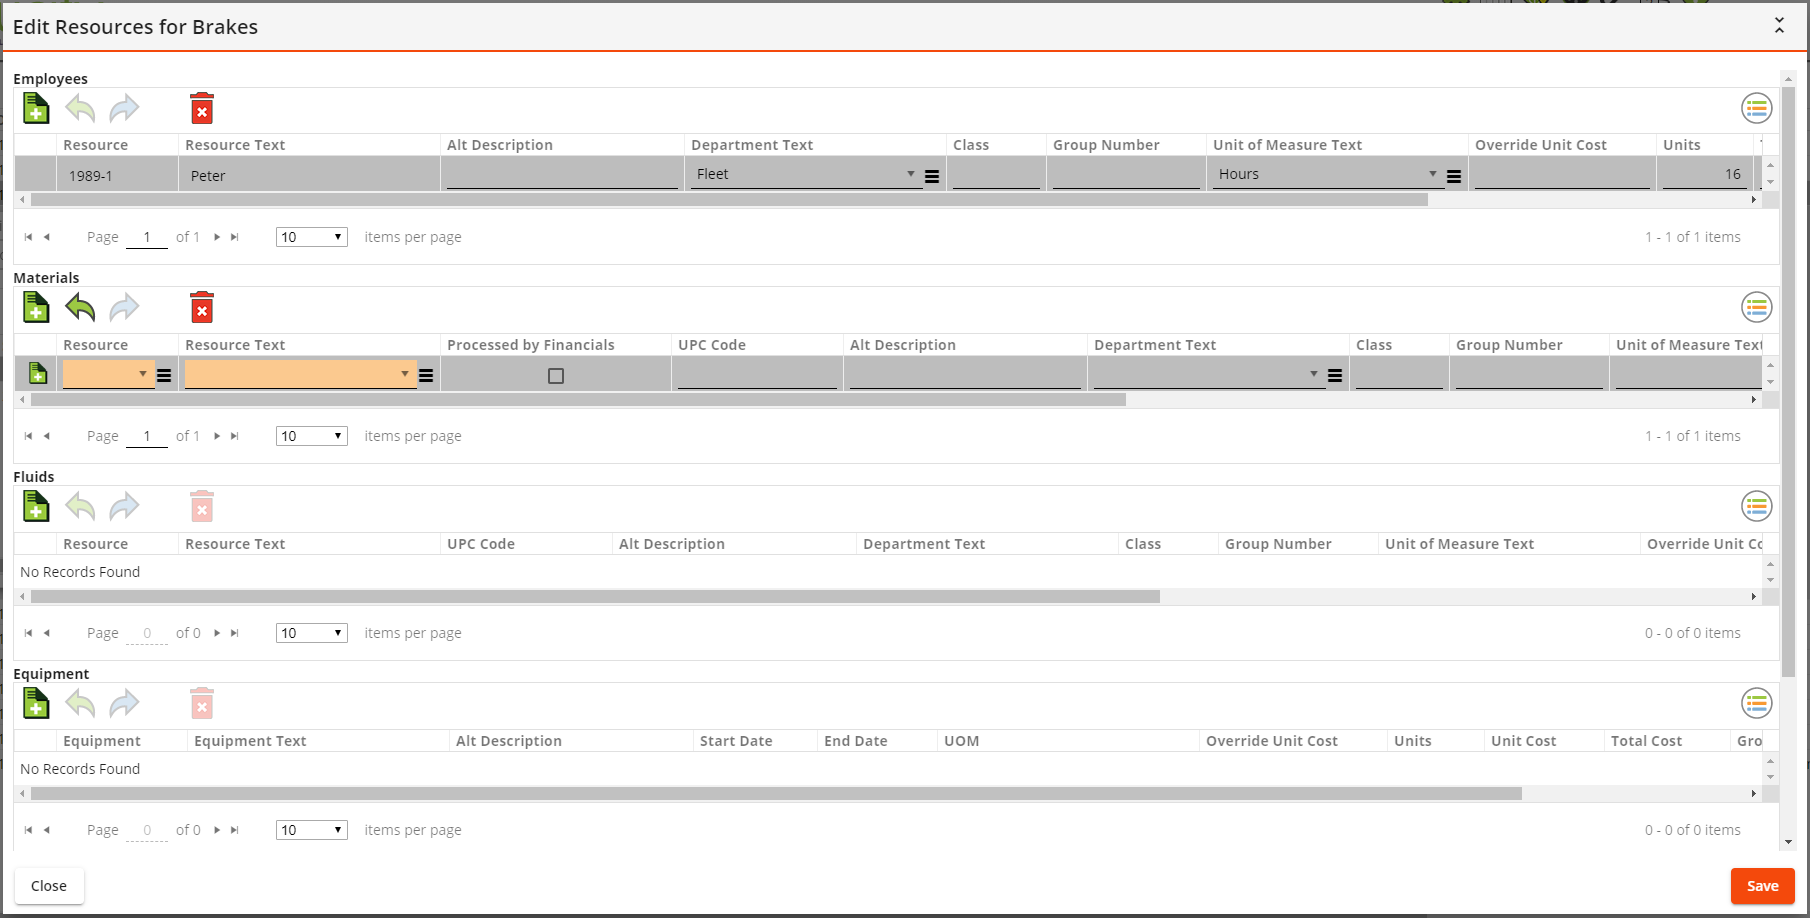
The Edit Resources tool in the Work Task grid displays a a single page with the editable grids for all Resources that the user may modify. This feature streamlines the process of creating and editing multiple Resources of different types.
![]() Use of the Edit Resources tool requires the Lucity Apps > Lucity Web > Allow Inline Editing permission, as well as the General - Add, General - Edit and General - Delete permissions for the Lucity Work Orders module.
Use of the Edit Resources tool requires the Lucity Apps > Lucity Web > Allow Inline Editing permission, as well as the General - Add, General - Edit and General - Delete permissions for the Lucity Work Orders module.
Note: The tool displays grids for the Resources that are attached to the open Work Order view.
Note: The Edit Resources tool is turned off by default and must be enabled in the grid.
Grid Functions
The Edit Resources view includes a grid for each type of Resource that can be attached to a Work Task. The grid that appears is identical to the grid that is available for each Resource in Lucity Web.
|
Add Resource |
Creates a new record in the associated Resource grid.
|
|
Undo |
Reverses the previous edit. |
|
Redo |
Recreates the last undone edit. |
|
Delete |
Deletes the selected Resource record.
|
|
Menu |
Provides access to the following tools:
|
|
Save |
Preserves all edits and closes the Edit Resources dialog. |
|
Cancel |
Abandons all edits and closes the Edit Resources dialog. |
 How to add a Resource in Edit Resources View
Standard Fields
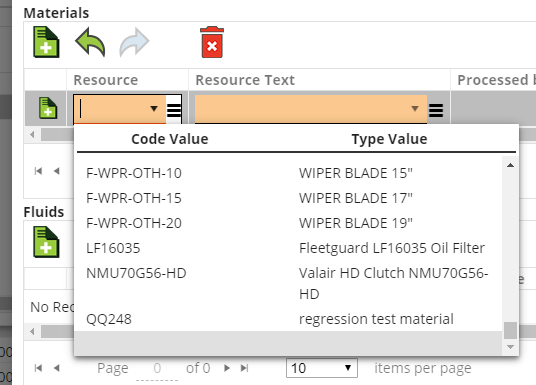
 for a pick-list pop-up. Note that pick-lists can be filtered.
 field for a calendar from which to select a date.
Specialized Fields
When a user edits within a grid, icons appear next to each modified or added record.
|
Added Record |
Appears next to a record that was added during this Edit session. |
|
Edited Record |
Appears next to a record that was edited during this session.
|
|
Deleted Record |
Appears next to a record that was deleted during this session.
|
Edit Review Screen
Click Edit in Grid  next to an edited record to see the Review screen. This screen compares the Original state of the record to the Current state.
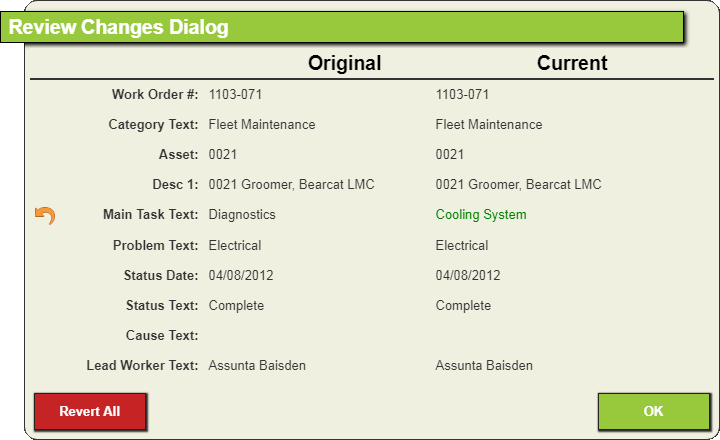
 next to an edited field to undo the edit.


 - Displays information about the grid.
 . A new row appears in that grid.