The Settings button on the LucityGIS Edit toolbar allows users to manage the login process associated with using Lucity GIS tools, as well as other aspects of the user experience.
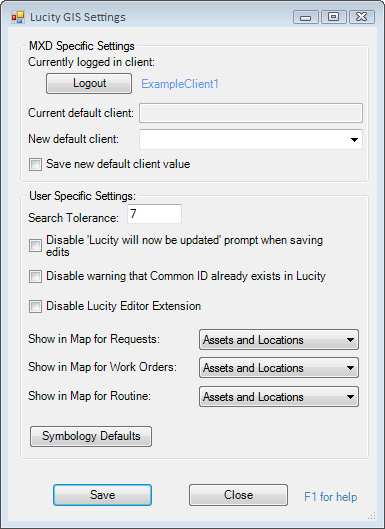
MXD Specific Settings
These settings are stored in the mxd map document.
Currently Logged in client
Identifies the Lucity configuration that the user is logged into.
Logout
Logs the client out of the current configuration. If a user attempts to use a Lucity tool, he or she must pick a client and log in again.
Current default client
Identifies the default client associated with this map, if any. When a default client is selected, users are not required to choose the client when they start and edit session in ArcMap.
New default client
Allows the user to select a new default client.
Save new default client value
Directs the system to save a change in the default client.
User Specific Settings
These are users settings stored in the database.
Search Tolerance
Controls the search tolerance for the Lucity Module tool. The search tolerance is a distance from the point you clicked outward.
Disable 'Lucity will now be updated' prompt when saving edits
Directs the system not to display this alert each time edits are saved.
Disable warning that Common ID already exists in Lucity
Directs the system not to display this alert each time a user types in a Common ID that already exists within the related Lucity Module.
Disable Lucity Editor Extension
Deactivates the Lucity Editor extension.
Show in Map for Requests
Determines whether the Show in Map tool displays Assets, Locations, or both when showing Requests.
Show in Map for Work Orders
Determines whether the Show in Map tool displays Assets, Locations, or both when showing Work Orders.
Show in Map for Routine
Determines whether the Show in Map tool displays Assets, Locations, or both when showing PM/Templates.
Symbology Defaults
Enables users to select layer files as symbology templates for tools that show Lucity data including Lucity views, Work Frequency, Work Order/Request/PM data, and TV Observations.
Save
Stores changes to the settings.
Close
Exits the Settings screen.
Login Settings
Every time users attempt to use a Lucity tool in ArcMap, they are prompted to supply a Lucity login and password. If more than one Lucity client exists, the user must also select the proper client before logging in.
Two settings can be modified to speed up this process:
When a user starts ArcMap and clicks a Lucity GIS tool, the system checks which Lucity client the user is logging into. If more than one client is available, the user is prompted to choose their client before logging in. If only one client is available, the program bypasses this step.
Setting a default client for the .mxd streamlines the process by bypassing the Client Selection dialog.
Note: This setting is saved with the .mxd and applies to any user that opens the map document.
On the Lucity GIS Edit toolbar, click the Settings button. The Lucity GIS Settings form appears.
Select a client from the New Default Client list.
Check the Save new default client value checkbox.
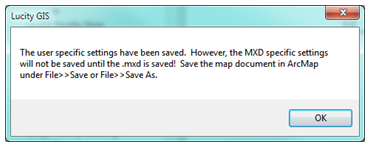
Click Save on the Lucity GIS Settings form. A prompt similar to the following appears:
Click OK to save the .mxd.
Note: If an agency also employs Windows Authentication, users do not receive any login prompts when using Lucity GIS tools, even at the start of an edit session.
Agencies that employ Lucity Windows Authentication can streamline the login process by eliminating the need to supply a login name and password when users attempt to use the Lucity GIS tools.
To take advantage of this feature, an administrator must configure Lucity Windows Authentication in the Lucity Security program.
Then, when a user implements a Lucity GIS tool:
The system checks to see who is logged into the computer and whether that user is configured for Windows authentication.
If the system finds an associated Lucity account, it verifies whether the account has permissions to run the Lucity GIS tools.
If the proper permissions are present, the system logs in the user and activates the Lucity GIS tools.
User Settings
Several user-specific settings can be managed using the Settings button on the Lucity GIS Editing toolbar. These settings are applied any time the user logs into the Lucity GIS extension, regardless of the .mxd map document or machine.
Several Lucity GIS tools search for features located near the point at which the user clicks in the map. Such searches are based on a predefined search tolerance. The default search tolerance is 7 map units.
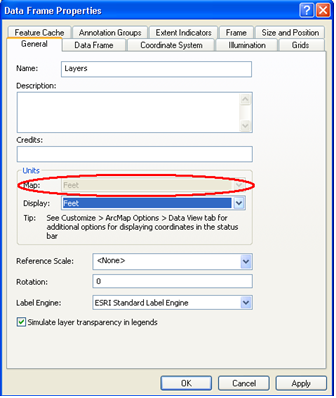
Map units are specified in the ArcMap Data Frame Properties dialog, which can be found at: View > Data Frame Properties > General tab.
Users can change the default search tolerance for Lucity GIS. Using the method prescribed below, the new value is applied to all Lucity GIS tools that use a search tolerance.
Click the Settings button on the Lucity GIS Edit toolbar
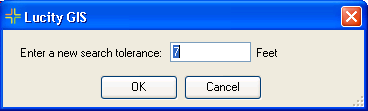
Enter a value for the NewSearch Tolerance. The value relates to the specified map unit, which is based on the projection used in the map.
Click Save.
Users may also change the search tolerance on the fly for a specific tool in the map. This change applies only while the tool is selected.
Click the desired Lucity GIS Edit tool.
Press Shift + F7 on the keyboard. The following dialog appears:
There are two methods for disabling the Lucity Editor extension:
Users can permanently disable the Lucity editor extension, which is useful for those who never or rarely edits feature classes linked to Lucity. Disabling the extension prevents it from launching every time the user edits a geodatabase linked to Lucity.
Click on the Settings button on the Lucity GIS Edit toolbar
Check the Disable ‘Lucity will now be updated’ prompt when saving edits check box.
Click Save.
Note: The new settings will take effect the next time ArcMap is opened.
Or, a user can disable the Lucity Editor extension for a single ArcMap session:
Check the Disable Lucity Editor checkbox on the Lucity GIS Edit toolbar
The Show in Map tool can display Lucity Work Orders, Requests, and PMs in several different ways within ArcMap. For example, it can display the Assets and/or the Address/XY locations associated with the Work Order, Request, or PM.
A user can modify several settings to control what the Show in Map tool displays:
Click on the Settings button on the Lucity GIS Edit toolbar
Choose either Work Orders, Requests, or Routines and click the associated drop-down box.
Select whether the Show in Map tool should show the Assets, the Locations, or Both.
In ArcMap, run the Lucity tool whose symbology you'd like to change.
Make any desired changes to the properties of the layer that the tool generated. These changes can include:
symbology changes (size, shape, color),
symbol levels,
labeling,
scale dependence,
fields displayed, etc.
Note: If fields are added to the layer, they still must be added manually each time the tool is run.
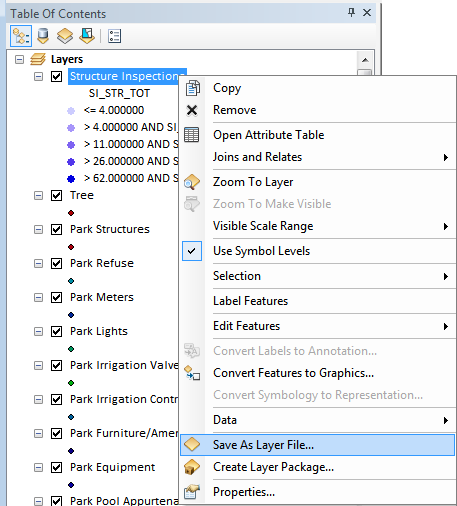
In the table of contents, right-click on the layer and select Create Layer File.
A Save dialog appears. Name the .lyr file and save it to a location where it can be stored long-term.
Note: If the tool generated more than one layer (e.g., points, lines, polygons) repeat Steps 3 and 4 for each layer.
In ArcMap, click the Settings button on the Lucity GIS Edit toolbar.
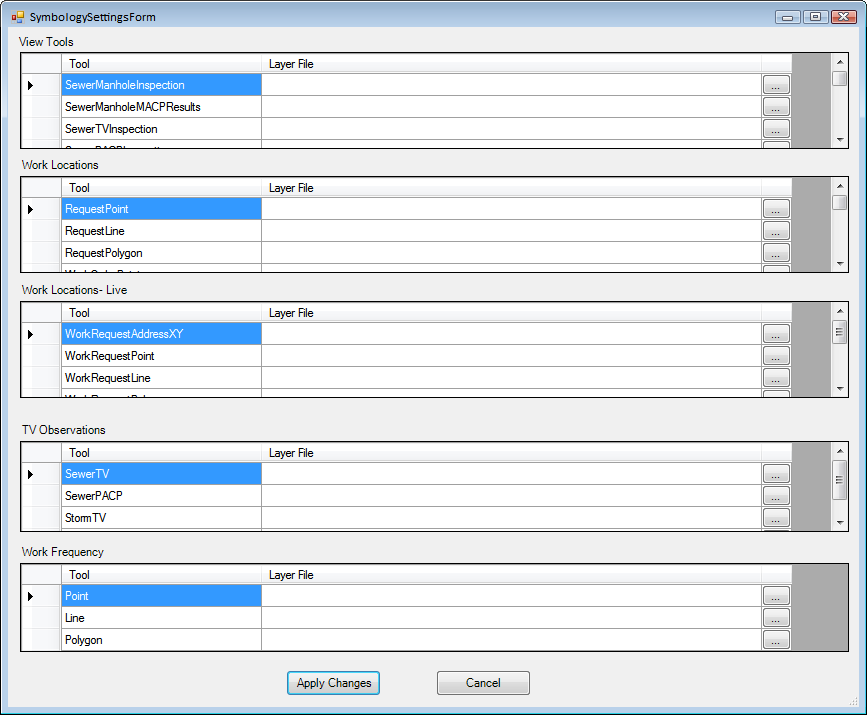
On the Settings tool, click the Symbology Defaults button near the bottom of the dialog box.
The window below appears. Find the related tool and layer.
Click the ... button and navigate to the location of the .lyr file created in Step 4 above. Repeat this step for each layer.
When finished, click Apply Changes. All settings are saved. The next time the tool is used the layer generated will use the settings stored in the .lyr file.
 How to bypass the login using Windows Authentication