Work Orders are the core of the Lucity Work program. They enable users to track the work that they are actually doing. This information can be used to gather information about the amount of time it takes to perform work, the costs associated with completing the work, the costs to perform work on specific assets, employee time, etc. It's about documenting, scheduling, and tracking costs of work.
Work orders can be generated in many different ways. They can come from requested work, planned preventative maintenance work, in response to an inspection, or on the fly.
However a work order is created, it can contain the same basic elements.
Categorization fields - The who, what, why, where of the work.
Assets - The object being worked on.
Locations - Addresses and coordinates of work being done.
Tasks - The actual work being performed.
Resource - The people, equipment, materials used to accomplish the work.
Open the Work Orders module by selecting Work > Work Orders.
Click the button. The work order form will open.
The Status is automatically filled out along with the Status Date and Status Time. The Work Order # field will not be populated until after the record is saved.
Enter a Category (required). The selected category determines the available problems, causes, crews, tasks, etc.
Select a Main Task and Problem.
Enter the Cause, assign a Crew, etc.
Assign a Supervisor
Assign a Lead Worker
The Asset and Location fields are auto-populated. These fields allow users to see at a glance information about the first asset attached to the work order.
The Request Comments grid is automatically populated from the comments in the Requests module; however, you can add or edit the comments in the grid from this module.
Enter a department, division, etc.
Enter any comments for the Comment to Crew field.
In the Work Order Locations grid, enter the address of each location where work will take place. The first address you enter in this grid will be displayed in the work order record's Address field.
In the Assets grid, enter any inventory assets associated with the Work Order. The first asset you enter in the grid will appear in the read-only Asset field in the Work Order section of the form.
In the Checklist grid, enter any checklist items. (Select the Checklist grid and click the button. Fill in desired fields in the Checklist form and click Save.)
In the Tasks/Resources grid, enter additional tasks in the Tasks grid.
Note: Any resources associated with a task (in the Work Flow Setup Tasks module) will be automatically populated in the Resources grid.
In the Routing grid, you can track tasks and sub-tasks and mark them as complete.
In the Costs grid, enter any cost information in the corresponding fields.
In the Billing grid, enter any billing or invoice information.
Enter any PMs associated with the work order in the Associated PMs grid.
Enter any resulting tasks in the Resulting Tasks grid.
Link any related Work Orders to the current work order in the Related Work Orders grid.
Link any Requests to the current Work Order in the Requests grid.
Note: The Tracking tab is a read-only grid that automatically records any status changes in the work order.
Create or view Daily Inspection records, Work Permit Records, or Work Order Water Loss records using the Links grid.
Enter additional information in the Custom tab.
Enter other comments in the Comments grid.
Click Save. Upon saving the Work Order, the Work Order # field will be automatically populated with the next available Work Order number.
When a user creates a work order from the Asset grid of an existing work order, the Category and selected assets will be carried over to the new work order. The two work orders will then be linked in the Work Orders grid. This is useful if you have several assets that need additional work done outside of the current work order.
For example, if you have a TV inspection work order involving 20 sewer pipes and five of those pipes need to be cleaned, you can create another work order from the Asset grid and the category and the five pipes you selected in the Assets grid will be carried over to the new work order.
In the Work Orders module, click the to expand the desired Work Order record.
In the Assets grid, select the Asset(s) that you want included in the new work order.
Click the button in the Assets grid and select the Create Work Order with Selected Assets for Selected Record(s) tool. A popup will appear prompting you to select a PM/Template on which to base the new work order.
Select a PM Template if desired.
Click the Continue button.
The system creates the work order and opens the work order module. Note: Depending on system settings if more than one view is available for the work order module, the following pop-up appears. This allows the user to select which view they want to open the work order in:
The category and selected assets will be carried over to the new work order. The Asset and Description fields will be carried over to the new work order asset from the the original work order.
One way a user can create a Work Order within a work order is by using the Create New WO button on the module toolbar. This will create a new, empty work order that is linked to the current work order in the Work Orders grid. This is useful when a user wants the current work order linked to the new one, but doesn't want any data carried over into the new one.
In the Work Orders module, select the desired Work Order record.
Click the button. A pop-up similar to the following appears:
Note: When run from the Work Order module this tool can only run against Selected Record(s).
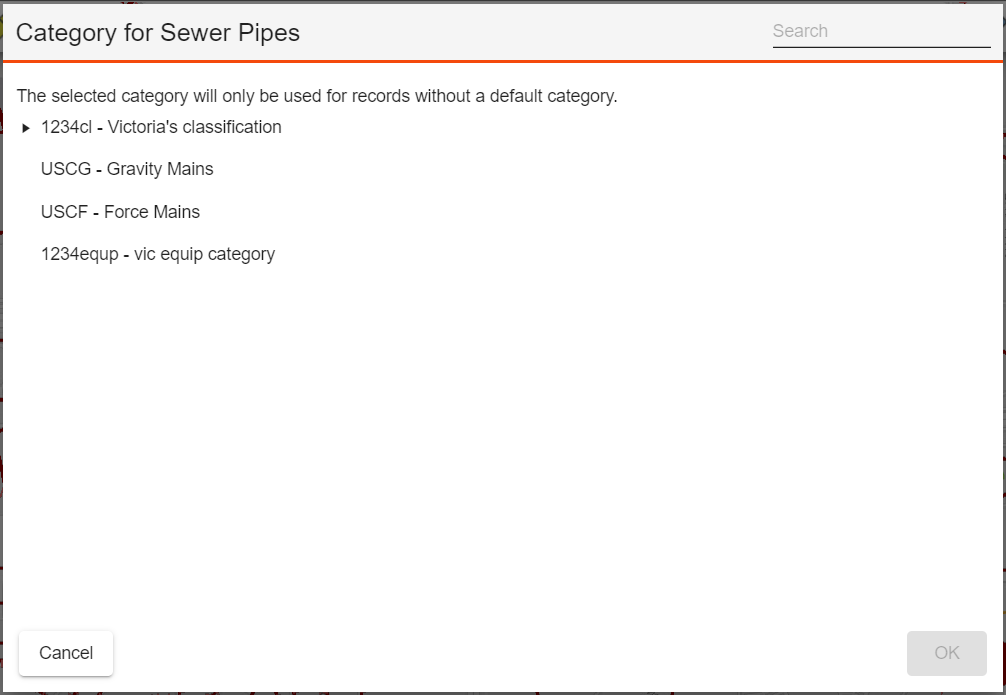
Click the Category Code button and select an option.
Select a category to be used on the work order. This will automatically be filled out if there is a Category on the record you are using to add a work order, but can be changed.
Click OK.
The Work Order view opens. The Category field will be populated with the category that was selected. The associated Work Orders will appear in the Work Orders grid of each work order and their respective Tracking grids.
Create a filter to identify the records that need a work order OR select one or more records in the grid that require a Work Order.
Click the button. The following pop-up appears:
Under Category Code enter the category to be used on the work order. This will automatically be filled out if there is a Category on the record you are using to add a work order.
Click OK. If there are open work orders on any of the selected assets, the following pop-up appears to ask whether the user wants to create another work order:
Click OK to continue. The system will generate a new work order. This work order will be linked to the original work order and any work orders and requests that the original work order was linked to.
The system opens the work order. Note: Depending on system settings if more than one view is available for the work order module, the following pop-up appears. This allows the user to select which view they want to open the work order in:
Select a View from the list and click OK. The view opens and displays the new work order. If no view exists, the system creates the work order and a notation appears above the grid indicating that the operation succeeded.
Note: If any of the following are true then a work order cannot be deleted.
The user does not have the Work Orders > Delete Permission.
The Imported To Finance flag is true on the Work Order.
The Billing Processed flag is true on the Work Order.
The Hard Locked flag is true on the work order.
The Work Option Prevent Task Deletion if Resource Attached is turned on and there are attached resources.
The Work Option Lock Processed WO Resources is true and a resource has been Processed By Financials (WR_FINANCE) is true.
The Work Option Integration of Oracle e-Business Suite is turned on and there is a material or fluid resource and the Financial Record Type (WR_REC_T) = R
The Work Option Integrate Work and Parts Inventory (Y,N) is turned on and the Work Order has a Material or Fluid that are linked to a Part and have Units > 0.
There is an employee resource that is Time Sheet locked
There is an associated PM that is Open.
The client uses Category Level Security and the user is not authorized for that category
The user does not have Allow Edit Of Closed Record permission and the work order is closed


 How to create a Work Order in the Work Order module
 button. The work order form will open.
 . Upon saving the Work Order, the Work Order # field will be automatically populated with the next available Work Order number.
 to expand the desired Work Order record.
 button in the Assets grid and select the Create Work Order with Selected Assets for Selected Record(s) tool. A popup will appear prompting you to select a PM/Template on which to base the new work order.
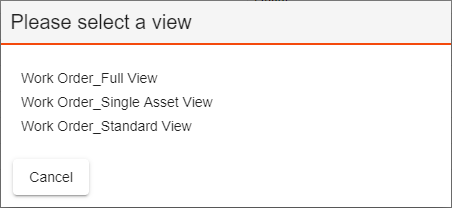
 button. A pop-up similar to the following appears:
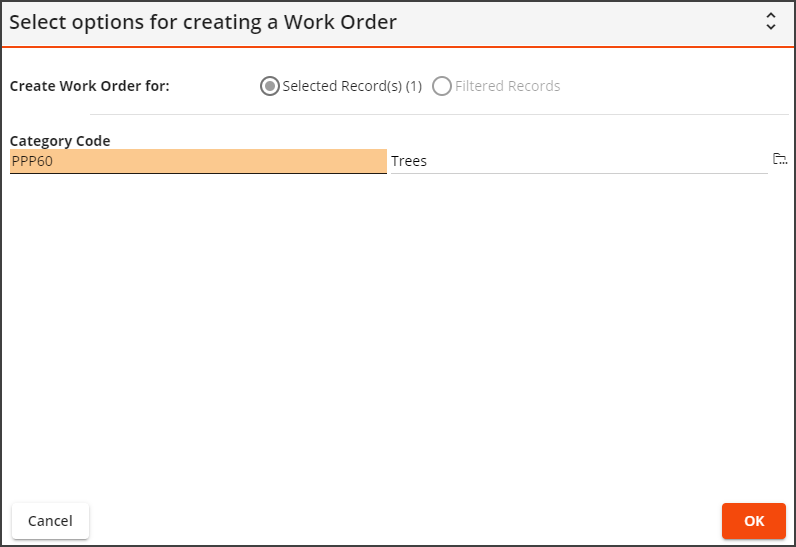
 button and select an option.
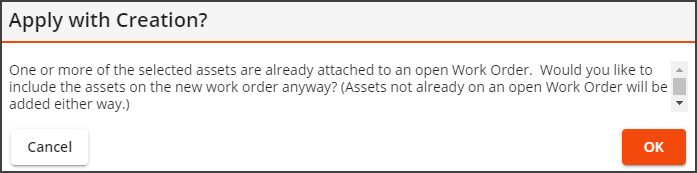
 .
.