Form Design Mode enables administrators to control the contents, layout and function of fields on a Form. This is a WYSIWYG (What You See Is What You Get) editor; that is, the form displayed in the Form Design Mode will look the same as the Form will appear out of Design Mode.
Note: As of Version 2019r3, you can now edit Forms and assign Forms to a grid within Lucity Web; however, you must still use the Legacy Form Editor in the Lucity Administration Tool to edit Views and create new Forms. More information about Form Assignment.
Requires the Lucity Apps > Lucity Web > Allowed to Design Views and Forms permission.
Open the module view in which you want to edit a form.
Navigate to the grid the form is attached to and click Open next to a record to open it. *You can open any record in the grid to edit that grid's record design.
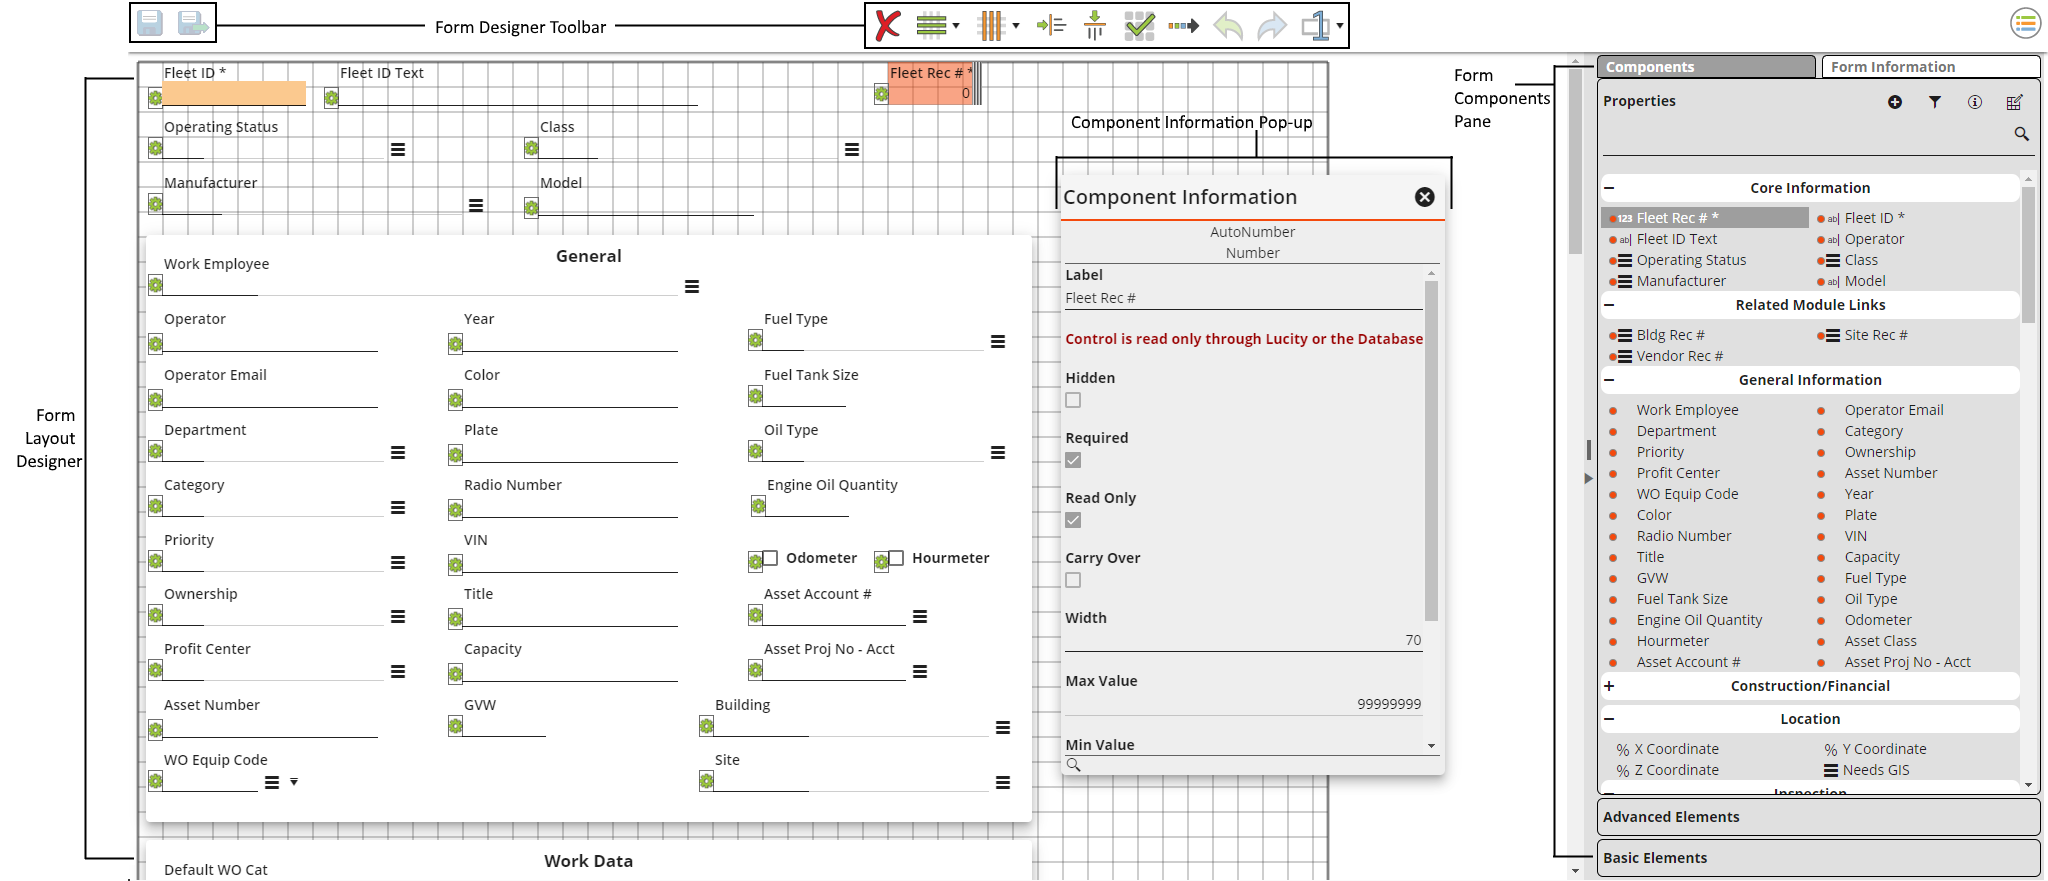
Click the Menu button and select Enter Design Mode. The form will open in an editable mode.
Make the desired edits to the form.
Click Save.
Click the Menu button and select Exit Design Mode.
As you move the component around red horizontal/vertical lines may appear. This are guides to help you snap the component in line with other components.
Release the component at the desired position.
Frames
To move a frame but leave its components in place click and drag the frame to the new location.
OR
To move a frame with all of its components click the frame twice to select the frame and its contents. Then click and drag the frame to the new location.
As you move the component around red horizontal/vertical lines may appear. This are guides to help you snap the component in line with other components.
Select one or more components in the grid. Make sure that the last component you select is the one that you want the rest of the components to align with.
Use Ctrl or Shift to select more than one component.
Click the button to align the selected components horizontally. he top of all selected components will be snapped to the same horizontal line, in line with the last selected component.
OR
Click the button to align the selected components vertically. The left side of all selected components will be snapped to the same vertical line in line with the last selected component.
Select one or more components in the layout window. Make sure that the top left component you select is the one that you want the rest of the components to align with.
Use Ctrl or Shift to select more than one component.
Click the button to align the selected components into a grid.
If the icon is toggled they will all appear in a line to the right of the upper left selected component. If the components reach the right edge of the form they will start a new line of components below the first line.
If the icon is toggled they will all appear in a column below the upper left selected component.
If the component can be resized then lines will appear around the component in the direction that the component can be resized. Break, Label, and Checkbox Properties cannot be resized.
Click and drag the control lines to change the component's size.
 How to move several components and align them
 next to a record to open it. *You can open any record in the grid to edit that grid's record design.
 button and select Enter Design Mode. The form will open in an editable mode.
 .
. 

 button to align the selected components horizontally. he top of all selected components will be snapped to the same horizontal line, in line with the last selected component.
 button to align the selected components vertically. The left side of all selected components will be snapped to the same vertical line in line with the last selected component.
 button to align the selected components into a grid.
 icon is toggled they will all appear in a line to the right of the upper left selected component. If the components reach the right edge of the form they will start a new line of components below the first line.
 icon is toggled they will all appear in a column below the upper left selected component.