Custom Timesheet Report Setup
Lucity provides several built-in Timesheet reports. It also allows an agency to upload its own Timesheet report.
Built-in Reports
- WebTimesheetBasic1WeekWeb.rpt – Shows one week of tasks and their totals; displays the Task field.
- WebTimesheetBasic2WeekWeb.rpt – Shows two weeks of tasks and their totals; displays the Task field.
- WebTimesheetAll1WeekWeb.rpt – Shows one week of tasks and their totals; displays the Task, Class, Account #, Project #, and Time Code fields.
- WebTimesheetAll2WeekWeb.rpt – Shows two weeks of tasks and their totals; displays the Task, Class, Account #, Project #, and Time Code fields.
Use the following steps to modify the Timesheet report used in Lucity:
 How to upload a custom Timesheet report to Lucity
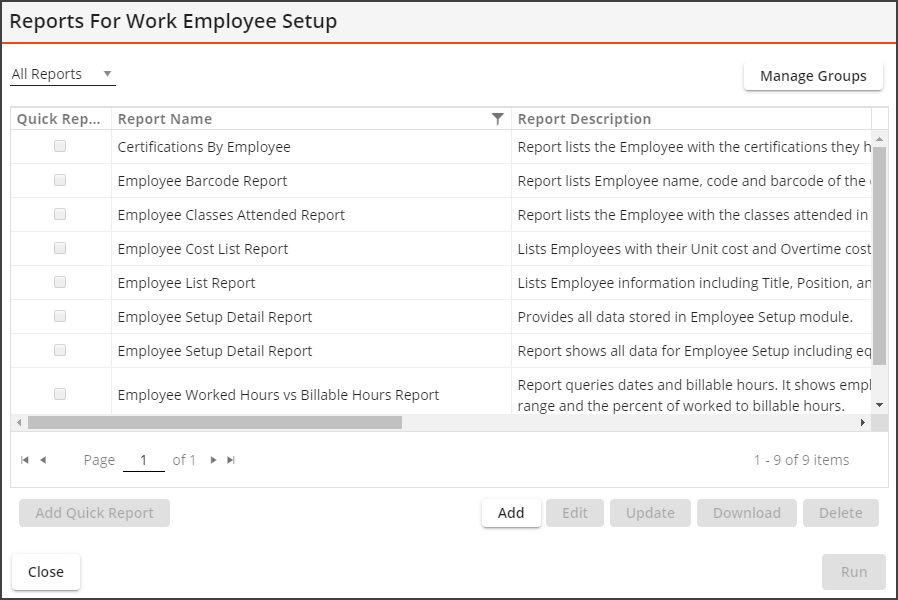
- Open the Employee Setup module and click the Reports
 button. A pop-up similar to the following appears:
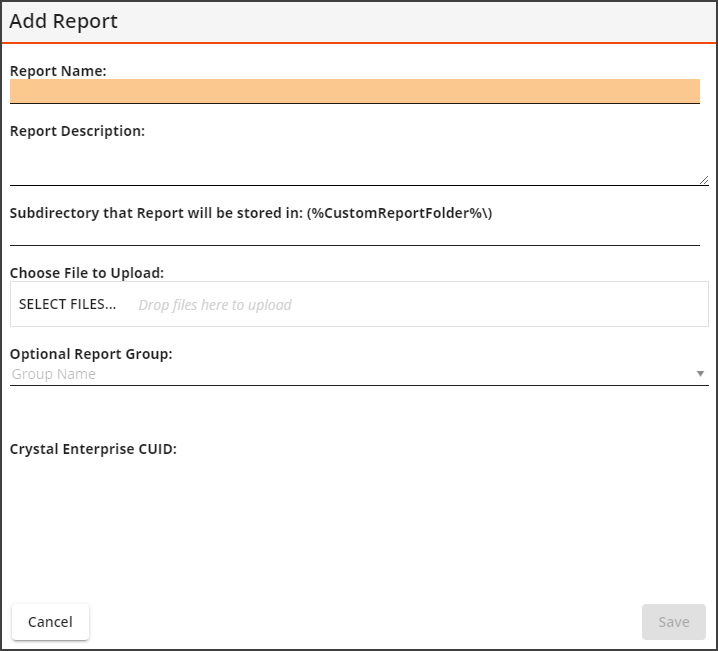
- Click Add. The following pop-up appears:
- Enter a Report Name and Report Description.
- Do not enter anything In the Subdirectory that Report will be stored in field.
- Under Choose File to Upload, click SELECT FILES... and select the .rpt file you would like to upload to the web server.
Note: The name of the .rpt file being uploaded cannot match any other .rpt files.
- Click Save. The report is uploaded to the Report Hive and to the Lucity Report Server.
How to point the Timesheet to a different report
- Review the report you plan to use.
- Open Lucity Web > Admin Portal > Settings > System Settings > Work.
- Locate the Name of the RPT file to use as the default time sheet report setting.
- To use a different Lucity report:
- Enter the name of the report's .rpt file.
- Example: WebTimesheetBasic1WeekWeb.rpt
- Options:
- WebTimesheetBasic1WeekWeb.rpt
- WebTimesheetBasic2WeekWeb.rpt
- WebTimesheetAll1WeekWeb.rpt
- WebTimesheetAll2WeekWeb.rpt
- To use a custom report:
- Identify the file name for the report.
- Enter <report file name>
- Example: timesheetreport.rpt