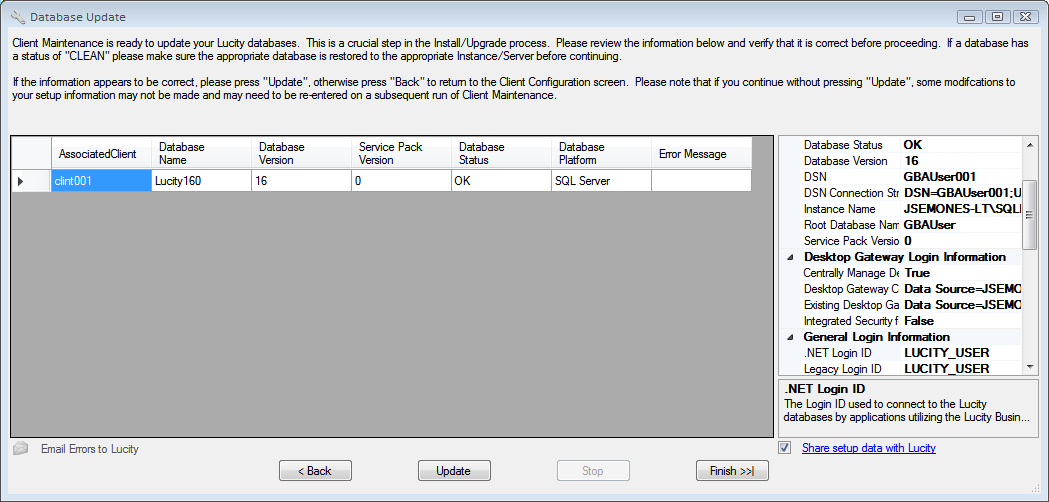
The Database Update process is used to evaluate each database and perform any updates necessary to ensure that the software is current.
Note: This process is critical. Please read the Database Update screen carefully.

- Review the information displayed. As a database is selected in the table, related information is displayed in the box on the right.
- If the information appears to be correct, click Update, and the Database Update process will begin.
- If the information is incorrect, click the < Back button. The program will return to the Client Configuration screen, where the user may modify the setup.
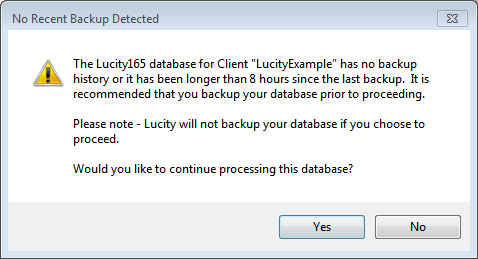
- If your database has not been backed up within the last 8 hours you will receive the following prompt. If you have not backed up your database you should do so now.

- Click Yes when you are ready to proceed with the update.
- As each database is processed, several status screens appear. You'll also notice that the navigation buttons are disabled, and the Stop button is enabled. Clicking Stop does not terminate processing of the current database; rather, it prevents any additional database processing after the current database is complete.
The Database Status changes to OK when a database is processed without error. If an error does occur:
- an error message dialog appears,
- the error is recorded in the Error Message column of the grid, and
- an error log file is generated.
When the Database Update process is complete, users can click the Email Errors to Lucity option to create an email message with the error and configuration information attached. Be assured that no password information is stored in the configuration information sent to Lucity.
- Click the Finish >>| button when the entire Update process is complete to save the configuration information and exit Client Maintenance.
Note: If you click the Finish >>| button before clicking Update, the system will skip all database processing. This is not recommended.
- The rest of the Server/Database installation will be completed.

