The Lucity Relates tool allows users to click on a feature(s) in the map and view all Lucity records related to it. The tool also allows users to create Work Orders, Requests, and Inspections in Lucity, based on a feature in the map.
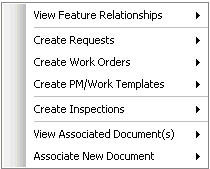
To use this tool, the map must contain a feature class that is connected to Lucity. Select the tool and right-click in the map. A menu appears with the following options:
View Feature Relationships
Displays any Lucity records related to one or more selected features in the map.
Create Requests
Creates a Request for a feature. If multiple features are selected it can create a separate Request for each selected feature.
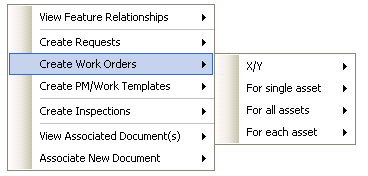
Create Work Orders
Creates a Work Order for one or more selected features. It can also create separate Work Orders for each selected feature.
Create PM/Work Templates
Creates a PM/Work Template for one or more selected features. It can also create separate PM/templates for each selected feature.
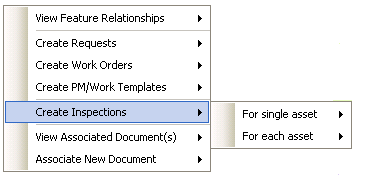
Create Inspections
Creates one Inspection for each selected feature.
View Associated Document(s)
Displays documents attached to the selected asset(s).
Associate New Document
Enables users to attach documents to one or more features in the map.
How To Use the Lucity Module tool
Select the Lucity Relates tool from the Analyst toolbar.
In the map, right-click on the desired feature. A dialog box appears:
Note: The Lucity Relates tool uses a default search tolerance of seven map units to obtain a list of features at the location of the mouse-click. The default tolerance can be changed using the Settings button on the Lucity Edit toolbar. This value can also be modified just for the current map session by pressing Shift + F7 when the desktop Lucity Relates tool is active. More information about modifying the search tolerance
Note: To work with multiple features, use the Lucity Relates tool to select several features and then right-click anywhere in the map.
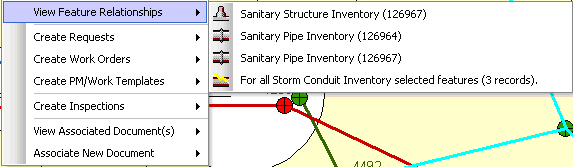
A sub-menu appears that lists the features located within the search tolerance of the mouse-click. If there are any selected features in the map, there will be an extra item in the list that allows you to view relationships for all selected features of a specific type.
(Example Below: For all Storm Conduit Inventory selected features)
Select the sub-menu item whose relationships you would like to view. When an item is selected, a dockable window appears. By default, this window is docked to the right of the ArcMap window.
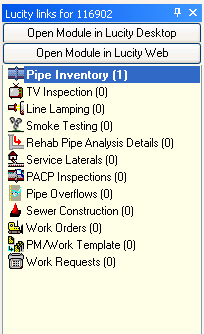
The window displays a list of related modules based upon the type of asset chosen. Modules with related records are listed in bold, and a record count appears in parentheses after each module name.
Select the desired module name, then, click the Open Module in Lucity Desktop or Open Module in Lucity Web button at the top of the docked window. Lucity opens and displays the related record(s).
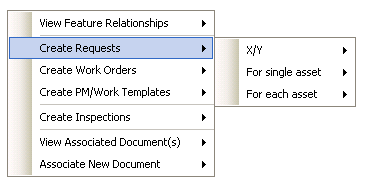
X/Y: Creates a request: 1) with the X/Y coordinate at the location of the right-click; or 2) against a single asset, and includes the X/Y coordinate.
For a Single Asset: Creates a Request for the chosen asset.
For Each Asset: Creates a separate Request for each of the selected assets (including multiple asset types).
Select the desired action. A grid appears. By default, this grid contains the required fields from the Request module (those required by Lucity and any fields users have set as required). Each row in the grid represents a separate Work Request record.
Populate the fields in the grid.
Other fields can be configured to appear in the grid. Refer to the Default Fields Setup tool, available on the Lucity toolbar in ArcCatalog, for more information.
To streamline data entry, populate the CategoryCode column first. (The system may automatically complete other columns based upon the Category you choose.)
To assign the same value to multiple rows, select the desired rows by holding down the Shift or CTRL key; then, click in the desired cell and set the value. After updating the cell, click on another cell to refresh the grid and view the updated values.
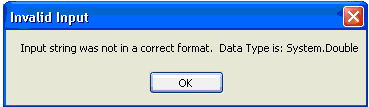
Note: The grid automatically detects data type errors when another cell is selected. If a value is not valid, a message similar to the following will appear:
A white button appears at the end of each Work Flow Setup column. Click the button and select the appropriate item from the list. If the user has permission, the Show All button is enabled, enabling the user to toggle between seeing just the items associated with the Category or all items in the system.
If desired, check the Export the current map display and attach it to the request(s) option to create a PDF of the current map extent and attach it to each Request.
After completing all required fields, Submit the request using the method you prefer:
Submit and View in Desktop: Submits the Request(s) and opens it in Lucity Desktop. The first record is opened in Edit mode.
Submit and View in the Web: Submits the Request(s) and opens it in Lucity Web.
Submit Only: Submits the Request(s), but does not open Lucity.
X/Y: Creates a Work Order or PM/Template using the associated X/Y coordinate.
For a Single Asset: Creates a Work Order or PM/Template for the selected asset.
For All Assets: Creates a single Work Order or PM/Template for all of the selected assets.
For Each Asset: Creates a separate Work Order or PM/Template for each selected asset.
If For all assets or For each asset is selected, the user will have the option to choose For all selected features in the map.
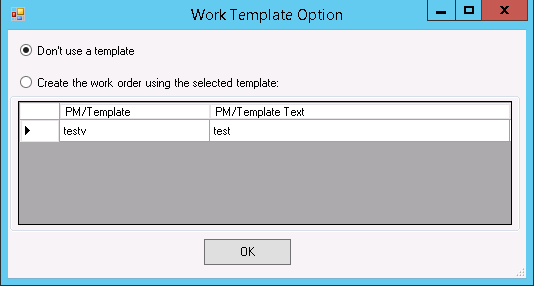
The following pop-up will appear asking if you would like to base the work order on a template:
Create the work order use the selected template - Click this button if you would like to use a template and select a template from the list.
Note: The list will only display templates that have a Category that match the type of asset you are going to create a work order for.
Click OK.
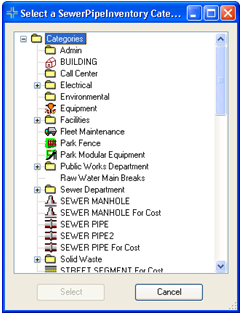
If you didn't use a template and the asset doesn't have a Default Work Category, or, if the For all selected features in map option is selected, the following pop-up will appear, prompting the user to select a Category for each type of asset.
Note: The Select button is only enabled if a valid Category is selected.
Select the desired action. A grid appears. By default, this grid contains the required fields for the Work Order or PM/Template (those required by Lucity and any fields set as required by users in the Desktop).
Populate the fields in the grid.
Other fields can be configured to appear in the grid. Refer to the Default Fields Setup tool, available on the Lucity toolbar in ArcCatalog, for more information.
To streamline data entry, populate the CategoryCode column first. (The system may automatically complete other columns based upon the Category you choose.)
To assign the same value to multiple rows, select the desired rows by holding down the Shift or CTRL key; then, click in the desired cell and set the value. After updating the cell, click on another cell to refresh the grid and view the updated values.
Note: The grid automatically detects data-type errors when another cell is selected. If a value is not valid, a message similar to the following will appear:
A white button appears at the end of each Work Flow Setup column. Click the button and select the appropriate item from the list. If the user has permission, the Show All button is enabled, enabling the user to toggle between seeing just the items associated with the Category or all items in the system.
If desired. check the Export the current map display and attach it to the Work Order(s) option to create a PDF of the current map extent and attach it to each Work Order.
After completing all required fields, Submit the Work Order or PM/Template using the method you prefer:
Submit and View in Desktop: Submits the Work Order(s) or PM/Template(s) and opens it in Lucity Desktop. The first record is opened in Edit mode.
Submit and View in the Web: Submits the Work Order(s) or PM/Template(s) and opens it in Lucity Web.
Submit Only: Submits the Work Order(s) or PM/Template(s), but does not open Lucity.
Cancel: Cancels the Work Order(s) or PM/Template(s).
For a Single Asset: Creates an Inspection for the asset.
For All Assets: Creates a separate Inspection for each selected asset.
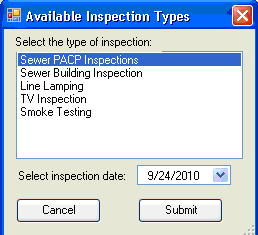
Select the desired action. A form similar to the following appears:
Select the Type of Inspection to create and specify an Inspection Date.
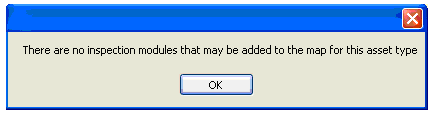
The list of inspection types is based upon the Asset Type of the selected feature. Some Asset Types have multiple Inspection Types, while others only have one. Conversely, a few Asset Types do not have an Inspection module. In such cases, the following prompt appears:
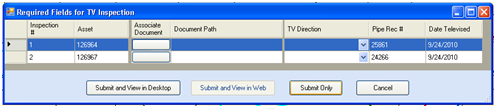
Once the Inspection Type and Inspection Date are selected, click Submit. A grid similar to the following will appear. By default, this grid contains the fields required by Lucity and any fields users have set as required in the Desktop application.
Populate the fields in the grid.
Other fields can be configured to appear in the grid. Refer to the Default Fields Setup tool, available on the Lucity toolbar in ArcCatalog, for more information.
To assign the same value to multiple rows, select the desired rows by holding down the Shift or CTRL key; then, click in the desired cell and set the value. After updating the cell, click on another cell to refresh the grid and view the updated values.
The grid automatically detects data-type errors when another cell is selected. If a value is not valid, a message similar to the following will appear:
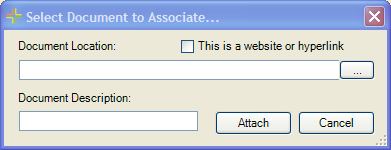
Click the white button in the Associate Document column to attach a document to an Inspection. The following window appears:
Type the path or browse to the document location. Enter a Description, then click Attach.
After Completing all required fields, Submit the Inspection. There are several submission options:
Submit and View in Desktop: Submits the Inspection(s)and automatically opens it in Lucity Desktop. The first record opens in Edit mode.
Submit and View in the Web: Submits the Inspection(s) and automatically opens it in Lucity Web.
Submit Only: Submits the Inspection(s) without opening Lucity.
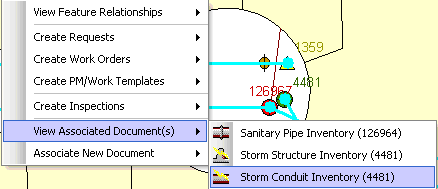
A submenu appears listing the features located within the search tolerance of the mouse-click.
Click on the desired Asset. The Associated Documents window appears:
All modules that contain documents related to the Asset appear in the list on the left. The number of associated documents is displayed parenthesis at the end of each module name. Select a module, and a list of the associated documents appears in the box on the right.
To view a document, simply double-click it. The document opens in a separate window.
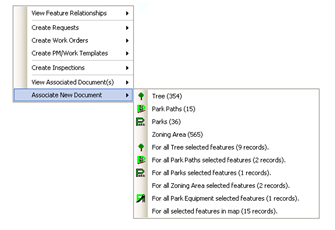
A sub-menu appears that lists the features located within the search tolerance of the mouse-click. If there are any selected features in the map, there will be an extra item in the list that allows you to view relationships for all selected features of a specific type.
(Example Below: For all Tree selected features)
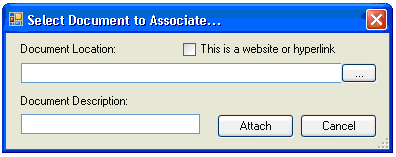
Select the desired option. The Select Document to Associate window appears.
Browse to the document or enter a web address or hyperlink. (A Document Description must be provided.)
Click Attach.
The document is now attached to the record(s) selected from the list.
 View Feature Relationships