Lucity enables agencies to replace the Lucity Timesheet report with a custom Timesheet report in the Timesheet and Timesheet Overview. Use the following steps to add a custom Timesheet report to Lucity.
Open the Work Order module and click on the button.
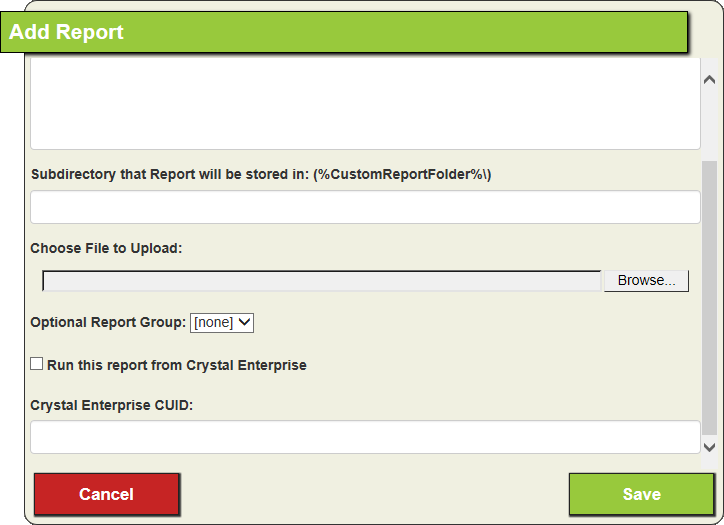
In the Report dialog, click the Add button . The following dialog appears:
Enter a Report Name and Report Description.
In the Subdirectory that Report will be stored in field, enter the name of the folder that will serve as the destination for the uploaded report.
Note: The program builds the path that the report will be uploaded to by using the location specified in the Lucity Web > Admin Portal > Settings > System Settings > Documents tab > Path where Reports are stored setting and adding on any subdirectories indicated in the Subdirectory that Report will be stored in field. If the subdirectories do not exist they will be created automatically.
Under Choose File to Upload, click ... and select the .rpt file you would like to upload to the web server.
Note: The name of the .rpt file being uploaded cannot match any other .rpt files.
Select Standard Report.
Click Save. The report is uploaded to the web server.
 How to upload the custom Timesheet report to Lucity
 button.
 . The following dialog appears: