The Work Order Routing tool takes a set of Work Orders (identified through a Work Order Filter) and locates them in the map. Then, the tool applies a GIS-routing service to determine the shortest route between the locations. This helps work crews plan their work for the day more efficiently.
Requirements
Before using this tool, users must create and save a filter in the Work Order module that isolates the Work Orders they want to route.
Routing Tab
The Routing tab enables users to select a Work Order Filter, narrow down the records to route, and start the routing process.
Options Tab
The Options tab allows users to change the properties of the routing output.
One Route
Multiple Routes By:
Enables the user to choose whether to create one route for all of the selected work orders or to create multiple routes simultaneously based on Supervisor, Lead Worker, or Crew.
Display Driving Directions
Includes driving directions with the routing map.
Use the Assets
Use the Address and X/Y
Tells the routing program which data to use for the location of a Work Order (Assets or Address/XY information) when a Work Order has both types available.
Vehicle Starting Location
By default, the work order route starts at the location of the first work order or at an address specified by the system administrator. To begin the route at a different location, enter an address in this field.
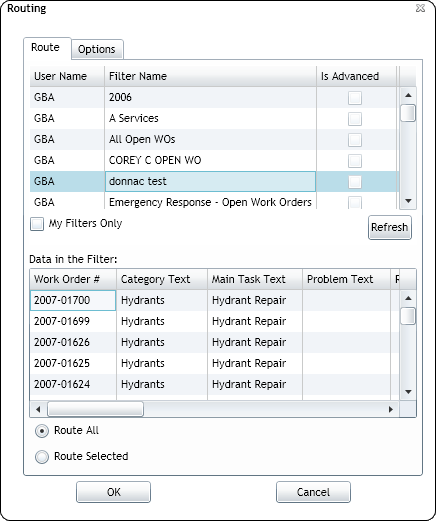
Click the Work Order Routing button. The following screen appears:
In the Route tab, select a filter. The Data in the Filter list (at the bottom) displays the Work Orders identified bythe selected filter.
Note: Check the My Filters Only box to display only the filters created by the current user.
Mark the Route All option (at the bottom of the screen) to route all records.
OR
Mark the Route Selected option and select the desired records in the Data in the Filter box to route a smaller set of records .
Make any desired changes on the Options tab.
Click OK.
The routing service creates a route based on the Work Order data and the preferences the user selected.
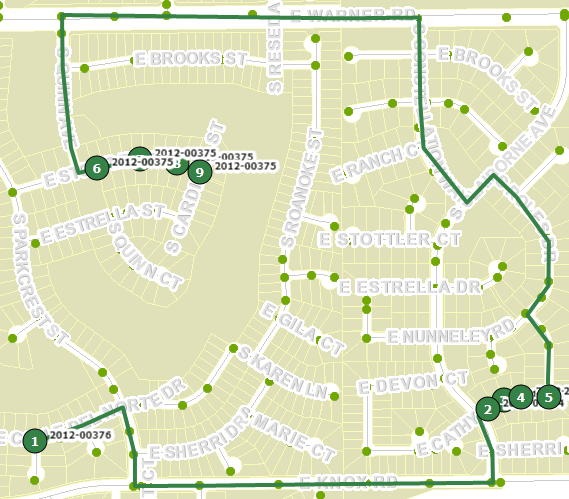
Two layers are added to the Map Layers tool: One layer for the route and another for the stops. The route will look something like the example below, with points along the route represented as numbers. The associated work order number serves as a label for each point.
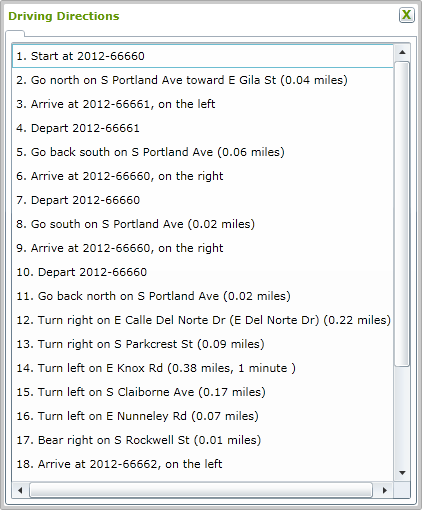
To use the Driving Directions function, mark the Display Driving Directions box on the Options tab before creating the route.
Once the route is created, a pop-up appears in the map window:
Click on a step in the driving directions to zoom to that step on the map.
If it is a stop, the map will highlight the stop and zoom to it.
If it is a section of driving, the map will zoom in and highlight the route with a white dashed line. This line will move in the direction of the route for a few moments.
 How to route Work Orders