The Water Merge tool on the Lucity GIS Edit toolbar enables users to combine Water pipes in the geodatabase and in Lucity.
The tool is only enabled only when: 1) two features are selected in the map, 2) the selected items are linear, 3) they are snapped.
How To Merge Water Pipes in the Map
Start an edit session in ArcMap.
Using the ESRI select tool, select the two adjacent Pipes to be merged.
Click the Merge Water Pipe tool on the Lucity GIS Edit toolbar.
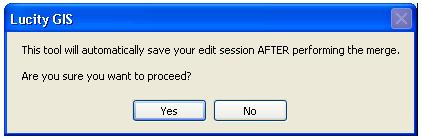
If the system detects unsaved edits, it will save them before launching this tool. After the Pipes are merged, the system will save edits again and update Lucity. When prompted about the save (examples below), click Yes.
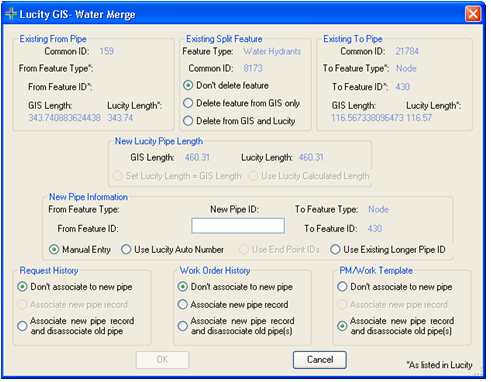
The Water Merge form appears. The sections in the upper-left and upper-right corners of the form display information about the two Pipes being merged.
In the top-center box (Existing Split Feature), choose how you want the system to handle the feature following the merge:
Don't Delete Feature: Retains the structure in both the Lucity Inventory module and in the structure feature class.
Delete Feature From GIS Only: Retains the Structure in the Lucity Inventory module, but removes it from the structure feature class. Note: This option is disabled if the tool cannot locate a Water Asset within one map unit of the common End Point for the two Pipes or if the Water Asset feature class is not editable.
Delete from GIS and Lucity: Removes the Structure from both the Lucity Inventory module and the structure feature class. Note: This option is disabled if the tool cannot locate a Water Asset within one map unit of the common End Point for the two Pipes, the Water Asset feature class is not editable, or the Asset doesn't exist in the Lucity Inventory module.
In the New Lucity Pipe Length section, choose how the system should treat any difference in the Pipe Length between Lucity and GIS (enabled only when such a difference exists):
Set Lucity Length = GIS Length or
Use Lucity-Calculated Length
In the New Pipe Information section, choose whether to:
Manually enter a New Pipe ID,
Use the Lucity Auto Number function (enabled only when the feature class uses a number-generator),
Use the End Point IDs, or
or Use the Existing Longer Pipe ID.
In the Request History section, select how the system should handle Work Requests associated with the original Pipe records after the merge:
Don't associate to new pipe - All Requests related to either Pipe will still bear the old Pipe IDs; however, the Requests will no longer be linked to the Pipe Inventory records.
Associate new pipe record and disassociate [from] old pipe - All Requests related to either Pipe are associatedwith the new Pipe.
Associate New Pipe Record - Disabled. This option will be available in a future release.
In the Work Order History section, select how the system should handle Work Orders associated with the original Pipe records after the merge:
Don't associate to new pipe - The old Pipe IDs will still be displayed in the Work Order Assets tab; however, the Work Orders will no longer be linked to the Pipe Inventory record.
Associate new pipe record - The Work Order Assets tab will display the old and new Pipe IDs, but only the new Pipe ID will be linked to the Pipe Inventory record.
Associatenew pipe record and disassociateold pipe(s) - The new and old Pipe IDs displayed in the Work Order will be changed to the new Pipe ID, and all will be linked to the same Pipe Inventory record.
In the PM/Work Template section, select how the system should handle PM/Work Templates associated with the original Pipe records after the merge:
Don't associate to new pipe - The old Pipe IDs will be removed from all PMs.
Associate [with the] new pipe record and disassociate [from] old pipe - The old Pipe IDs will be removed from all PMs and the new Pipe IDs will be added.
Associate New Pipe Record - Disabled. This option will be available in a future release.
After all selections have been made, click OK. A confirmation message appears when the process is complete.