There are several types of form fields that enable users to view or edit Lucity records. This pages provides an overview of these fields and how to navigate through them.
Pick lists
Pick lists help users add specific assets, resources, locations, etc. to work orders and requests. In Lucity Web, there are several pick list variations:
Single drop-down boxes - A single box that shows both the Code and Description together.
Dual drop-down boxes - Separate boxes for the Code and Description. When the user makes a selection in one field, the system automatically selects the other field.
Text control boxes - An empty text box for the Code and a pick list button for the Description. Enter the Code and exit the field to automatically populate the Description field, or, click the pop-up button.
If a user enters invalid data into a pick list field, an error message appears.
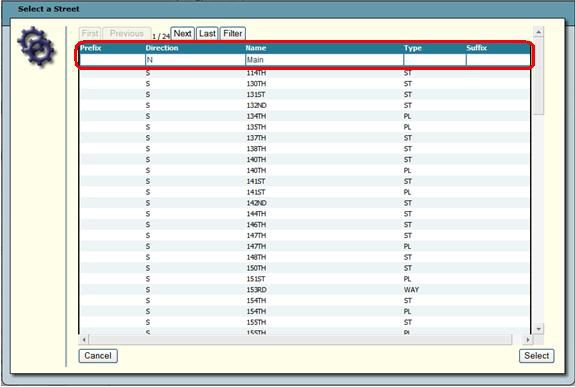
Click on the Pick List button to the right of the field. The following pop-up appears:
To filter for specific data in the pick lists, type the filter criteria in the blank fields at the top of the screen, then click the Filterbutton. The system narrows down the available selections by the criteria entered.
The filter searches for data that either starts with or contains the value entered (depending on system settings). For example, if the user enters "Main" in the Street Name column, the filter finds the first Street record that starts with "Main."
Enter "%[criteria]" to search a field for that criteria anywhere in the field.
Click on the First, Previous, Nextor Lastbuttons to move through multiple pages of options.
Highlight a Street listing and click Select. The highlighted street is added to the pick list field on the form.
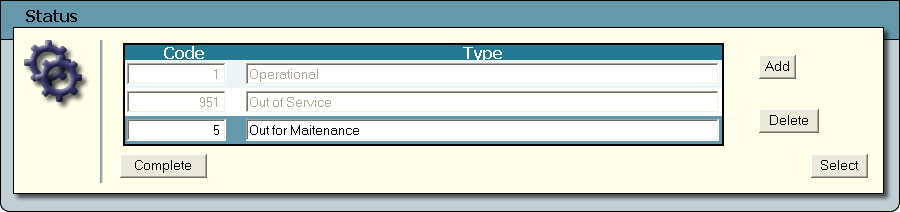
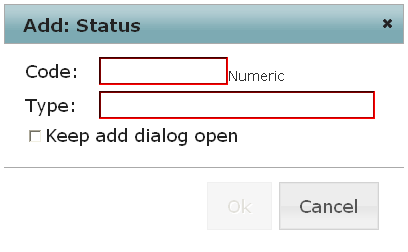
If the pick list can be edited, a message appears in the bottom-left-hand corner of the screen.
Click on the words Codeor Type to sort the columns.
Select a pick list item.
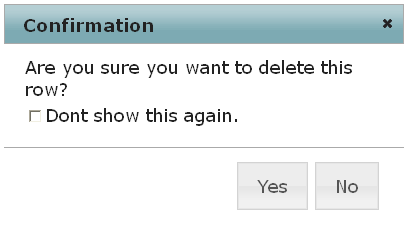
Click the Delete button. The following pop-up appears:
Mark the Dont show this again box to hide this prompt for future deletions. Marking this box will hide this prompt for all pick lists on the form.
Click Yes to complete the deletion.
Note: Picklist options listed in gray are hard-coded and cannot be deleted.
Click Complete to leave the dialog or Select to use the selected option to fill out the form field and leave the dialog.
Requires the Popup Lists - Edit and Popup Lists - Delete permissions for the related module.
Required Fields
Requied fields are identified with an asterisk (*) and a different background color (orange). If users attempt to submit a form without data in the required fields, a warning message appears (see sample below).
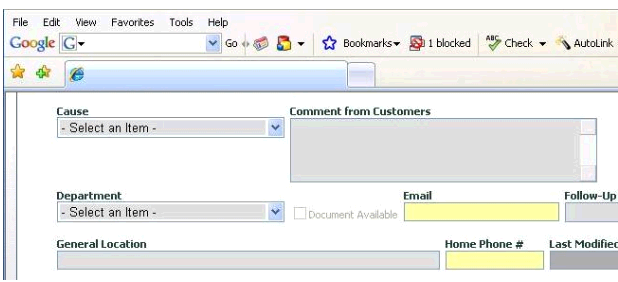
Yellow Fields
Some users may see yellow text boxes on the detail forms. These fields indicate that the Google toolbar can provide values because the user has enabled Google's AutoFill option. This is NOT a feature of Lucity; it is the browser or a browser add-in altering the appearance of the form.
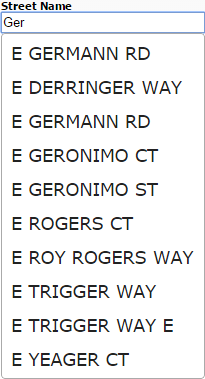
Street Fields
In street fields users can begin to type the name of the street and the field will automatically search the whole street name for all possible matches. It then displays the first 10 matches.
Note: The typed in value must match something in the list. For example, if a users typed in East in they would not get the streets that just have E in front of them.
Default Values
Certain fields have default values that have been applied by the system administrator. These fields appear with data already filled in on the form and cannot be changed.
AutoCalc fields
Several fields within Lucity are calculated automatically. Some formulas are built in, and some are set up by administrators. The following rules apply to the fields in Lucity Web.
Calculated fields are read-only.
If a field that is used in the calculation is empty, the calculated field remains blank.
If the resulting calculation is too large for the field, an error occurs, and the record cannot be saved.
If the calculation results in division by zero, an error occurs, and the record cannot be saved.
Form Navigation
Navigate through form fields by clicking in the desired fields or by using the Enter key (read-only fields are automatically skipped).
Shift+Enter cycles backwards through the fields.
Use Ctrl+Enter to go to the next line in a multi-line text box (like a Comment field).
Hotkeys
Several form fields allow users to press the F5 key to copy a value from one field to another. Such fields are listed below:
In Requests, the value in the Phone field can be copied to Home Phone, Phone 1, Phone 2, or Work Phone.
In Work Orders and Work Tasks, the value in the Start Date field can be copied to the End Date.
In Work Orders, the value in the Total Cost field can be copied to the Billing Amount.
In Fleet Travel Log, the value in the Start Date field can be copied to the End Date.
In Fleet and Equipment, populates the WO Equip Code with a related value.
Note: Request forms now have a "look up" function. Fields with this function allow you to type information, click on the Lookup button, and select the correct record to fill in the rest of the information on the request.
 How to delete a pick list item