Example: Desktop report WOSumGrProb.rpt would be copied and renamed WOSumGrProbWeb.rpt for use in Lucity Web.
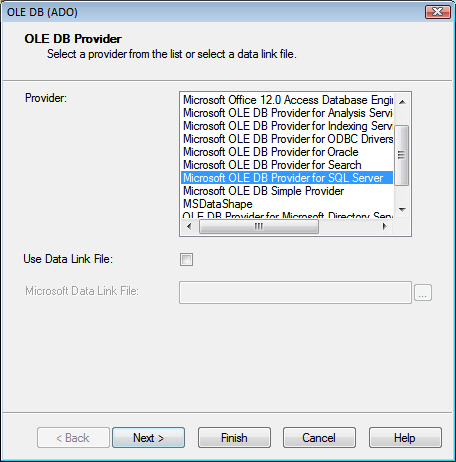
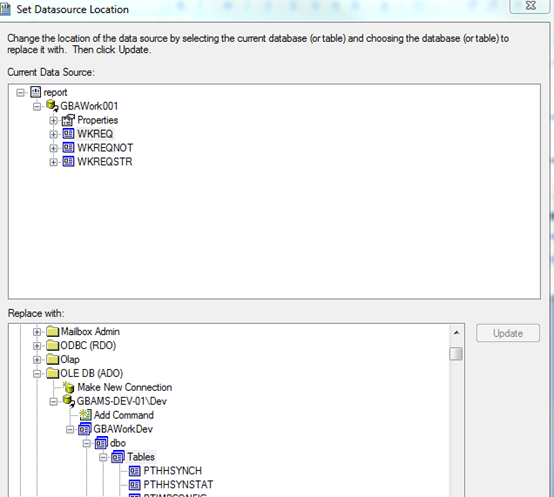
- SQL Server Clients select OLE DB (ADO)>>Make New Connection.
- Oracle Clients select Oracle Server.
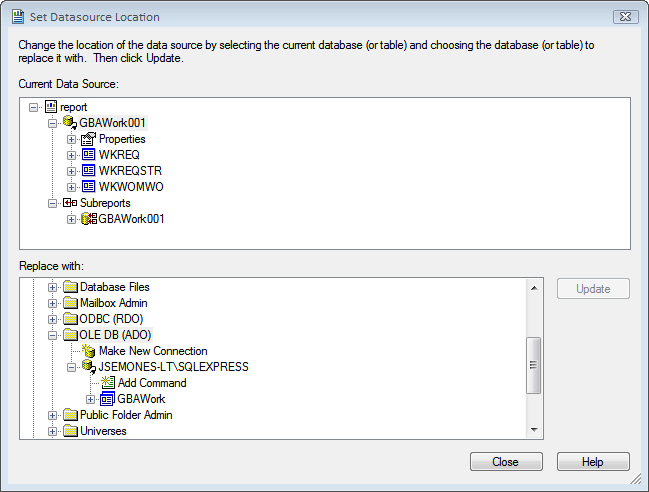
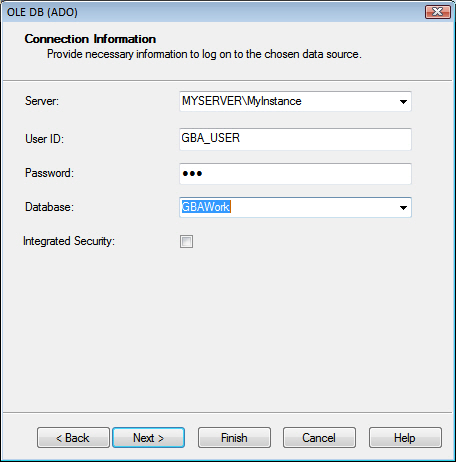
- For SQL Server, include the SQL Server Name, User ID, Password, and Database. The Database is specific to the report database with which it was created, such as GBAWork or GBAEquip.
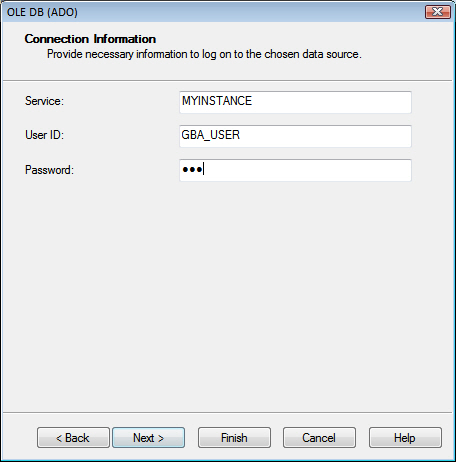
- For Oracle, include the Service, User ID, and Password.
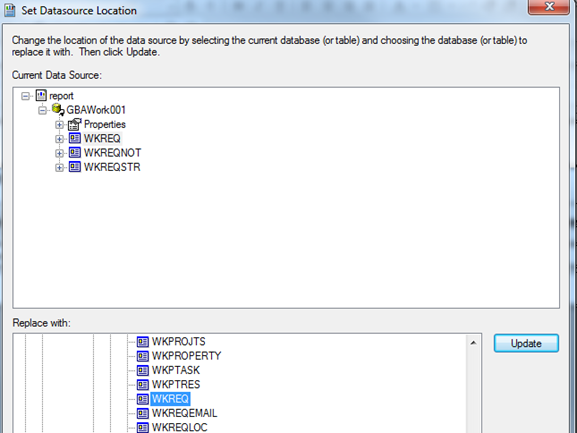
Once the connection has been created, individually (manually) map every table from the report, one table at a time.
After the report is converted for Lucity Web use, it must be loaded into the application.
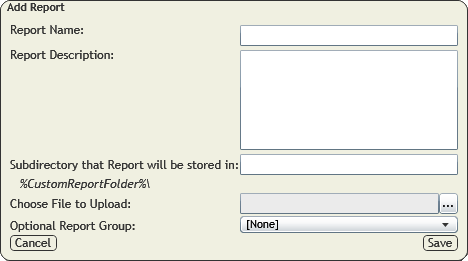
Note: Reports are automatically uploaded to the location specified in the Lucity Administration Tool's Path where Reports are stored setting, which may be found in the System > Settings > Documents tab.
Note: If the folder name that the user enters does not exist, the system will create a folder with that name within the folder to which the reports are uploaded.
Note: The name of the .rpt file being uploaded cannot match any other .rpt files.
- When editing a report, the Save button is replaced with an Update button.