The Reports tool enables users to run and configure reports in Lucity Web. Reports are documents that automatically pull information from the Lucity program and display it different ways. They can provide detailed information about one item or a general overview about sets of items.
To launch the Reports tool, click the on the toolbar. A list of available reports appears.
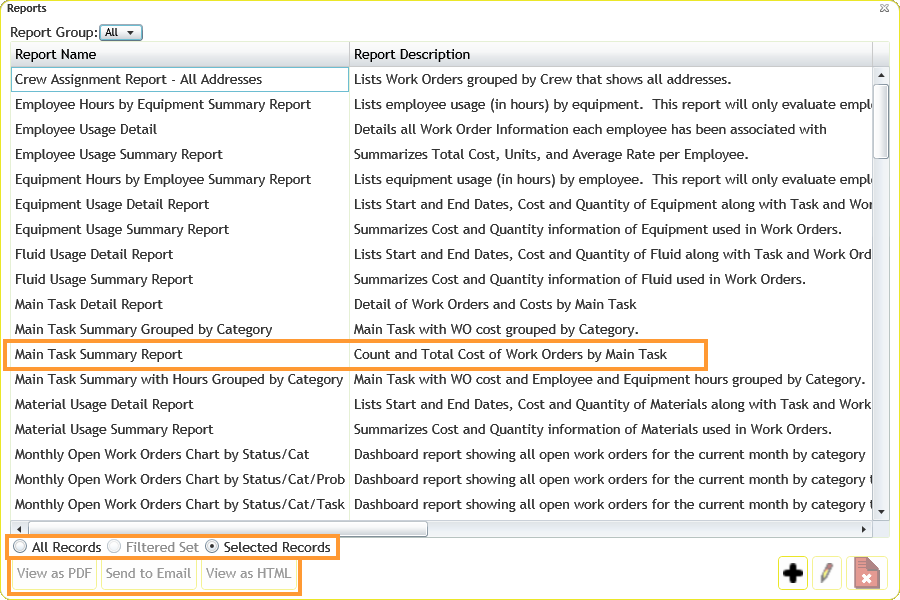
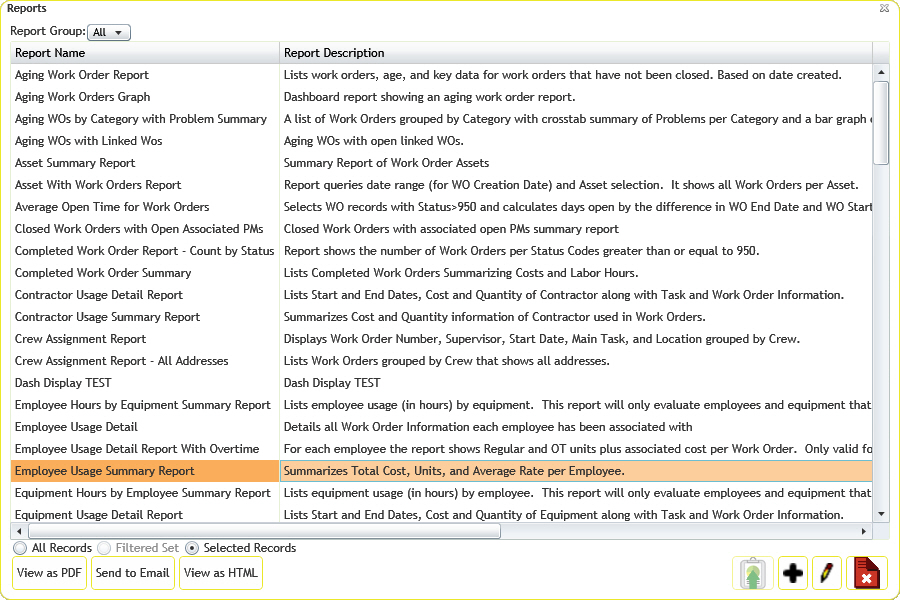
Each report is listed by name, along with a brief description and its file name.
Note: Reports cannot be run on the Filtered Set if the filter is created on a Comment field.
Note: The Work Order Form (Blank) is a blank Work Order that can be printed and used to enter information about a new or existing work order. It contains no data. If you want to use this Work Order form, print it against a single record, rather than against all records. The report may not run properly if it is run against all records.
Quick Reports
Quick Reports are the reports an agency uses most often. By design, they are generated as .pdfs and limited to 10 pages or less.
Click the drop-down arrow next to the on the toolbar to access Quick Reports.
Reports can be grouped together to make it easier for users to find reports for a specific department or those that relate to their specific position.
At the top of the Report window, use the Report Group drop-down to select a group. The window displays only the reports in this module that are related to the selected group.
Select All in the drop-down to show all reports for the module again.
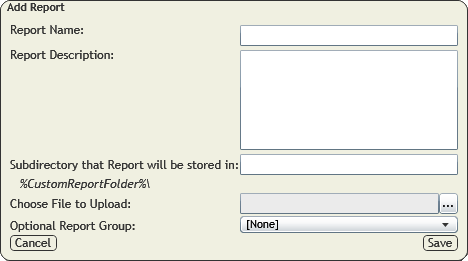
To add a new report, click the Add button . The following dialog appears:
Enter the Report Name and Report Description.
In the Subdirectory that Report will be stored in field, enter the name of the folder to which you want to upload the report file.
Note: Reports are automatically uploaded to the location specified in the Lucity Administration Tool's Path where Reports are stored setting, which may be found in the System > Settings > Documents tab.
Note: If the folder name that the user enters does not exist, the system will create a folder with that name within the folder to which the reports are uploaded.
Under Choose File to Upload, click ... and select the .rpt file you would like to upload to the web server.
Note: The name of the .rpt file being uploaded cannot match any other .rpt files.
Assign the report to a Group (optional).
Click Save.
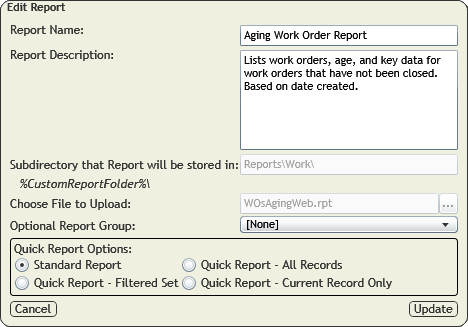
When editing a report, the Save button is replaced with an Update button.
To edit a report, select it from the list and click the Edit button .
Enter or change the Report Name or the Report Description.
Assign the report to a group (optional) or modify its group.
Choose or change the type of report:
Standard Report - The report will generate when the user clicks the Report tool, selects the report and how to run it, and runs it.
Quick Report - All Records - Adds the report to the Quick Report drop-down list, located next to the Report tool. The report will always run against all records.
Quick Report - Filtered Set - Adds the report to the Quick Report drop-down list, located next to the Report tool. The report will always run against the current filter set.
Quick Report - Current Record Only - Adds the report to the Quick Report drop-down list, located next to the Report tool. The report will always run against the current record.
Click Update.
Note: The Report File Path and File Name cannot be modified for reports that Lucity provides with the software.
Send to Email - Sends the report to the current user's email address. Note: The current user must have his or her address set up in the Lucity Security program.
View as HTML - Opens the report in a web browser as an .html file.
Click the on the toolbar to launch the Reports tool.
Select a report.
Click the Edit button .
The Edit Report dialog will appear:
Choose one of the quick report options:
Quick Report - All Records - Adds the report to the Quick Report drop-down list, located next to the Report tool. The report will always run against all records.
Quick Report - Filtered Set - Adds the report to the Quick Report drop-down list, located next to the Report tool. The report will always run against the current filter set.
Quick Report - Current Record Only - Adds the report to the Quick Report drop-down list, located next to the Report tool. The report will always run against the current record.

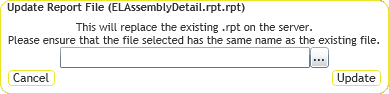
 How to upload an updated custom report