- Right-click in the grid and select Add Record. The following window will appear:
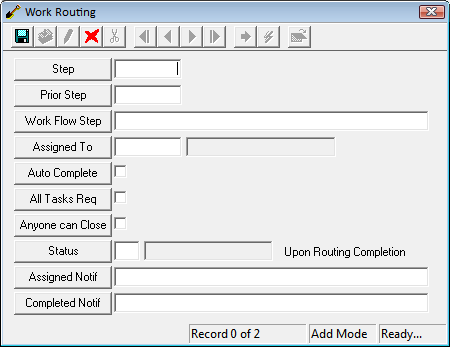
- Enter the step number (e.g. 1, 2, 3) in the Step field.
- Enter the number of the previous step in the Prior Step field (i.e. the step that must be completed before the current one).
Note: When entering the first step, enter a zero in this field.
- Type the name for this Routing Task in the Work Flow Step field.
- The the Assigned To field select an employee to complete the task. Only the assigned employee has permission to close a routing task (unless you have the Anyone Can Close box marked or this field is left blank).
Note: The system uses the employee login ID to determine if a user has permission to close a routing task; therefore, it is important that each employee have a login ID listed in his/her Work Flow Setup Employee record. If not, that employee will not be able to edit or close routing task records.
- Mark the Auto Complete box if you want the routing task to be closed automatically once all the sub-tasks are closed.
- Mark the All Tasks Req box if you want each sub-task to be a required task. If this is box is marked, you will have to mark each sub-task as complete before closing the routing task.
Note: You can override this function for specific sub-tasks by editing the sub-task record.
- Mark the Anyone Can Close box if you want all employees to be able to close the routing task.
- Select the Status of the work order upon routing completion (i.e. when all routing tasks are completed, what status do you want auto-populated in the work order? Closed, on-hold, on-going, etc.). This is not required.
- Select which notification will be sent to the Assigned To employee when the Routing Task is activated in the Work Order module, Routing Tab.
- Select which notification will be sent to the Assigned To employee once the task is marked as complete on the Work Order module, Routing Tab.
Note: Notifications are created in the General > Notification Setup module. Notifications will be sent to the Assigned To employee (if one is selected) as well as any addresses included in the Notification's Recipient List.
- Save and Close the record.