To set up a Custom Feature in the desktop for your custom layer, follow the steps below:
- Access the Custom Feature Definition module in the desktop application by selecting General > Custom Feature Definition from the main menu. You'll see a window similar to the one below:
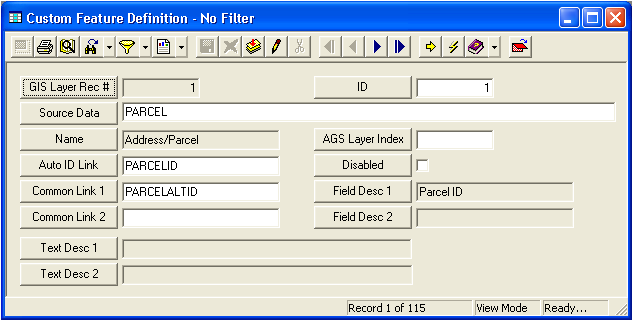
- Click the Add button.
- Populate the ID field with a number greater than 1000 (this will identify it as a Custom feature).
- The program will automatically populate the Internal ID field with a database generated number.
- In the Source Data field, input your centerline shapefile name without the .shp (e.g. 'Streets'). This should follow the conventions outlined in GIS Setup.
- In the Name field, input what you would like your Custom Feature to be called (e.g. 'Custom Streets'). This will be displayed in the work order when it is created against your custom feature class asset from the GIS.
- Use the AGS Layer Index field to track the layer index for the Web Map. This layer index corresponds to the index of the layer in the ArcGIS Server (AGS) map resource REST service that is defined in the UI Admin System Settings > Geodata Map Service.
- Mark the Disabled checkbox if this is not an active feature class in your GIS. Note that additional feature classes will also need to be disabled in the Geodatabase Synchronization Setup tool.
This helps improve performance with the Lucity GIS extension as it allows the GIS tools to look at only the active feature classes.
- In the Auto ID Link field, input an autonumber from the shapefile. This is any field that stores a unique numeric identifier. This field is required.
For example, OBJECTID is always a unique field for personal and enterprise geodatabases and may be used for the Auto ID Link. Any other field that is numeric and unique can be used as well.
- In the Common Link 1 field, input the field attribute name from the shapefile that holds the unique identifier (e.g. Street Number). The value from this field will be displayed in the System ID 1 field. This field is required.
This must be a different field than the Auto ID Link.
- Populate the Common Link 2 field. This is a secondary field used to uniquely define the feature. The value from this field will be displayed in the System ID 2 field. This field is optional.
- Populate the Field Desc 1 and 2 fields. These are alias names for the Common Link 1 and 2 field names.
These fields are optional; however, it enhances the interface from GIS if these are populated.
- In the Text Description 1 field, input the field attribute name from the shapefile that holds the Custom Feature (e.g. Street Name). This allow you to identify which custom feature is attached to a work order (e.g. which street it is). These fields are optional.
Text Desc 1 and Text Desc 2 are two fields that are in the feature class that should be populated into the work order.