The Purchase Request integration process involves first creating a Lucity Purchase Request to sync with Finance Enterprise (FE) Purchase Requests. Then Lucity polls the FE Purchase Request's Status to determine when it has generated a Purchase Order, at which time the Lucity updates the Purchase Request Status.
Purchase Request sync
The following process syncs Lucity Purchase Requests with FE by pushing a Lucity Purchase Request into the FE Purchase Requests (POUPPR) screen.
Create and save a Purchase Request in Lucity. More information about Lucity Work > Purchase Requests.
Lucity fires a task to push the Purchase Request to FE. More information about this task is available in Lucity's Admin Portal:
The task's status from queued to finished can be viewed in Web App Management > Background Tasks.
Problems during this task are logged in Web App Management > System Errors.
More information about this process is can be viewed in Web App Management > App Activity Log.
When the Lucity task is finished, the Purchase Request can be viewed in FE's Purchase Requests (POUPPR) screen.
Once the Product is ordered and received, it can be entered into the FE Fixed Asset module and added in Lucity as an Asset. You can then proceed to the Fixed Asset integration to tie a Lucity asset to the CS Fixed Asset lookup.
Purchase Request Status polling
The following steps enable users to schedule polling the FE Purchase Request Status to update the Lucity Purchase Request Status once an FE Purchase Order has been generated. This scheduling only needs to be completed once unless you want to change or delete duration or frequency. More information about Lucity Administration Tool > Purchase Request Status Polling.
Important: Edits to or deletions of the Lucity and FE Purchase Requests are not updated after the initial record sync.
Open the Lucity Administration Tool.
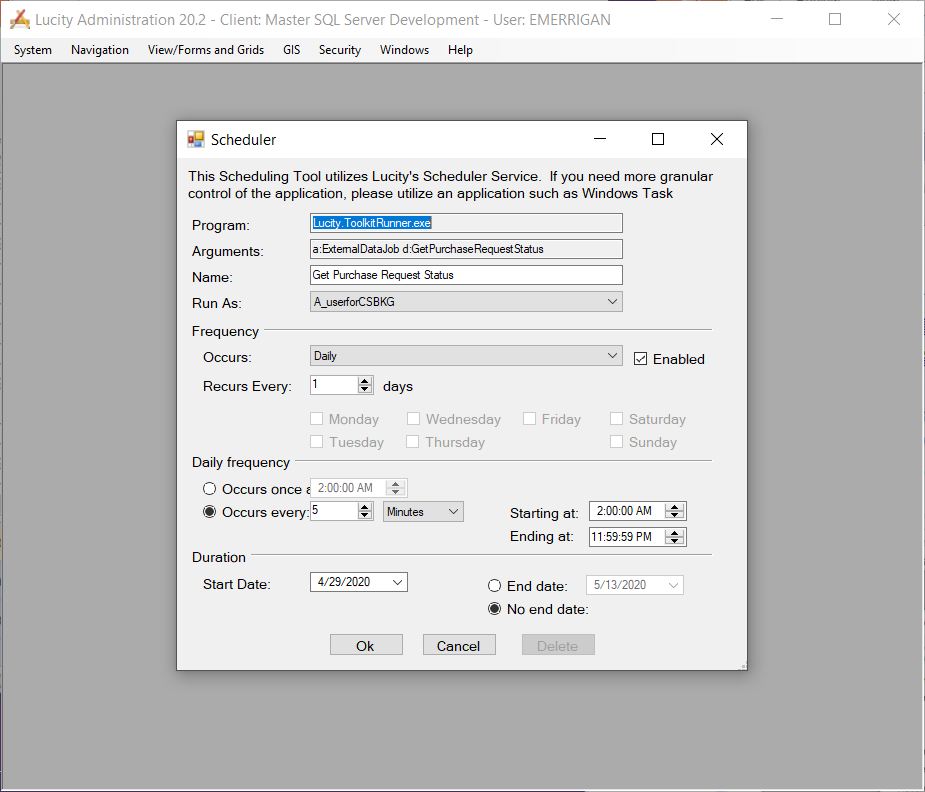
Select System > Schedule An Integration Task > Get Purchase Request Status. The following pop-up appears:
In the Run As field select the desired services user who is configured with a link to an FE OpenID. This user will likely be the fallback user.
Select Frequency options.
Select an Occurs option.
Select Enabled to enable this frequency.
Enter a value in Recurs Every.
Select Day options to indicate the day(s) on which the task should run.
If you selected daily frequency, enter times and values in the Daily frequency section.
Select Duration options.
Enter a Start Date.
Enter and select an End date, OR select No end date.
Click Ok. Lucity will now poll FE for Purchase Request Status based on your selected frequency and duration to update the Lucity Purchase Request Status.
Note: Lucity only polls FE for all corresponding Purchase Requests that are marked Sent to Financials and are locked in Lucity, and whose Status is not completed. Polling updates Lucity Purchase Request Status to match the FE Purchase Request Status.