Warning: This section is only for configuring Cloud (software as a service) clients.
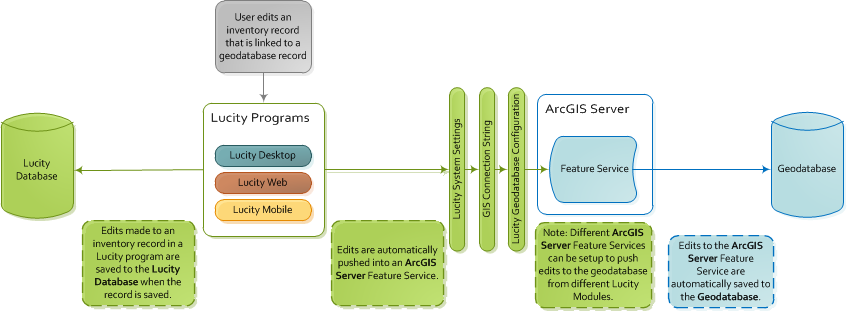
The Lucity (Cloud)-to-ArcServer integration instructs Lucity Web/Mobile GIS tools to:
recognize ArcGIS Server data as linked to Lucity, and
allow edits made in LucityInventory modules to be pushed to the ArcSDE via the ArcServer.
This is a recommended configuration for all agencies as it is required for many Lucity tools to work properly. It can be configured so that edits are not passed to the geodatabase.
Note: Agencies that use Lucity Cloud and GIS must complete this configuration..
Process
Inventory Edits
Edits made in the Lucity interface are pushed directly into the Lucity database.
During the push, the program checks the Lucity settings to determine how it should connect to ArcGIS Server. Then the program pushes updates into the feature service, which automatically updates ArcSDE.
Setup
This configuration uses feature services to display information. These feature services form the primary link between Lucity and the ArcSDE.
Most of the Lucity-to-ArcServer configuration is completed using the GIS Config tool which is primarily designed for configuring Lucity with ArcGIS Online. This section covers how to connect this tool with ArcGIS Server instead of ArcGIS Online. For a complete instructions on how to use all the functions in this tool, see the guide for the GIS Config tool. Just be aware that the instructions in this guide override any contradictory instructions in that guide.
Create one or more feature services in your ArcGIS Server. Keep in mind:
Each feature layer that an agency wants to link to Lucity must be contained in one or more of its feature services.
Each feature layer that an agency links to Lucity must have a unique, user-friendly name. This name is used whenever the feature layer is included in a service that Lucity references.
The feature layers must display all of the fields that an agency wants to link to Lucity.
The service does not need any additional non-Lucity feature layers.
The service can either be a new service or an existing one.
This service does not need to be included in any Webmaps.
This service does not require any special symbology.
This service must be available over the internet.
Publish the feature services to the ArcGIS Server.
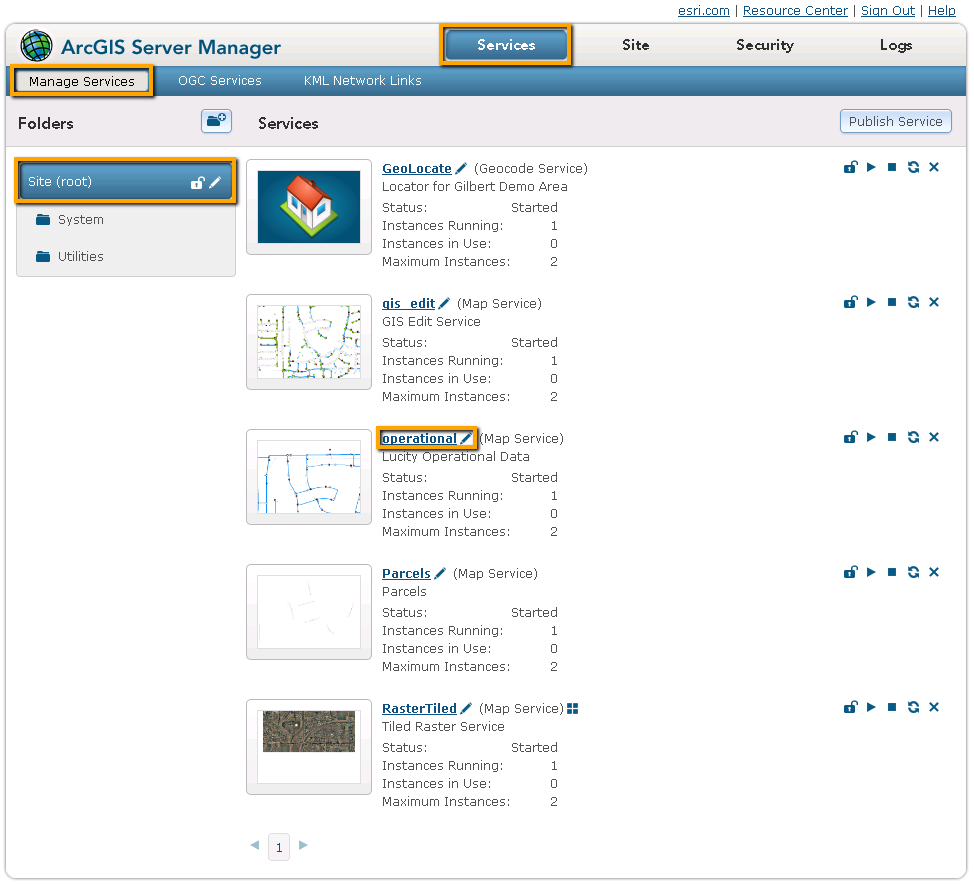
If collecting information for the map service that contains your operational data, click on the REST URL. A page containing the properties of the map service appears.
Scroll down and copy down theSpatial ReferenceNumber. (Do this only for the layer that contains Lucity data.)
Users must have the Lucity App Admin > Run permission to complete the following steps in the Lucity Administration tool.
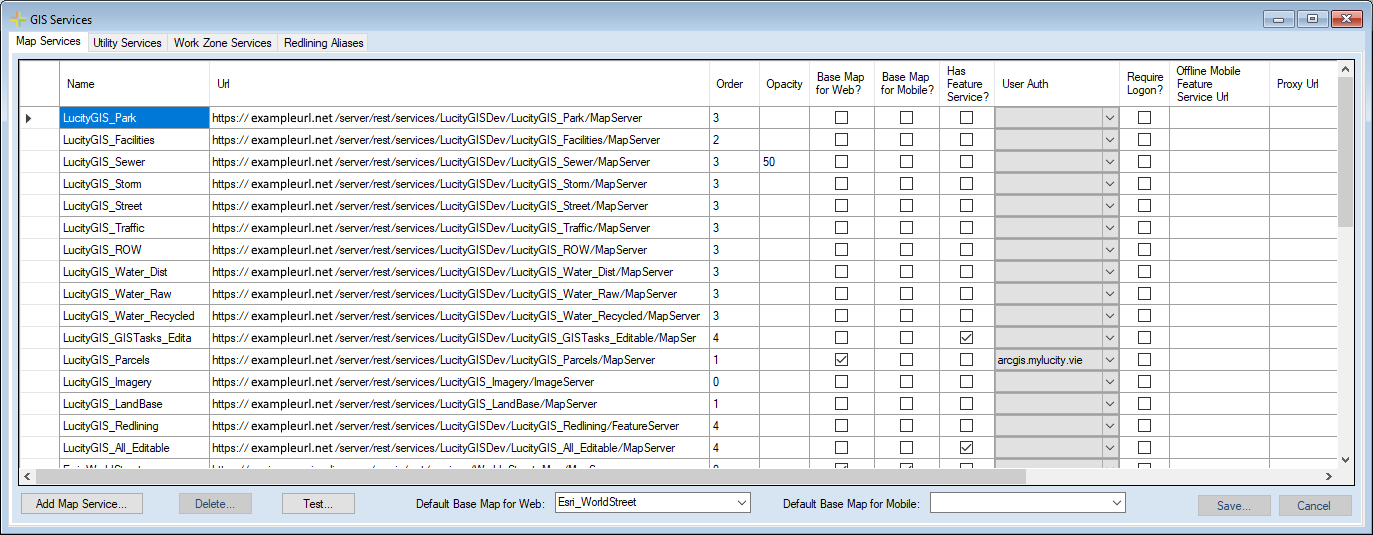
Launch the Lucity Administration Tool and select GIS > GIS Services.
On the Map Services tab click the Add Map Service button.
Enter a Name and the REST URL of the feature service that will be used to connect Lucity to GIS.
Note: This URL should end in /FeatureServer.
If the service is secured use the Lucity Administration Tool > GIS > Authentication Setup tool to enter the authentication. Then select that authentication for the service using the User Auth field.
Click the Save button.
Close the GIS Services tool
Set the Feature Service as the Connection String.
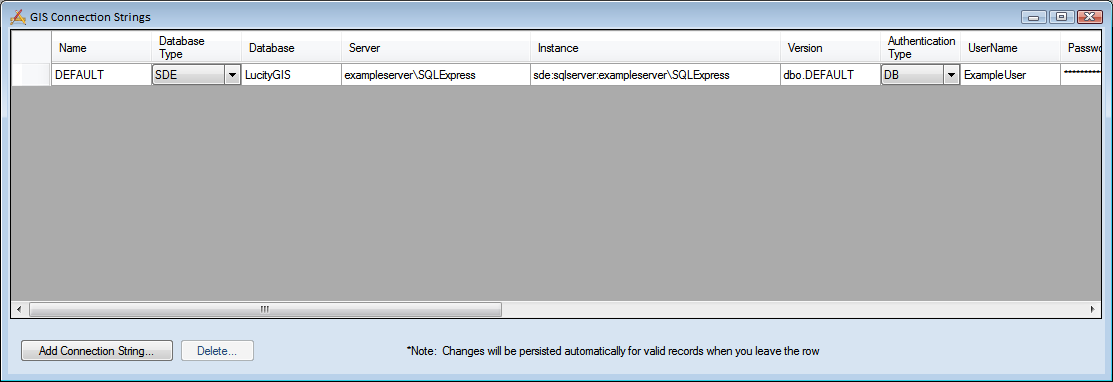
In the Lucity Administration Tool go to GIS > Connection Strings.
Click Add Connection String.
In the Name field, enter DEFAULT. (The first database in the list must have this name).
If this is not the first connection string, enter any name.
Under Database Type, select SDE.
Use the Editable Map Service dropdown, select the feature service that you added to the map services grid.
Note: This configuration only supports 1 geodatabase connection string.
Configure Lucity to recognize that it is using a feature service.
Open Lucity Web > Admin Portal > Settings > System Settings > GIS Edit Integration section.
Make sure the Use Feature Service instead of Lucity SOE setting is set to TRUE.
Open the Lucity GIS Config tool.
In the Administration Tool, select GIS > GIS Config.
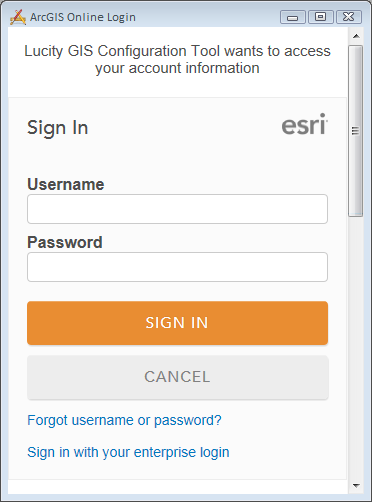
The ArcGIS Online Login window appears.
Cancel or close the login prompt.
Several error messages will appear because the program cannot connect to ArcGIS Online. Close these.
The program will open and will connect to your SDE data connection.
Configuring Feature Class Layers to Lucity
Once the tool is opened look at the ArcGIS Server Data box.
This box lists all the feature services currently configured with Lucity that have the same root url as the feature service associated with the default geodatabase connection string.
Expanding the node next to the service lists all feature class layers that are part of that service.
Layers in green are the default service for that layer.
Layers in orange are configured with Lucity, but are not the default service for the layer.
Layers in black are not configured with Lucity
Example: A layer such as Equipment may be included in multiple services, but there can only be one service that is defined as the default service for a given layer. The default service will typically be the service associated to the GIS Connection String record. However, this can be overwritten by changing the Edit Map Service on the Layer Info tab for the selected layer.
Note: Service information can not be updated via the GIS Config tool. Changes must be made via the GIS Services module in UI Admin.
To configure a feature class layer that is not linked to lucity select a feature class layer listed in black.
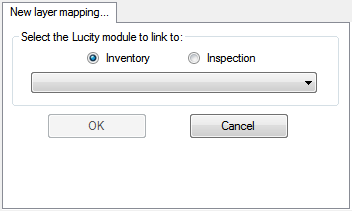
Right-click on the layer and select Link Layer to Lucity. The following fields are displayed on the right side of the tool:
Select whether the feature class layer should link to an Inventory or Inspection module.
In the drop-down box, select the Lucity module to which the layer should link.
Click OK. The configuration is created for the layer and feature class.
Select the layer in the ArcGIS Online Data section or the Current GIS Configuration section to display the Feature Class Configuration section.
In the Administration Tool, go to GIS > GIS Config.
Select the desired layer in the ArcGIS Service Data (ArcGIS Online Data) section or the Current GIS Configuration. The Feature Class Configuration section appears.
Go to the Fields tab.
Decide which field you would like to link.
Look at the field in Lucity. Copy down its field display name use the Field Property tool on the form and find the field name.
In the GIS Config tool, select the feature class linked to the correct module.
Search through the grid on the right for the Lucity field that uses that field name or display name.
Enter the name of the feature class layer in the Feature Class Field Name field.
OR
Push the Field Lookup button for a list of fields from the associated feature class.
 How to configure the ArcServer feature service