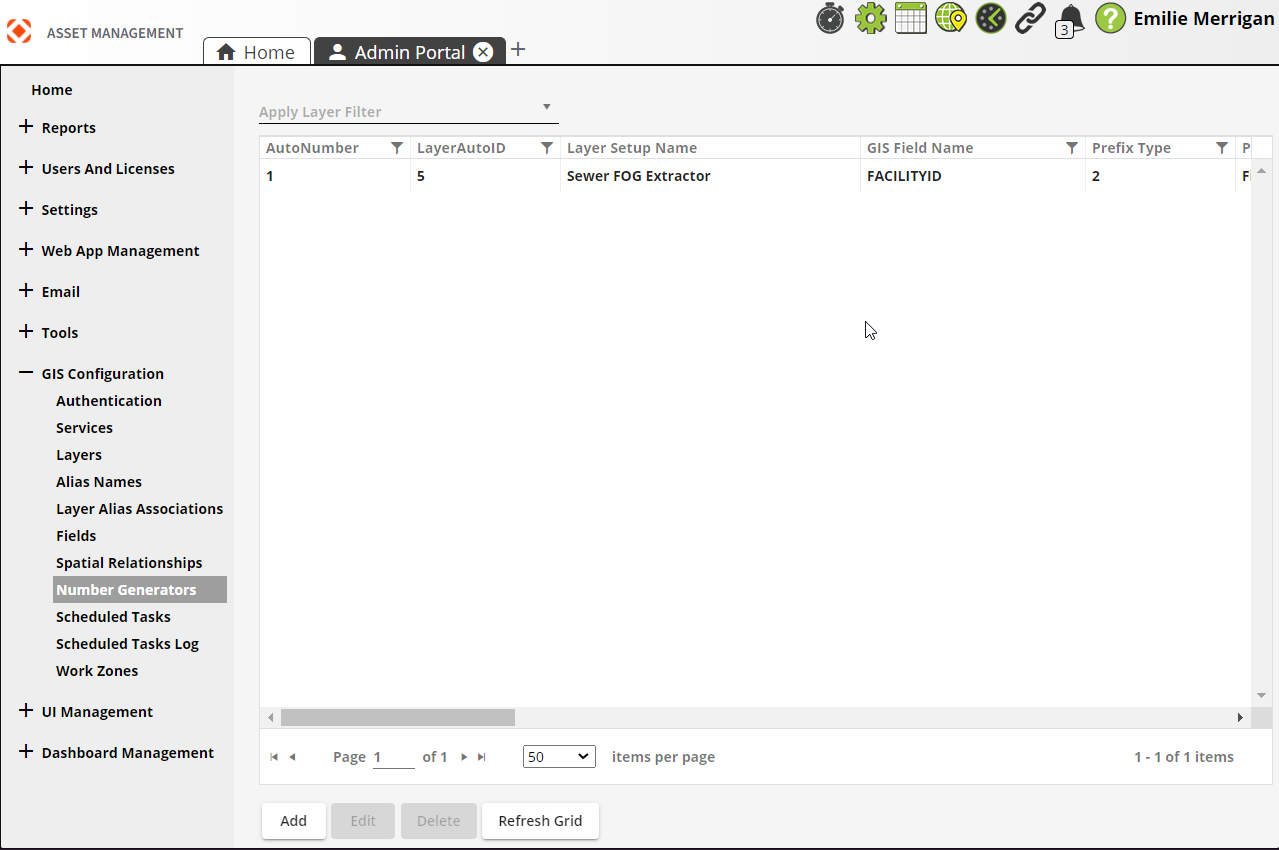
Number Generators
The Number Generators section enables the user in populating a feature class field with a unique value. Fields in a feature class can be setup so that the EAM GIS extension will populate the field with a unique value.
 Requires the GIS > GIS Setup Number Generator > Run Security permission to view this section.
|
Buttons |
Description |
|
|
Adds a new number generator. |
|
|
Opens a selected number generator for editing. |
|
|
Deletes a selected number generator. |
|
|
Refreshes the current grid. |
- Open
 .
. - In the menu on the left select GIS Configuration > Number Generators.
-
Select Add at the bottom. The following pop-up appears:
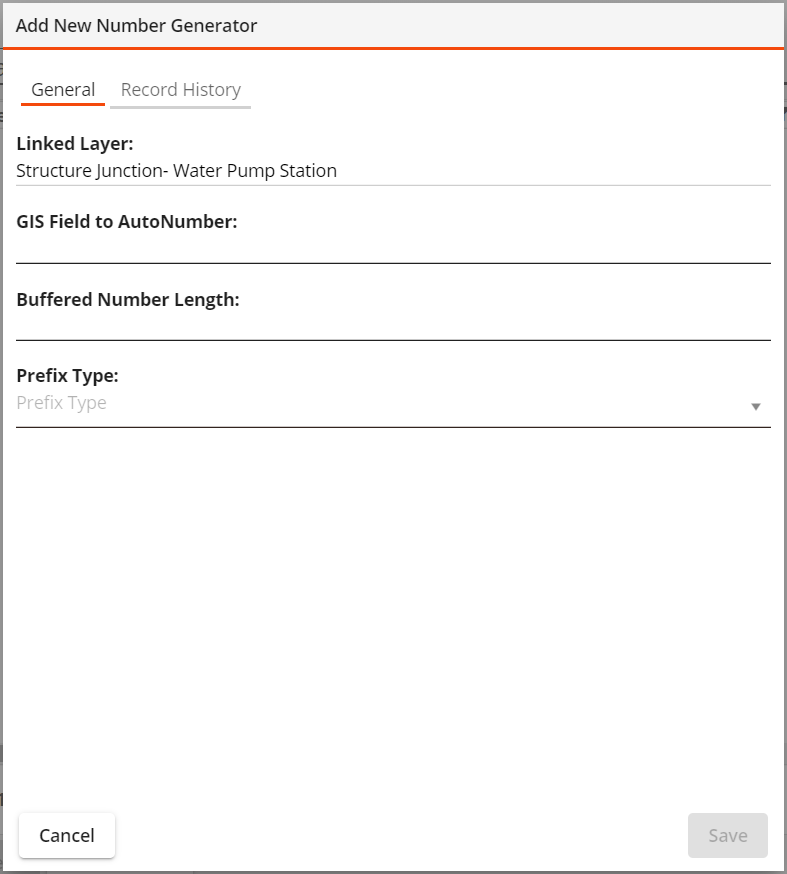
General tab
-
Select a Linked Layer (required).
-
Enter a value under GIS Field to AutoNumber (required).
-
Enter a Buffered Number Length if desired.
-
Select a Prefix Type (required) and its related options:
Prefix Type 1: None.
-
Enter the Next Field Number.
- Select Save. The system will populate your selected feature class field as you have defined.
Prefix Type 2: Use a set prefix.
-
Enter a Prefix, Separator Character and Next Number as desired.
-
Select Save. The system will populate your selected feature class field as you have defined.
Prefix Type 3: Use a prefix based on a field value.
-
Enter a Separator Character.
-
Navigate to the Next Number tab below.
Prefix Type 4: Use a prefix based on a related polygon layer.
-
Enter a Separator Character.
-
Navigate to the Related Layer tab:
-
Select a related Layer Setup Name (required). If necessary, select Related layer is not linked to Lucity.
-
Enter a related Layer Field Name (required).
-
-
Navigate to the Next Number tab below.
-
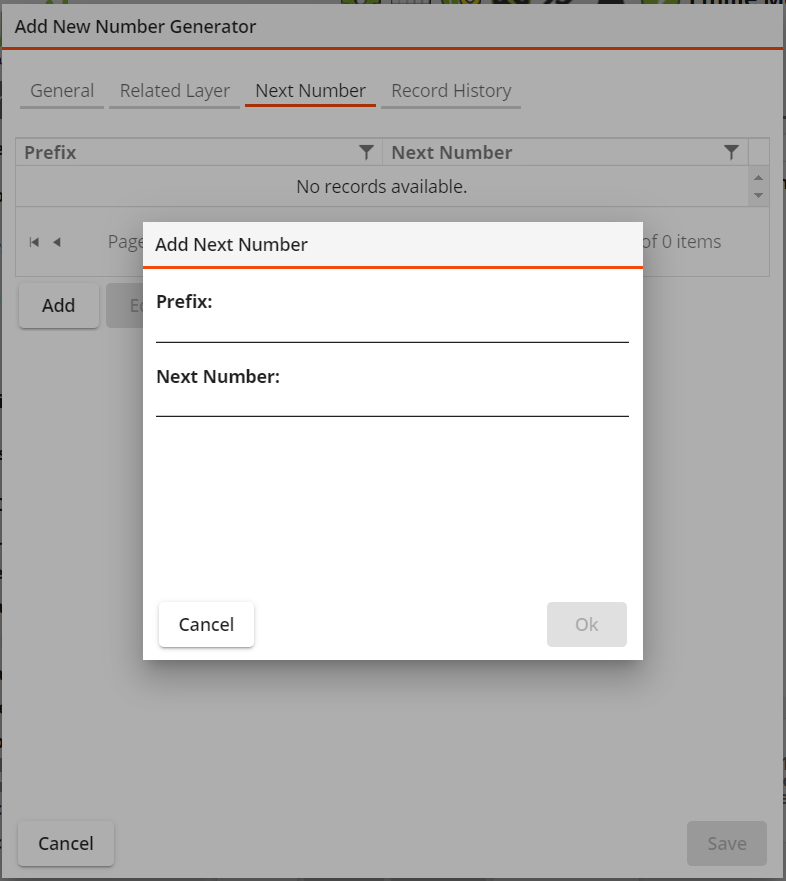
Next Number tab (only for Prefix Types 3 and 4)
-
Select Add. A new pop-up appears:
-
Enter a Prefix and Next Number to indicate how you want the numbering to appear.
-
Select Ok.
-
Select Save. The system will populate your selected feature class field as you have defined.