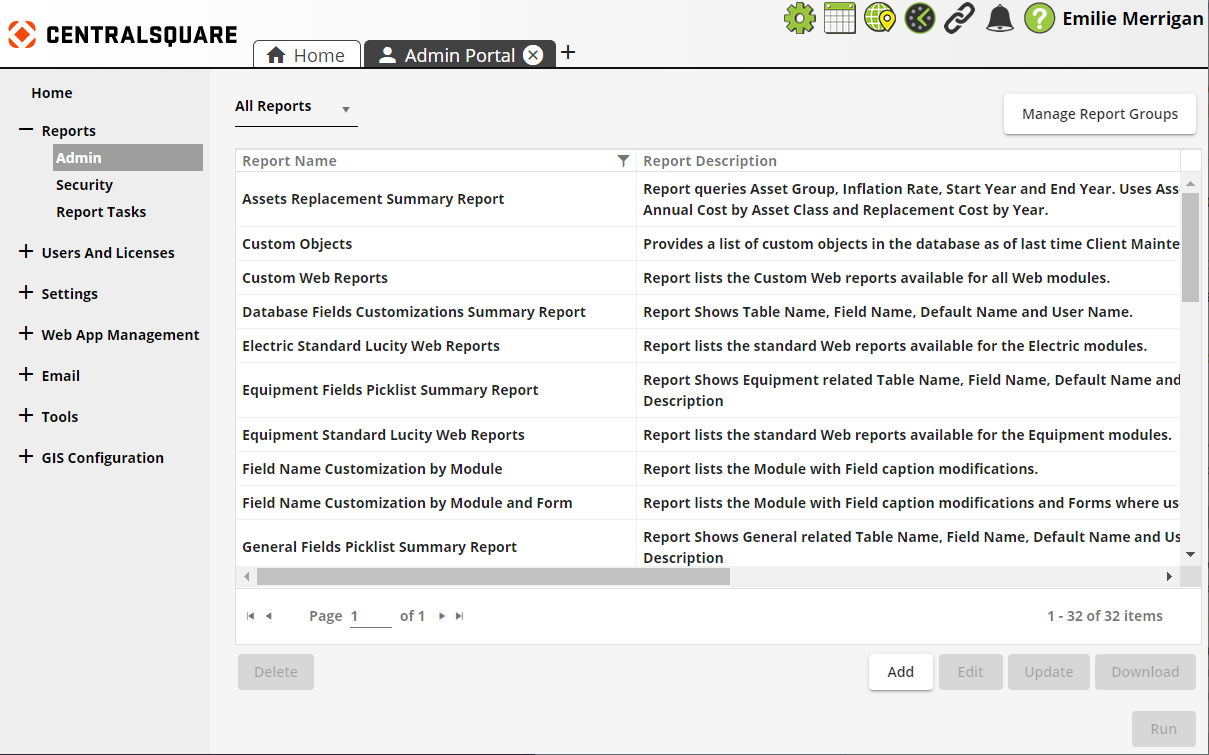
Reports
The Reports section of the Admin Portal provides access to various administrative reports. Expand the Reports menu to display two subcategories: Admin Reports and Security Reports. Individual reports are listed by name, along with a brief description and the file name/location. You may need to scroll right to view the latter.
- Admin Reports: Provide information about the configuration of the Web application and database objects.
 Requires the Admin > Reports - Administrative > Run permission.
 - Security Reports: Provide information about permissions assigned to groups and to individual users. Requires the Admin > Reports - Security > Run permission.
|
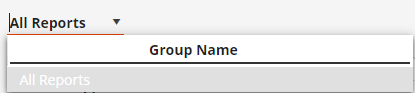
Report Groups Selector |
Enables the user to choose to view all reports or a subset of reports. |
|
|
Provides a means to create and manage report groups. Report groups can be based on department, type of user, type of report, etc. |
|
Reports Grid |
Lists the reports indicated in the Report Groups Selector.
|
 Select the filter to search within a column.
  Select a column header to sort the records. This icon indicates the column by which the data is sorted.
Manage Reports Tools
The following buttons are located at the bottom of the Reports screen:
|
|
|
|
|
Enables the user to modify basic settings for an existing report. |
|
|
Replaces the selected custom report with a new .rpt file. |
|
|
Downloads a copy of the selected custom report's .rpt file. |
|
|
|
|
|
Runs the selected report. |
Running Reports
-
At the top of the Report screen, use the Report Group drop-down to select a group.
-
By default, this drop-down provides an All Reports option in addition to the list of report groups.
-
The window displays only the reports in this module that are related to the selected group.
-
- Select All Reports in the drop-down to once again show all reports for the module.
- In the Report screen, select the desired report.
-
Select the Run button. The following pop-up appears:
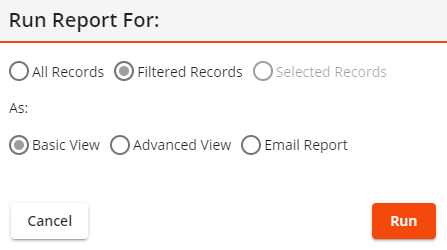
- Select how you wish to view/distribute the report:
Basic View - Generates the first ##* pages of the report. Users can scroll through the entire document.
The number of pages printed is controlled by the Max # of Pages on PDF Crystal Reports Web Performance system setting.
Advanced View - Generates the first page of the report. Additional pages are generated on the fly as the user pages through the report. This view also allows the user to review the report parameters.
Email Report - Generates a Basic View of the report and sends it as an attachment to the email addresses the user provides.
- If Basic View or Advanced View is selected, the report opens in a new application tab. Enter any user-defined parameters.
-
If Email Report is selected, the following pop-up appears:
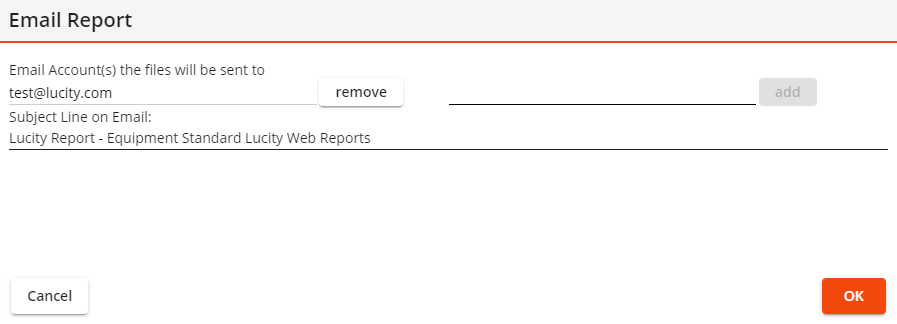
- Input the list of email addresses to which to send the report.
By default, the report is sent to the currently logged in user's email address.
Type an email address and select add to add another address to the list.
Select remove next to an email address to remove it from the list.
- Update the Subject Line on Email if desired.
- Select OK to send the email with the attached report.
- Input the list of email addresses to which to send the report.
Managing Report Groups
Requires the module's Admin - Lucity App Admin - Run permission.
-
Open the Manage Report Groups tool.
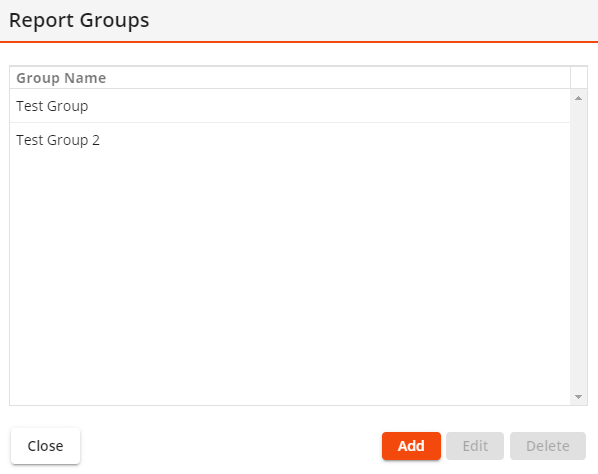
-
Select Add. The tool displays a Group Name field.
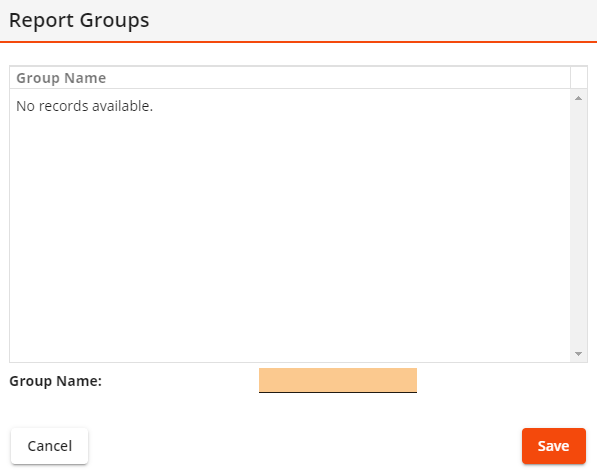
- Enter the Group Name. The name should identify the department or user group that the report group pertains to or the nature of the reports in the group.
- Select Save.
-
To add a report to an existing Report Group, select the Report from the grid and select Edit.

- In the Optional Report Group field, assign the report to a group or modify its group.
- Select Save.
-
Select Manage Groups at the top right.
- Select the desired Report Group from the list.
-
Select Delete. The following pop-up appears:
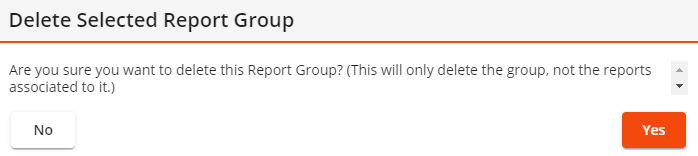
- Select Yes.
- The Report Group is deleted.
Managing Reports
-
To add a new report, select the Add button. The following dialog appears:

- Enter the Report Name and Report Description.
-
In the Subdirectory that Report will be stored in field, enter the name of the folder to which you want to upload the report file.
Notes:
-
Reports are automatically uploaded to the location specified in the Admin Portal > Settings > System Settings > Documents > Path where uploaded documents are stored (Internal) (Document Hive) setting.
-
If the folder name that the user enters does not exist, the system will create a folder with that name within the folder to which the reports are uploaded.
-
-
Under Choose File to Upload, click Browse... and select the .rpt file you would like to upload to the web server.
Note: The name of the .rpt file being uploaded cannot match any other .rpt files.
- Assign the report to a Report Group (optional).
- If this report is run from Crystal Enterprise:
Check the Run this report from Crystal Enterprise box.
Enter the CUID for the report in Crystal Enterprise.
- Select Save.
-
To edit a report, select it from the list and select the Edit button.
- Enter or change the Report Name or the Report Description.
- Assign the report to a group (optional) or modify its group.
- If this report should be available from Lucity Mobile check the Available for Mobile checkbox.
- If this report is run from Crystal Enterprise:
Check the Run this report from Crystal Enterprise box.
Enter the CUID for the report in Crystal Enterprise.
- Select Save.
-
Select the report you wish to update from the list and select Update.
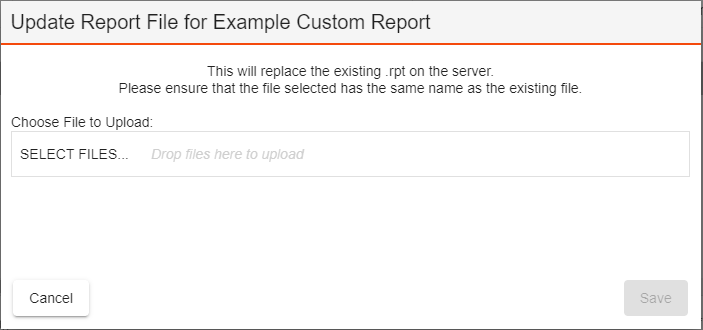
- Select SELECT FILES... and select your updated .rpt file.
-
Select Save. The new copy of the report will be uploaded and replace the existing report file.
Note: The reports that EAM provides with the software cannot be updated.